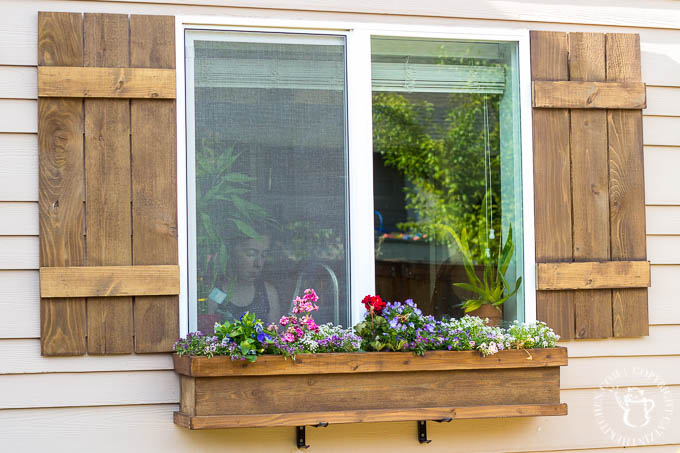
Looking to dress up a plain exterior window? It doesn't get any cheaper, easier, or more flexible than this plan for a DIY Window Box and Shutters!
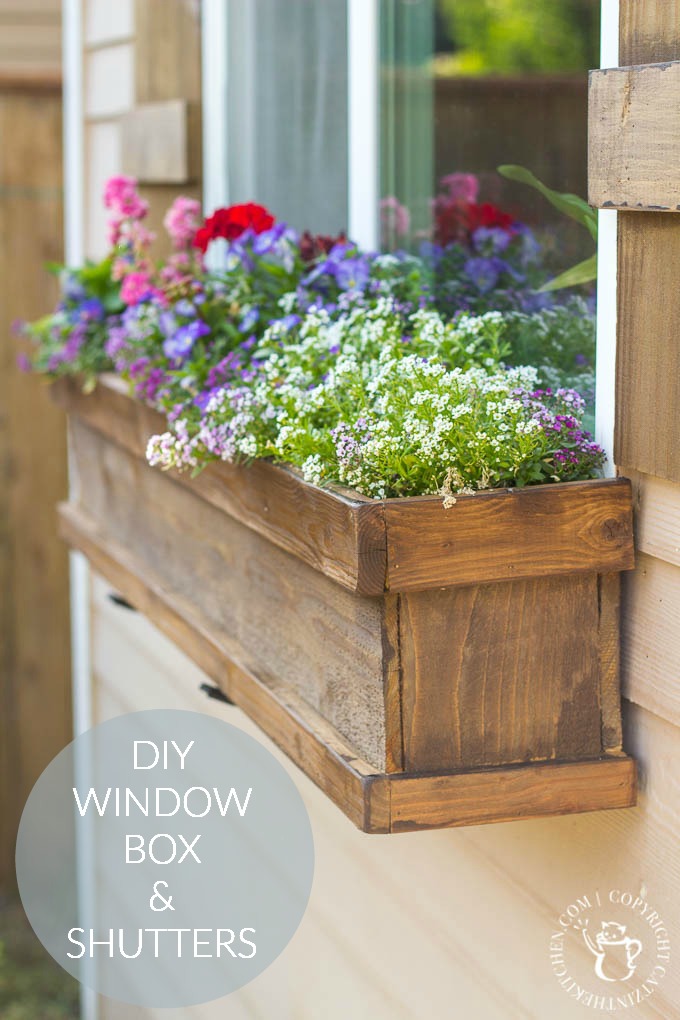
Chels and I have been working on a few DIY projects this spring and summer that we haven't shared with you yet (we did recently share the farmhouse style dining room table we built last fall, and we've just finished a less formal round table that we'll share soon!). Those are perhaps a bit more ambitious projects, but if you're looking for something super easy...look no further than these easy window boxes and shutters!
We live in a "development," like so many Americans in the suburbs. Each house is designed to have a bit of character out front - alternating elevations, rooflines, paint colors, finishing materials, and landscaping, to keep things from looking too cookie cutter. In back, however...other than color, everything looks the same! It's a big flat wall. That's fine, of course, and from the developer's point of view, makes all the sense in the world. We spend quite a bit of time in our little backyard, though, and so we started looking at little ways to personalize it. We haven't done much yet, though we have lots of ideas! Some of them are spendy...so let's start with one that's definitely not. Each of these little projects (window box and/or shutters) can be built for around $10, so they're not going to be breaking any banks! We highly recommend you try this project out for yourself!
Window Box
Let's talk about the window box first. As I've been doing a lot lately, I paged through Shanty 2 Chic's impressive library of DIY projects until I came across this post about window boxes from three summers ago. It didn't have the spiffy step-by-step PDF directions that their larger projects typically have, but it also didn't really need them - this is a simple project!
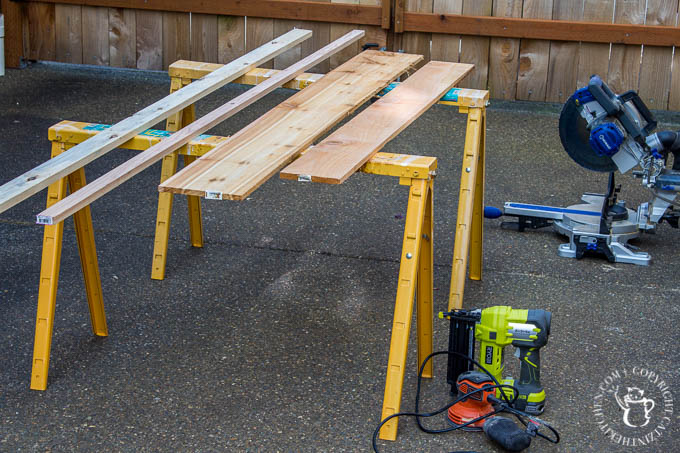
So, what do you need in the way of lumber and tools? Not much. A 1x8 cedar board, a 1x6 cedar board, and two pieces for the trim, a 1x3 and a 1x2. The length of the boards you need will depend on the size of window box you're building. We wanted ours to stretch the full width of our kitchen window, which is about 40 inches wide. I build a couple of these for gifts in addition to the one we put on the kitchen window, so you'll see a few sizes in these pictures. Shanty 2 Chic's is about 28 inches long. Additionally, the type of boards you buy depends on the look you're going for - the original post uses good quality finished cedar lumber, which is a little more spendy. We were going for a rustic, worn look, so we were able to get away with cedar fencing, which is very cheap - think $1-4 per board!
For tools, you'll need a miter saw, preferably, or a skill saw. A nail gun is nice, but finishing nails and a hammer will work, too. An electric sander is a good idea, though you could get by with sandpaper.
To figure out the length of the boards you need, think about it like this: the narrower cedar board (the 1x6) is going to make up the bottom and ends of the box. The ends need to reach the top of the 1x8's, so you'll need about 15 inches of 1x6 to cover that. The wider cedar board (the 1x8) is the front and back. So, for a 28 inch box, you'll need about 56 inches of 1x8 and about 43 inches of 1x6 (so, maybe a five foot 1x8 and a four foot 1x6, if those are the lengths your home improvement store is selling). For a 40 inch box, you'll need about 80 inches of 1x8 and 55 inches of 1x6. Always buy a little extra if you can...well, at least if you're like me and make mistakes!
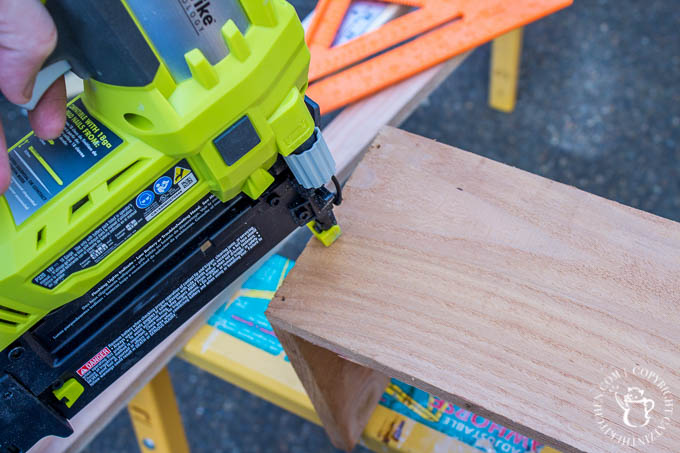
Getting the "box" put together can be a little challenging the first time, but it's not too bad. Take the bottom piece, set it on top of the end pieces, and use outdoor wood glue and nails to put them all together. Once you have this "U" structure in place, the front and end pieces go on easily, add strength, and keep the whole thing square.
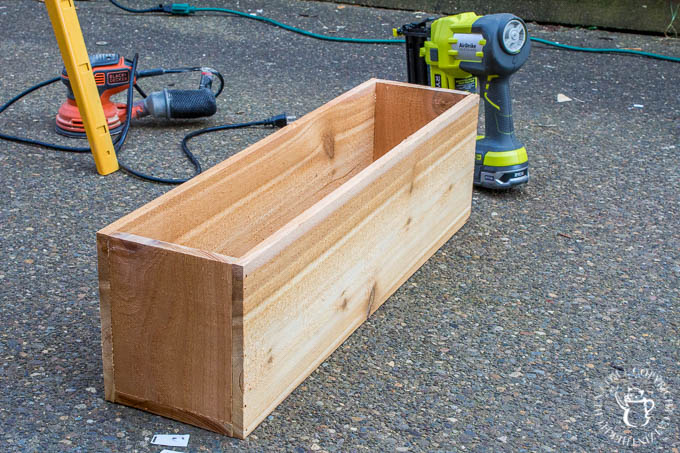
Now you have the box, of course. The trim is easy - just measure and cut as you go. Especially if you're using the cheap fencing cedar, you can get a little variability in widths, so be sure to measure for each piece of trim rather than just assuming that everything will come out the way it's supposed to. In this plan, the wider piece goes on top and the narrower piece goes on the bottom, while the back gets no trim at all, as it will be facing the wall. If you are planning to make a box that will just sit on a porch or a table, you can add additional trim pieces to finish the back as well.
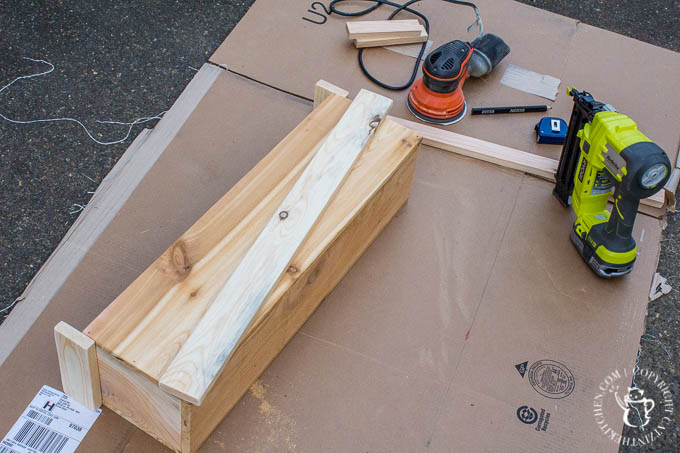
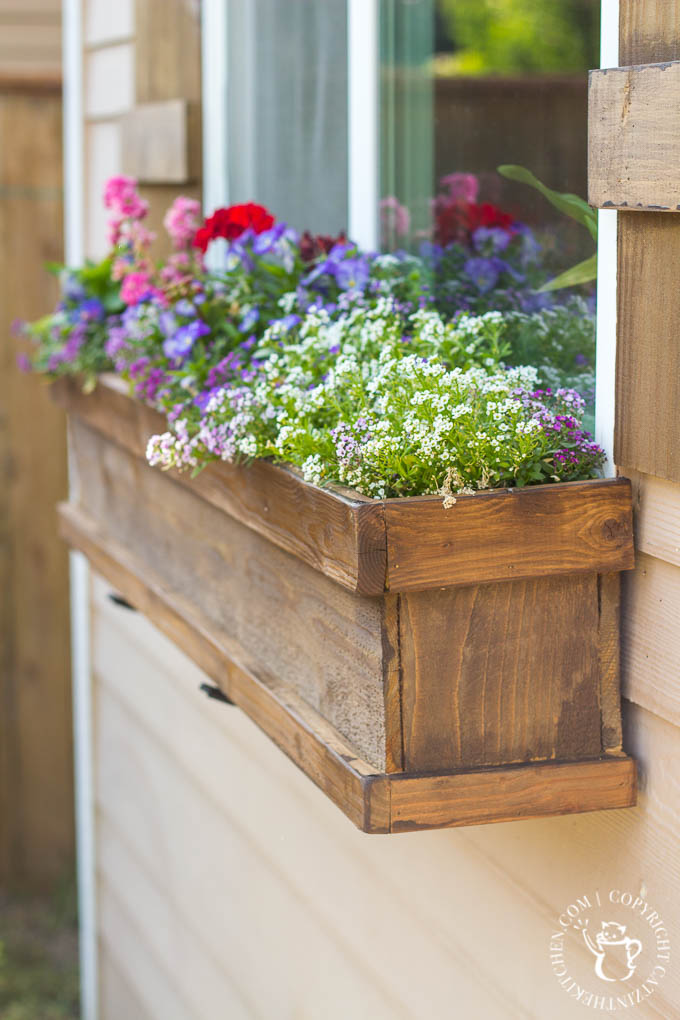
And that's it! The basic box is complete. Your call on how to finish it, where to mount it, how to plant in it, and what to plant in it, of course. We needed to mount ours on the siding of our house, so we had to find an appropriate mounting kit at Home Depot - I think it was under $10. For our finish, we used Behr's transparent weatherproofing water-based stain, and had the good folks at Home Depot mix it to our desired hue, which was something called Cordovan, if I remember correctly. I sanded down the rough cedar a bit prior to staining, but it still soaked up a lot of stain.
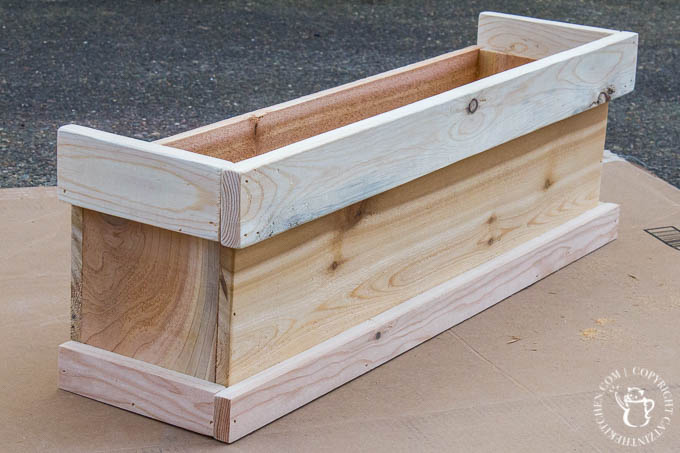
One tip that I loved from Shanty's plan was to use plastic planter inserts in the box, rather than putting dirt directly inside. For one thing, I have to imagine that the box will last much longer, especially here in the Pacific Northwest where everything is constantly wet. Secondly, it makes replanting so much easier! Pull out your insert, replant, drop it back in. Brilliant.
Shutters
Now, what's easier than these incredibly simple window boxes? These ridiculously simple shutters, of course. These will run you something like $5 apiece, depending on the cost of the panels and the size of your windows, and they take all of 15 minutes to build.
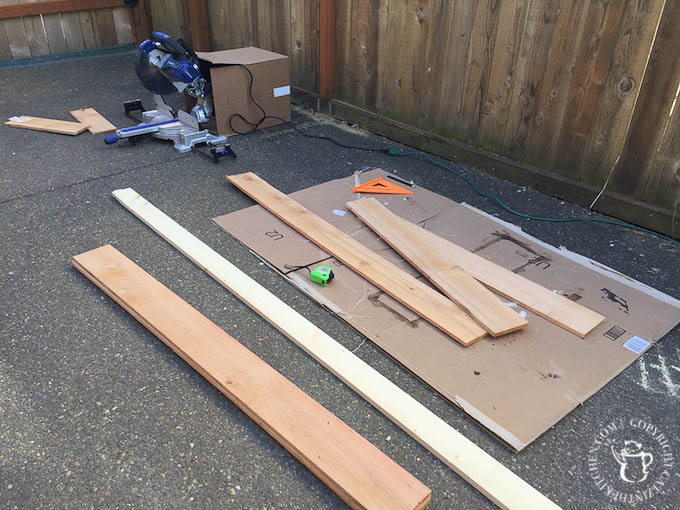
You basically need two types of wood for this little project. The same 1x6 cedar boards that we used for the window box, and the same 1x3 trim boards as well! Again, overall measurements will depend on the size of your window. This window was roughly four feet high, so I went ahead and bought a separate piece of cedar fence board for each slat, and then one really long (eight foot) piece of trim that I could chop up for the cross pieces.
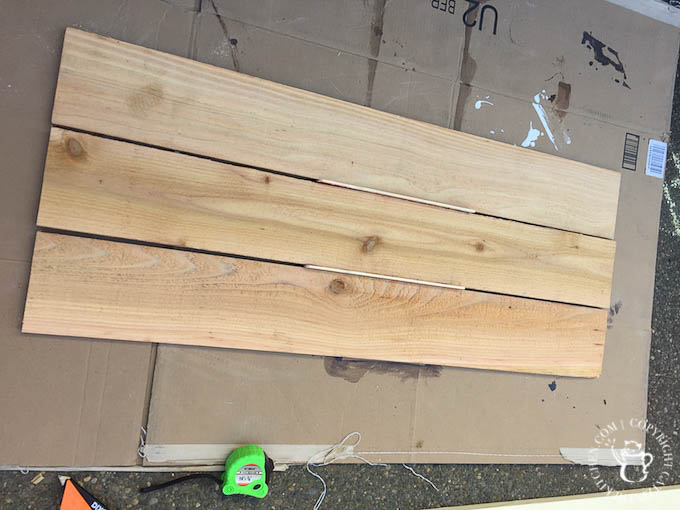
I can't remember where I read this tip, but it's brilliant. Once you've cut your boards to the correct length (equal to the height of your window), use those little free paint mixing sticks to space them! This keeps the spacing perfectly even, which is key. Once they're laid out, spaced, and square, measure across for the length of your trim pieces, cut appropriately, and lay them out to make sure everything fits. Be careful to use the same side of the trim board facing out for all of your shutters - different sides can have different levels of finish, which will result in the stain taking very differently. You could end up with some unwanted variation shutter to shutter.
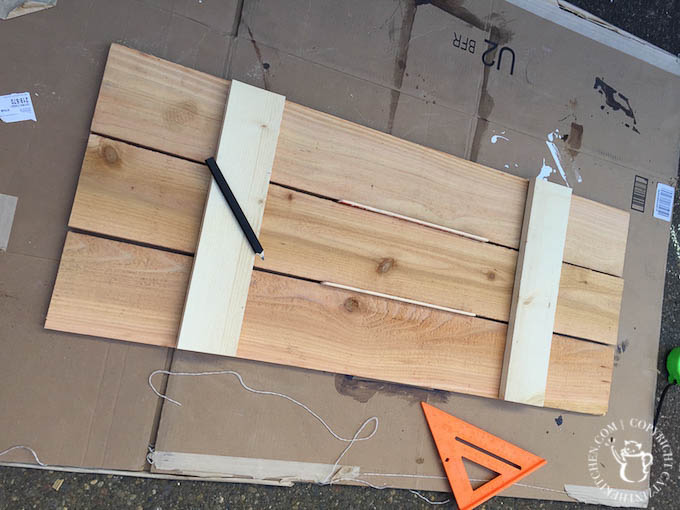
You can use wood glue and finishing nails to secure the trim pieces in place - make sure your nails are short enough that they don't come out the back of the shutters, though! Measure carefully to make sure everything is evenly spaced and square, and then nail it all together! Don't forget to pull your paint stirrers out when you're done.
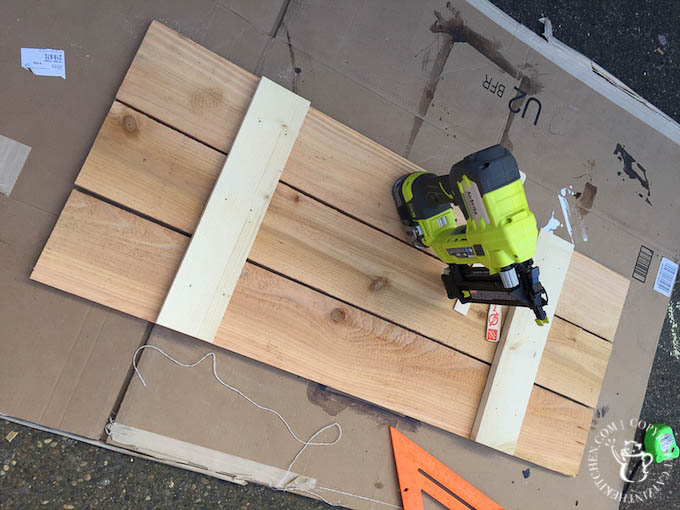
That's it! They're done and ready to be stained. We used the same Behr stain I mentioned above for the shutters, as we wanted them to match the window boxes - sort of rustic barn wood look. Or, at least, that's what we were trying for! We are definitely amateurs here...
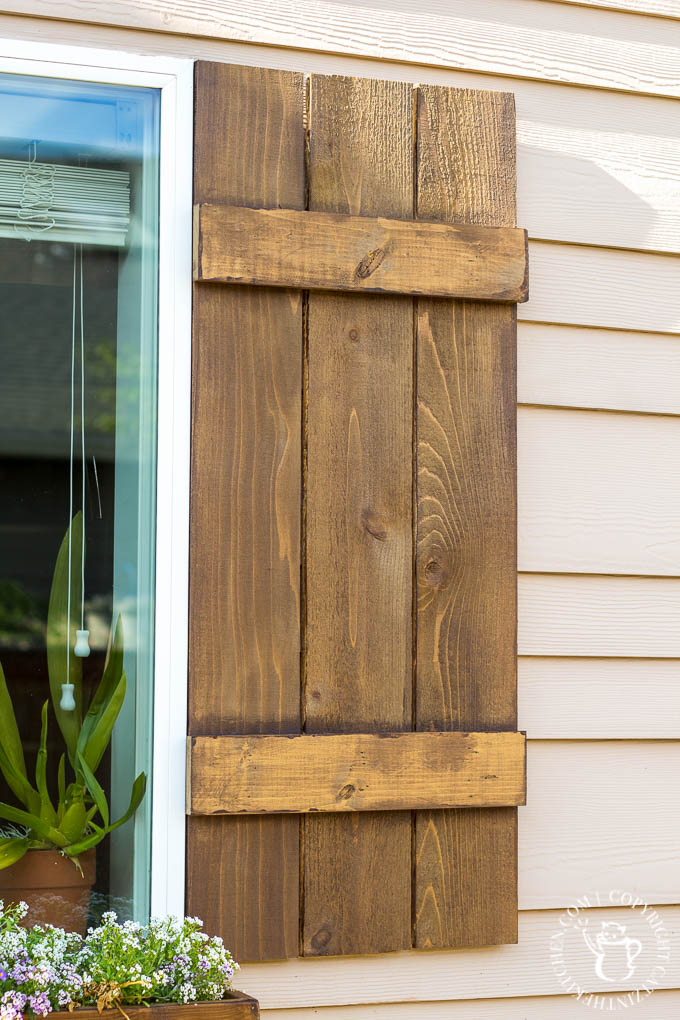
So, that's it. A quick and cheap way to pretty up a plain window. We're going to work on adding shutters to more of the windows in the back of the house, and maybe (maybe!) add a really long window box to this one six or seven foot wide window we have back there. I'm not totally sold on that idea, but we'll see.
If you missed it earlier, the link to Shanty 2 Chic's original window box post is here. Please let us know if you have any questions about the methods or materials we used, or suggestions for improvement - we all benefit from that! We hope to bring you more DIY posts soon!




Lara says
Gorgeous! Please, I would like to know which wood stain ( specifically the color) or sealing did you use for the flower boxes? Thank you!
Joshua Rief says
Hi, Lara! My apologies for the delayed reply. According to my notes from the project, it was a Behr (Home Depot) weather-proofing transparent stain tinted to “Cordovan”. Hope that helps!
Kelli Magee says
Do you have a printable version of this? Like a list of all tools and materials for both and step by step directions for both that people could print out as a guide?
Joshua Rief says
Hi, Kelli - we don't at the moment. We did add a plugin a few months ago that will allow this functionality, and have it on a couple of other DIY posts. Hopefully, when time allows we'll be able to redo this one in that format!
Gina says
Hi good afternoon I was just looking at the shutters and flower box you mentioned you bought a kit for the flower box because of your siding what did you use to hang the shutters? I’m not sure what to use Thanks for all you do🙌🏼
Joshua Rief says
Hi, Gina - it was four years ago, so I was worried they wouldn't still have it, but they do! We used the Vigoro 3-in-1 plant bracket. I just went and added the link to the post as well. Hope it works out for you!
Suzanne Renshaw says
@Joshua Rief,
So, I went on FB and saw someone was making shutters . I asked for a bid and it was over $450 for 2 windows!!! I came across your page and went to Menards for the supplies. The worker even cut all my boards! I just put them together this morning and now am going to Home Depot to get your recommended stain color. I am in shock! It was under $60 and they look amazing!!!! And I did them myself!!! Going to tackle the window Box next !!
Thank you so much for this page!
Joshua Rief says
I am so glad to hear it! This is such a simple little project, but can make such a big difference. It makes me so happy to know this was helpful to you!
Penny says
Soooo... I have not found ANYWHERE that has liners that fit!! What the heck! Most taper from 5-8” online and the local landscaping stores do not carry! Help! Email me please!
Joshua Rief says
Hi, Penny - we bought ours at Home Depot back when we wrote this post in the summer of 2016. Amazingly, I still have the receipt! I checked the serial number, and it doesn't look like Home Depot carries them anymore, unfortunately. I agree - all of the ones I see for sale are tapered now, and too wide for the box!
Leihh says
Off topic off the shutters what colors is the green in the window? Any idea the paint name?
Joshua Rief says
Hi, Leihh - hmm, I'm not sure which color you're looking for! Do you mean that little strip of paint color you can see on the right hand side behind the glass?
Amber says
@Joshua Rief, Yes! I was wondering tht as well! This is so inspiring! I can't wait to build these! :)
Joshua Rief says
Ah, I see what y'all are referring to there! I am sad to report that trim you can see the window is white, and it's just the sun through the glass that makes it appear green. ☹️
Jen says
How did you attach the shutters to the house. I don’t see any screws or nails.
Joshua Rief says
Hi, Jen! I used short nails from my nail gun to tack them up (they are super light). Tried to make sure the nails were short enough that they didn't go all the way through the siding!
Stacy Handley says
I love the idea of making this myself. What did you use to hang the shutters? I have hardie board and batton vertical boards. Thank you
Joshua Rief says
Hi, Stacy! We have Hardie as well, and I just used short nails (from my nail gun) to tack them in (tried to make sure the nails were short enough that they wouldn't go all the way through the siding). The shutters are so light, this seemed to work really well!