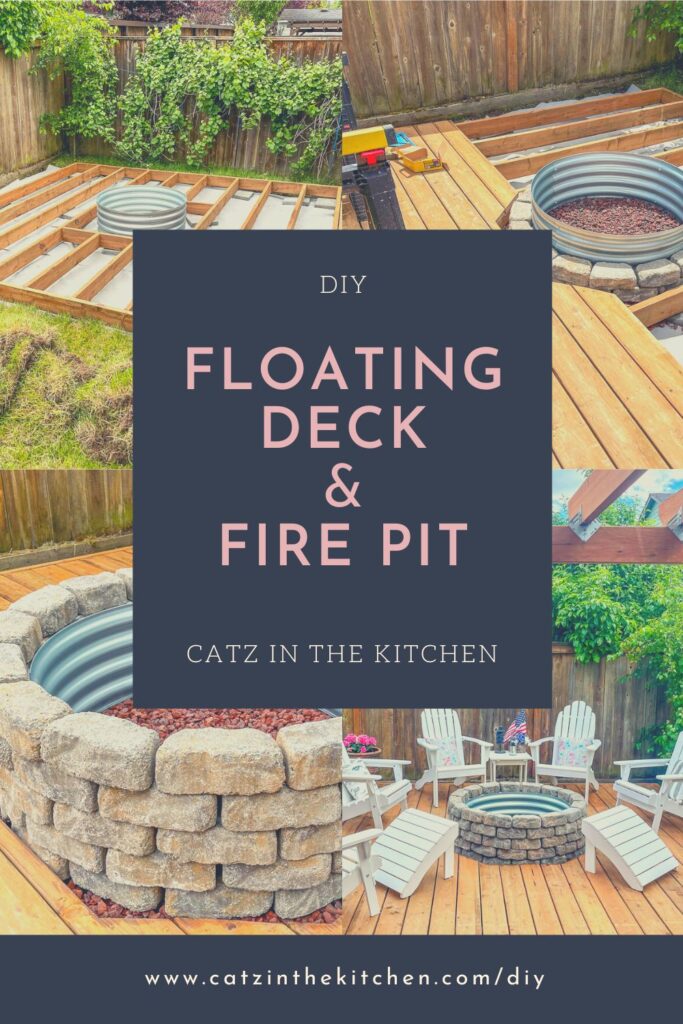
We're sharing our experience building a floating deck & fire pit, a quite simple project if you've got a little extra space in your backyard!
As I write this, I'm reflecting back on the summer and trying to remember how I had time to complete this project. Right now, it feels like I spend roughly 99.9% of each day trying to keep a certain three-month-old happy. Of course, that's not even remotely true. The reality is that little Cadáin sleeps great at night, which is a huge blessing, and is generally a delightful chap in the mornings. It's the evenings that are brutal right now. As with all of our children, colic sets in around 2-3 months, and for that brief time period (which is now), the day is pretty much shot from 3 PM onwards.
Having done this four times before, I know this is a very temporary phase. The little man is a delight, and we already cannot imagine our family without him in it! But any parent who deals with colicky babies is lying if they don't admit that you begin to lose your mind just a little bit every afternoon as your tiny master descends into his or her daily bout with temporary insanity.
At any rate, back in May, Chels was seven months pregnant, we were still a family of six, and even though I work a demanding full time job...I apparently had time for DIY projects. I have faith that this time will come again.
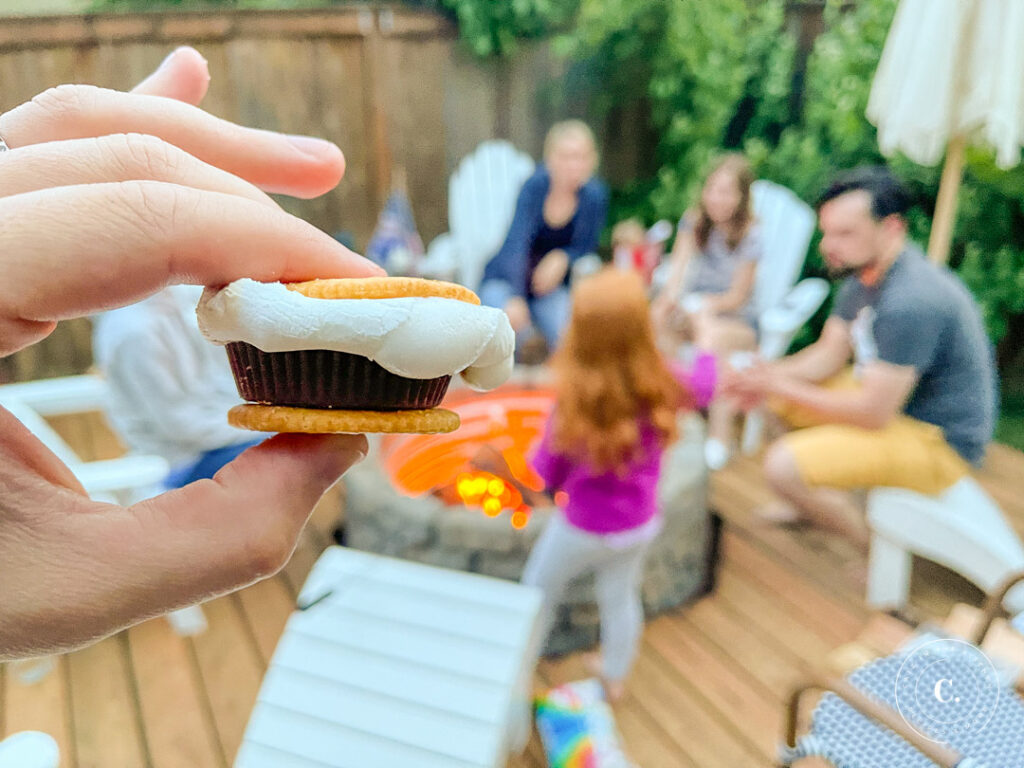
Chels has been asking me to tackle this project for years. I'm not sure how many years, but I would say at least four or five. Probably about the time I built our covered back deck (2017). Her vision for our little suburban yard included an extension of the deck over some grass we really didn't use, and the addition of a traditional brick fire pit. She wanted a spot that could be used for the occasional family gathering during the late summer evenings we have here in the Pacific Northwest, making s'mores around the campfire at 9 or 10 PM.
Before we go any further, I’ll give you my standard disclaimer about my own DIY abilities and the purpose of this post. First, I’m an amateur! That will be obvious as we go forward, I’m sure! My goal here is not to instruct you on every aspect of how to execute a similar project, but merely to share my experiences, what seemed to work well and what didn’t, what resources I found helpful, what I would do differently, and so on, in an effort to make your experience better and easier should you embark on a project of your own! Naturally, any DIY project you take is always at your own risk – you know the drill (no pun intended). Always check local codes and regulations before beginning any project like this.
For some reason, inflation soaring, lumber prices in the stratosphere, baby number five just weeks away, I decided this was the year we should get that done.
For some reason, inflation soaring, lumber prices in the stratosphere, baby number five just weeks away, I decided this was the year we should get that done.
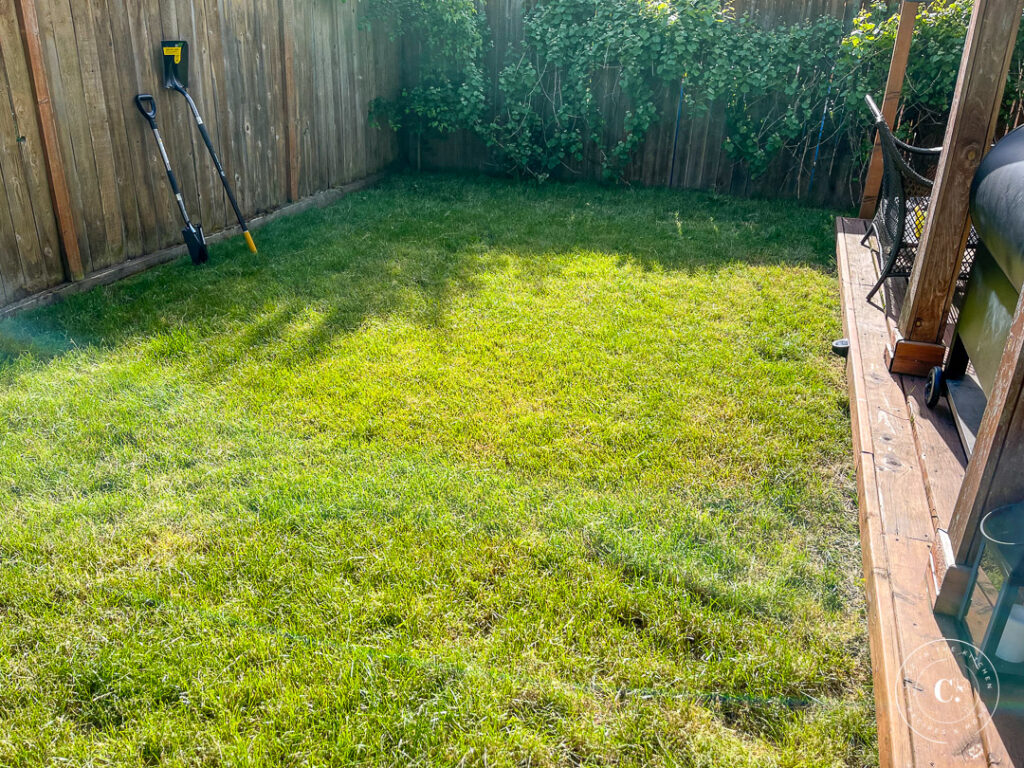
Truth be told, the hardest part of this project (by far) is digging out the grass. May this year was incredibly wet - tons and tons of rain. And I knew that it would be much easier to dig out the top layer of grass when the underlying ground was wet than it would be in say, July or August, when the underlying ground was hard as a rock. Our little neighborhood is built on old farmland, and most of the houses are on artificially raised mounds of clay and rock. As you can imagine, digging in that clay and rock is...delightful. Especially when the clay is baked solid in the sun. So I dug in May.
The Deck
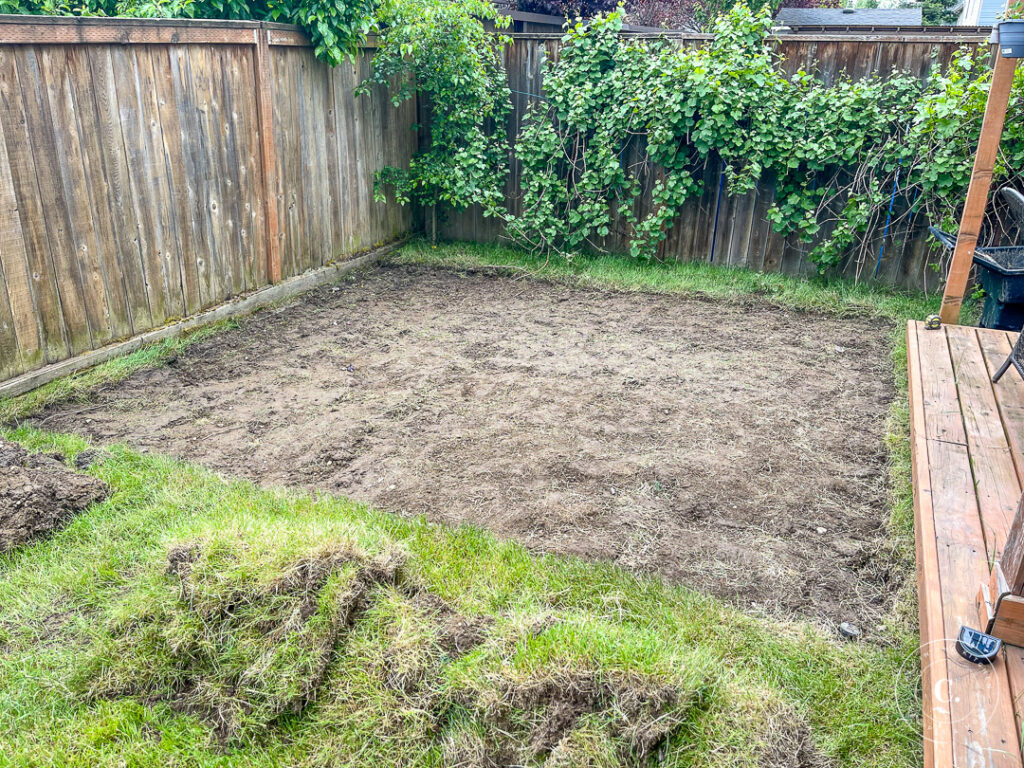
The ground was incredibly wet. It was absolutely pouring. The good news was that I, a deeply, disturbingly, disproportionately sweaty person, didn't have much of a chance to sweat in the midst of the never-ending deluge that was this past May. I got wetter and muddier than I've ever gotten in my life, but the ground got dug up. I dug out an area that was roughly 12 foot by 12 foot, just a couple of inches deep - deep enough to remove the grass and get the bare ground something remotely resembling level.
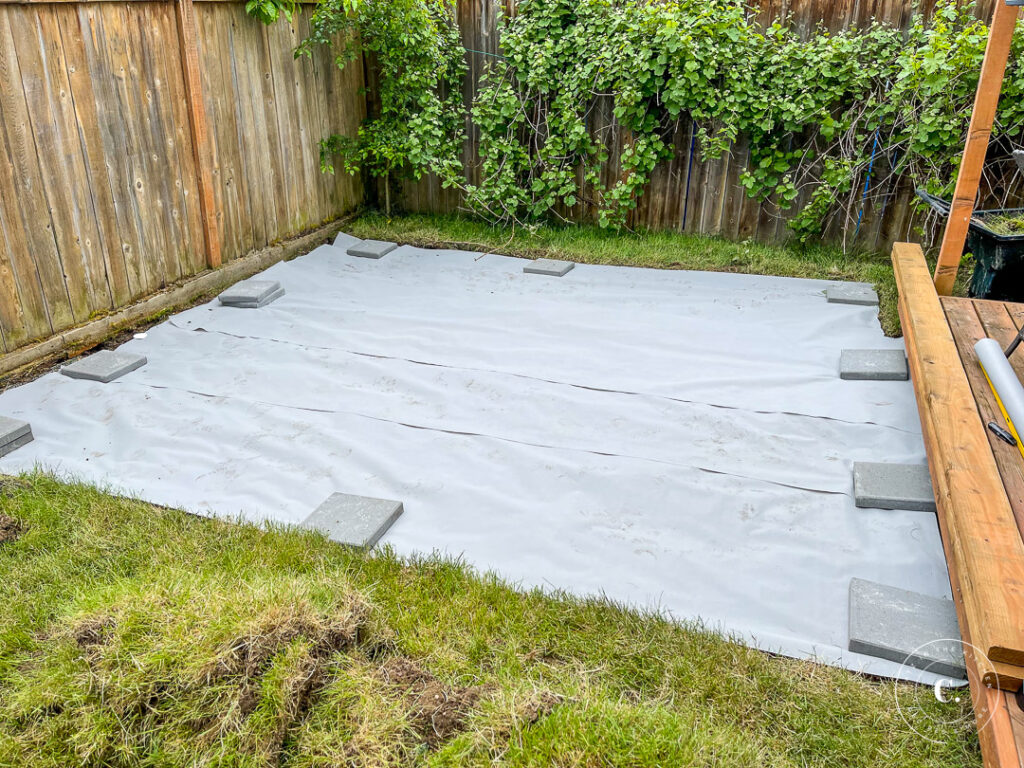
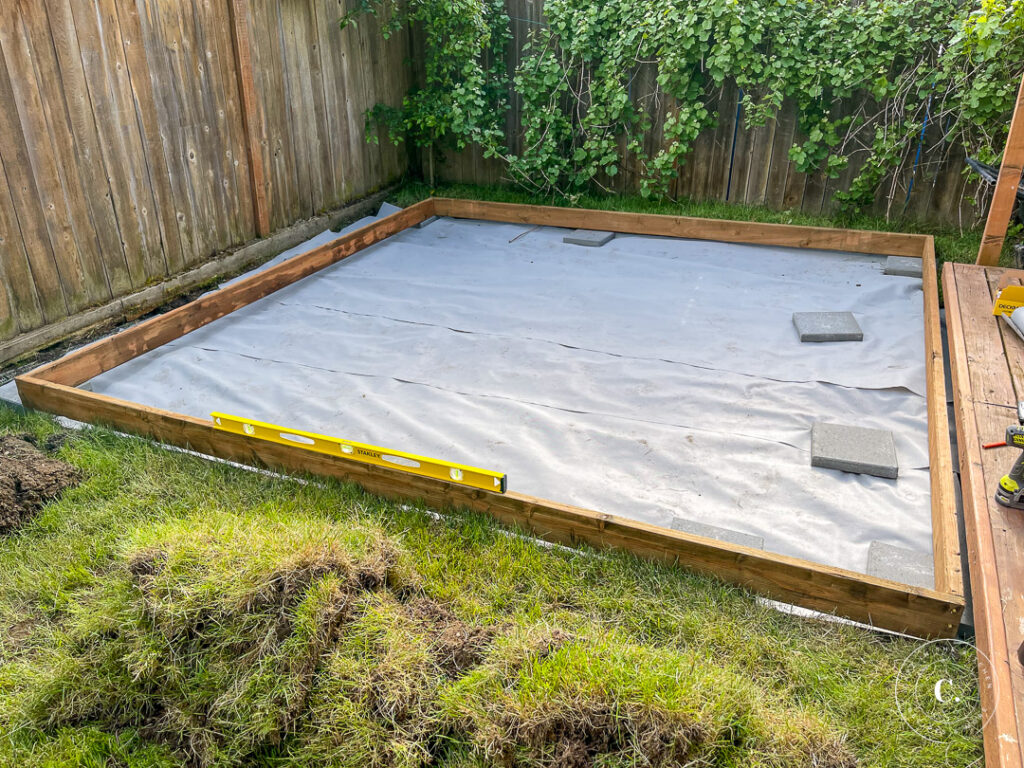
With the ground dug out, I covered the exposed ground with a good weed-blocking fabric, and weighed that down with 12x12 pavers. The next step was to try to create a square frame that was something approaching level. This required quite a bit of measuring, squaring, and experimenting with the placement of the pavers themselves. Finally, the square was close enough to level, and I decided to call it good. I used pressure-treated 2x6's for this section, as I would for the rest of the framing. Even though the beams would be resting on pavers and never actually contact the ground, I still wanted to be sure they wouldn't rot. Remember, we live in the northwest. It rains. A lot.
Even though the beams would be resting on pavers and never actually contact the ground, I still wanted to be sure they wouldn't rot. Remember, we live in the northwest. It rains. A lot.
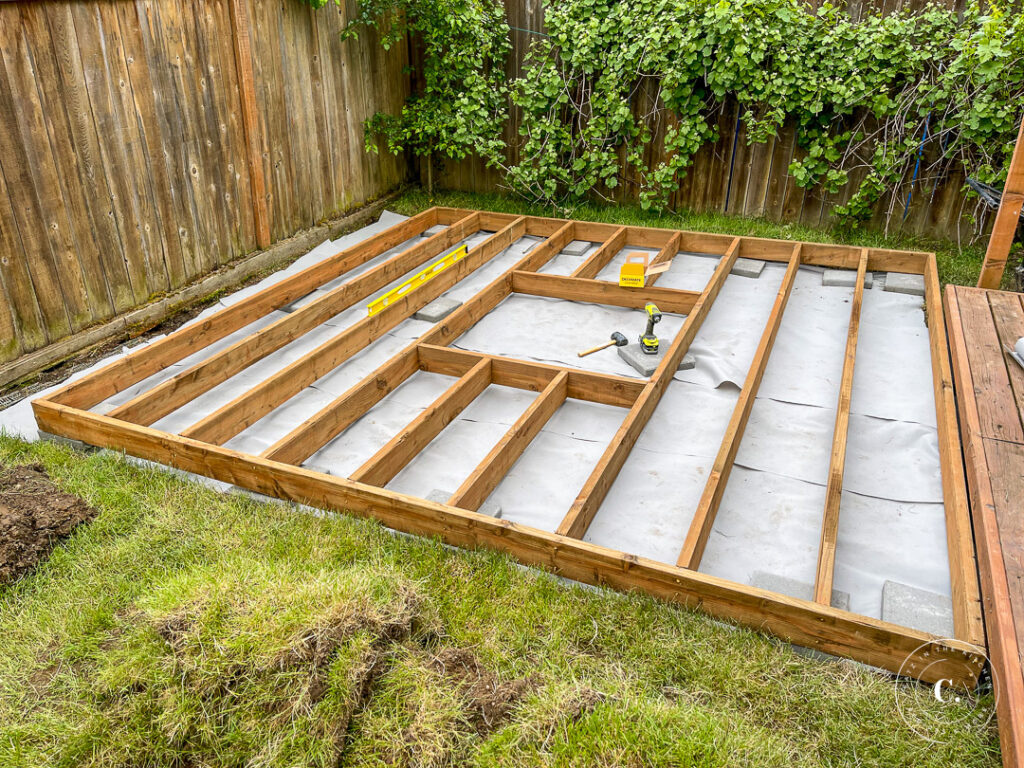
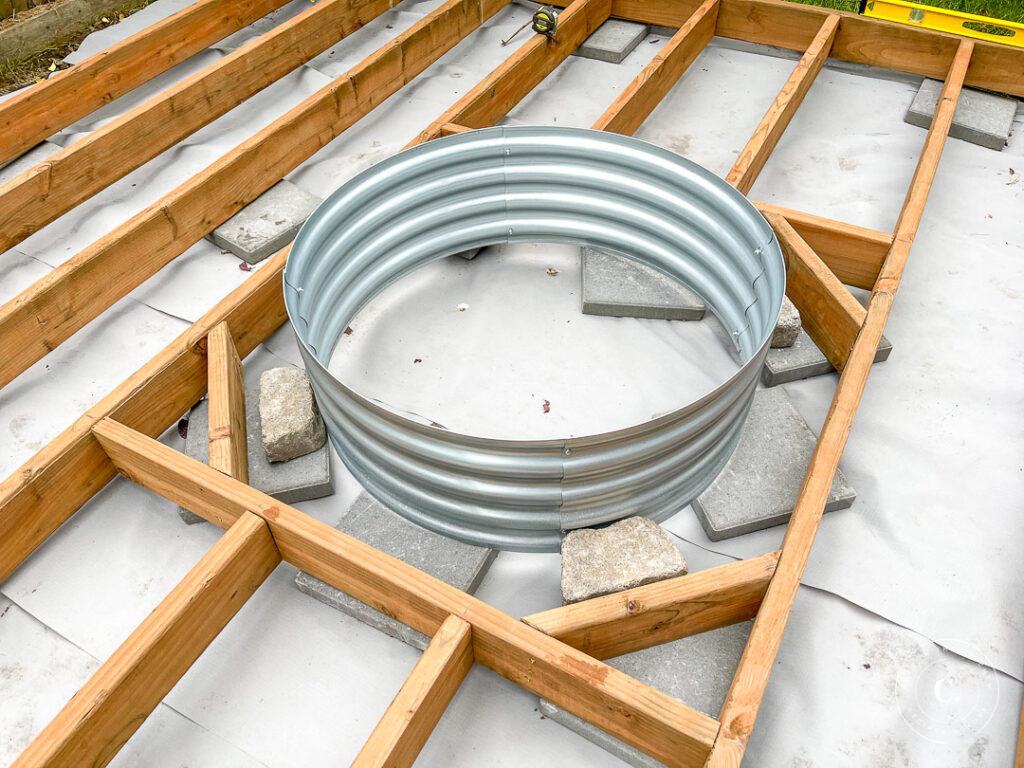
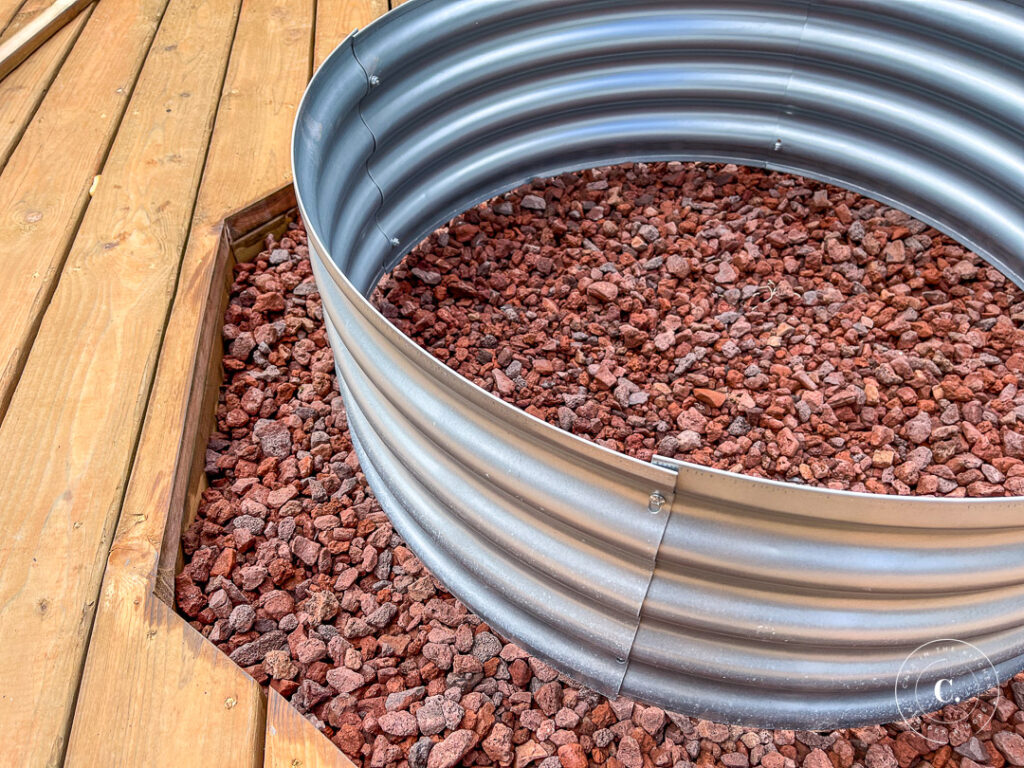
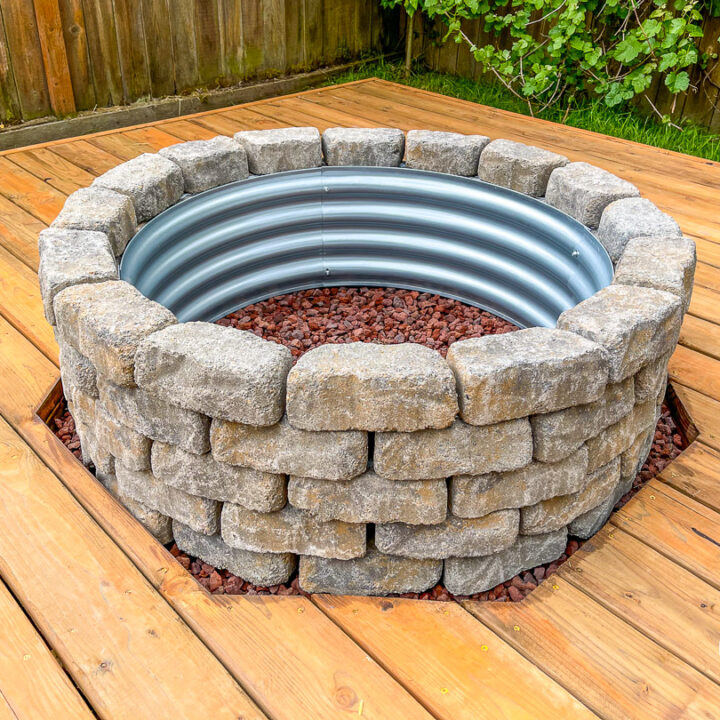
Once the square frame was in place, the next step was to run beams lengthwise across the frame to add strength to the structure. I wasn't worried about running beams both directions - the deck boards would add that stability. That said, I did take some time to measure out a square in the middle that would accommodate the fire pit size I had chosen - three feet across. I purchased a galvanized steel frame on Amazon that would fit the purpose, and then left enough margin to be able to lay bricks around it.
Once the beams were in place lengthwise, and the square in the middle was ready for the galvanized steel ring, I put the ring together and set it up with supporting pavers in the dead-center of the deck. I made sure the square center frame itself was well-supported by additional pavers, as well as the ring.
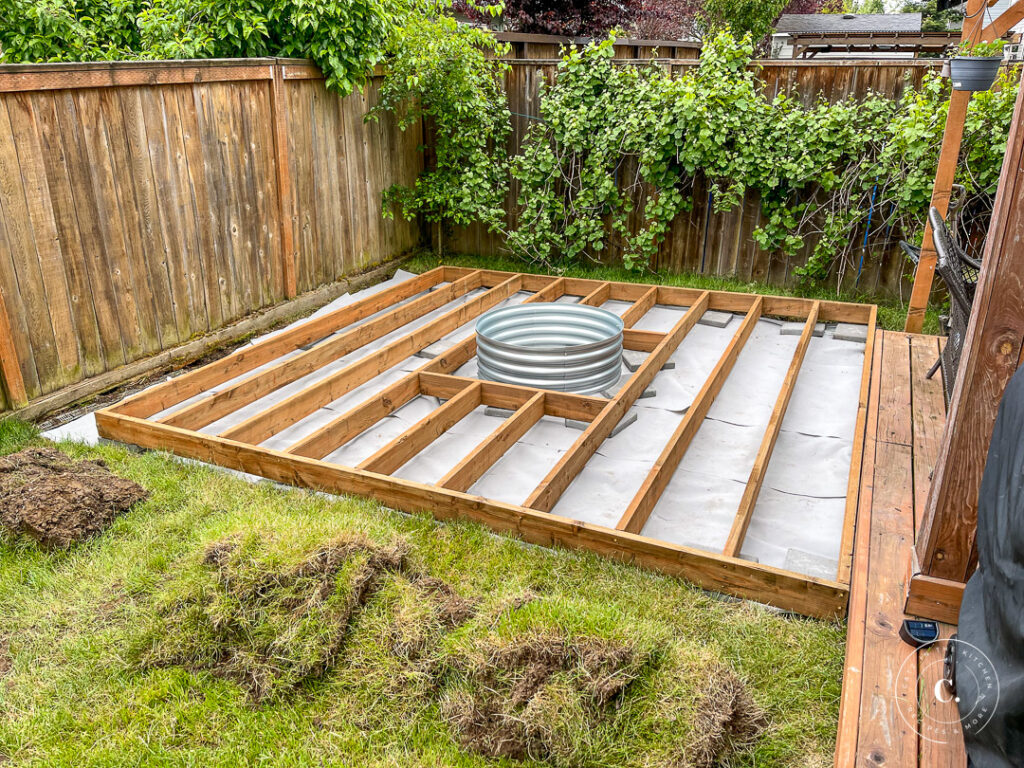
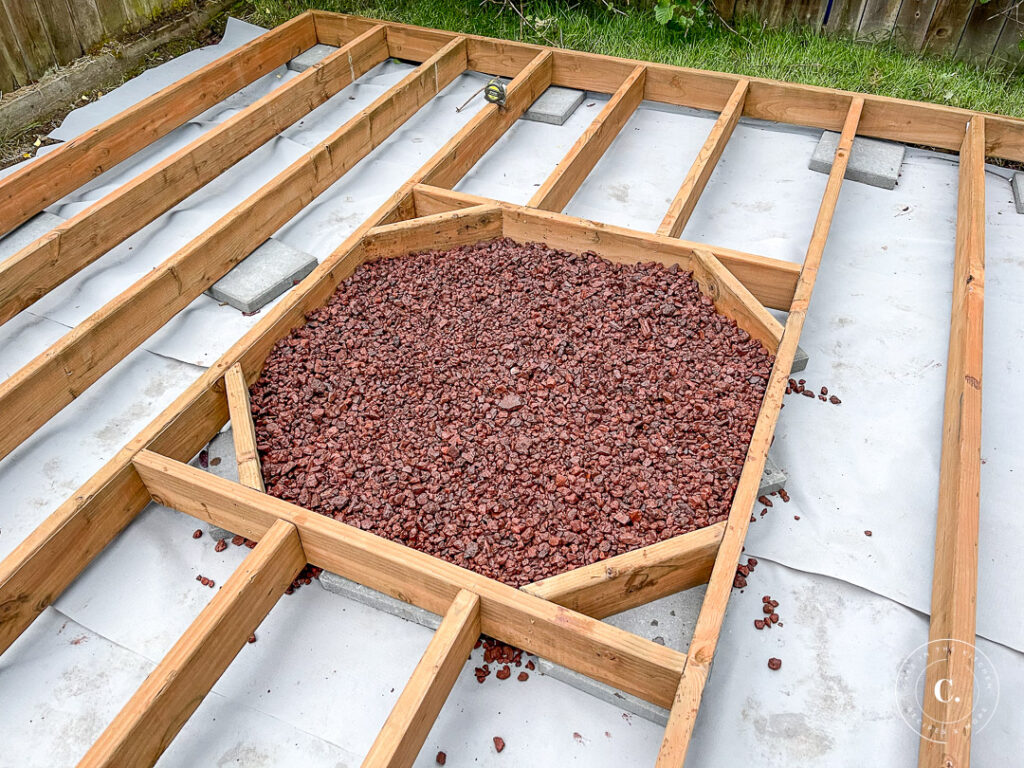
To add some additional stability, I added corner braces of 2x6 lumber that could also rest on the pavers, spacing with the bricks we had chosen, making sure there would be enough room for a circular brick structure in the center.
Once I was comfortable with the spacing and support, I poured in red lava rock to fill the center space. I wanted to make sure the lava rock would support the ring, but also underly the whole area where a fire might be lit, both leveling and supporting the brick ring I intended to build there. It took about 15 bags of red lava rock to achieve the level I was looking for.
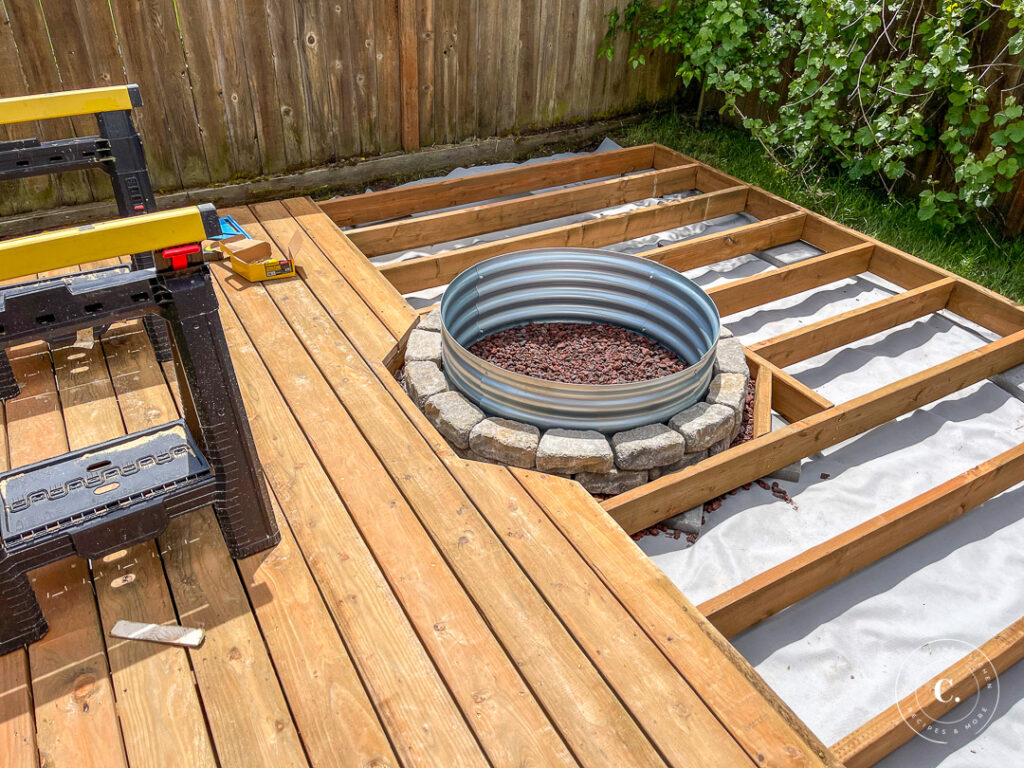
With the lava rock in place, I put the steel ring back, and then laid two layers of the stone around it. I didn't cement the stone in at this point, but I wanted it sitting there to guide me as I built the deck surface around it.

I laid uncut 12-foot 2x6 pressure-treated boards perpendicular to the frame beneath, securing each one with at least two decking screws at each joint with the frame. This created an extremely strong, rigid structure that stayed square while distributing weight evenly across the underlying beams.
The Fire Pit
When I got to the center section with the fire pit cutout, I cut the 12-foot beams accordingly, measuring as I went, securing them to the underlying frame, and sealing the cut (exposed) surfaces with wood preservative. As I worked my way around the fire pit, I created an octagon-shaped opening in the deck. Yes, a truly circular shape would have been cool, but it would have been a LOT more work for a marginally more visually-pleasing result. So we end up with this circle-inside-an-octagon-inside-a-square situation.
Yes, a truly circular shape would have been cool, but it would have been a LOT more work for a marginally more visually-pleasing result. So we end up with this circle-inside-an-octagon-inside-a-square situation.
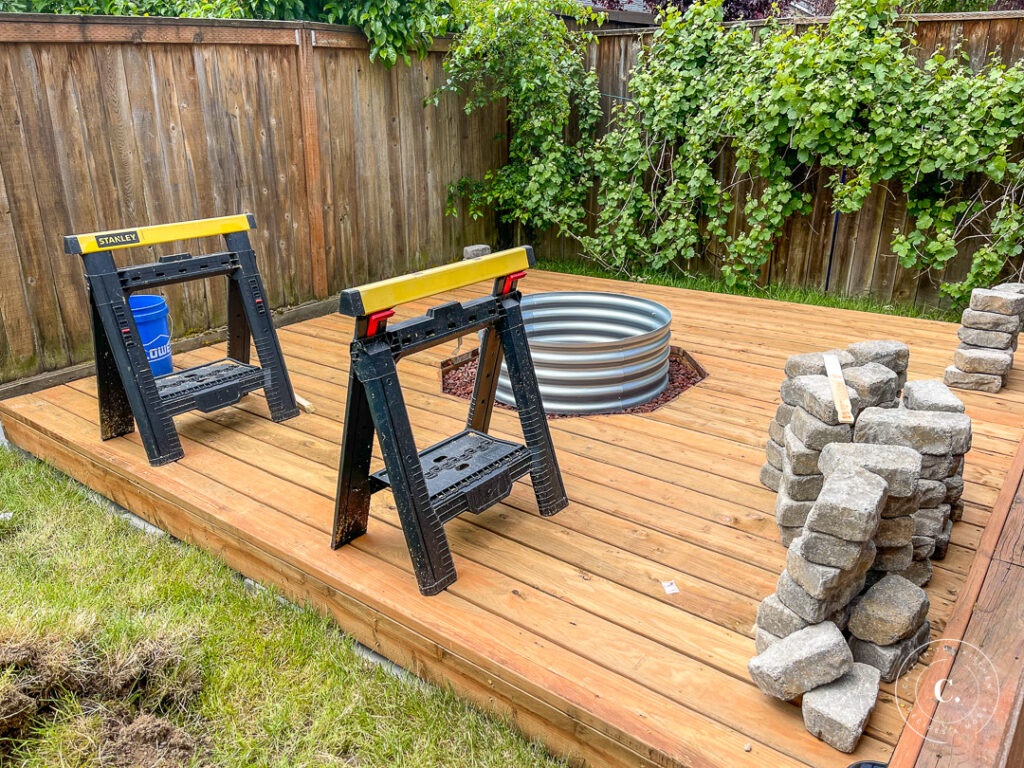
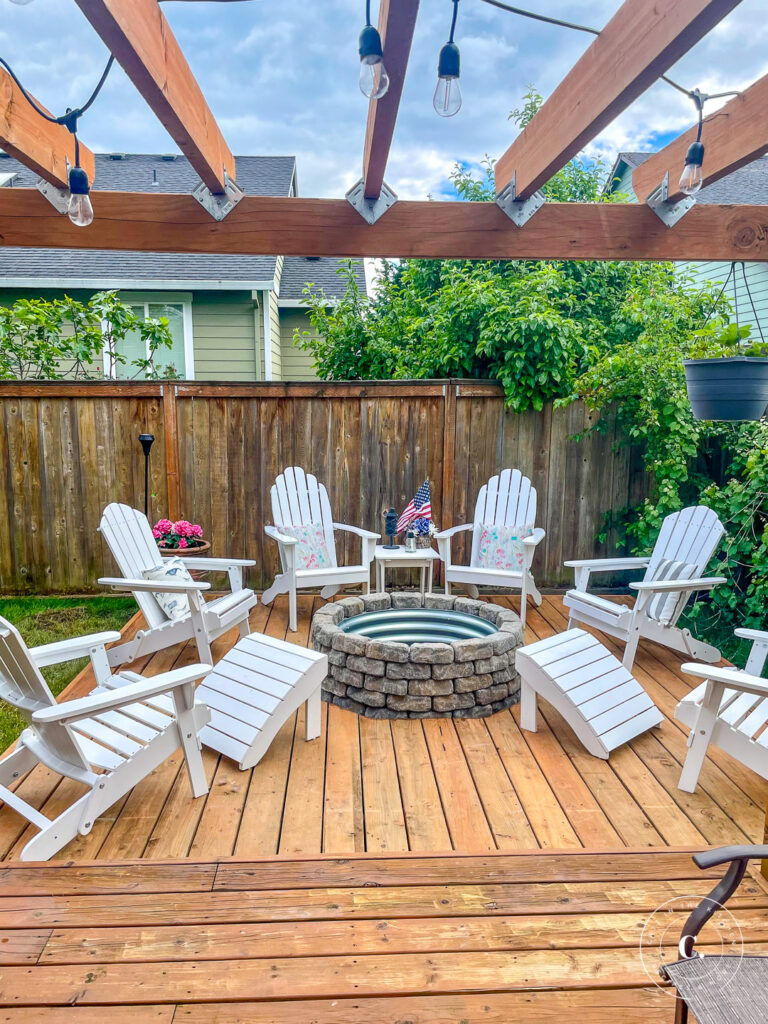
When the decking was all cut and laid, I removed the loose stone from the fire pit ring, and prepared to lay the rings of stone for a final time. It took 80 bricks, set in five rings of 16 bricks apiece, to complete the fire pit. I used landscape adhesive, laid from a caulking gun, to secure the rings in place.
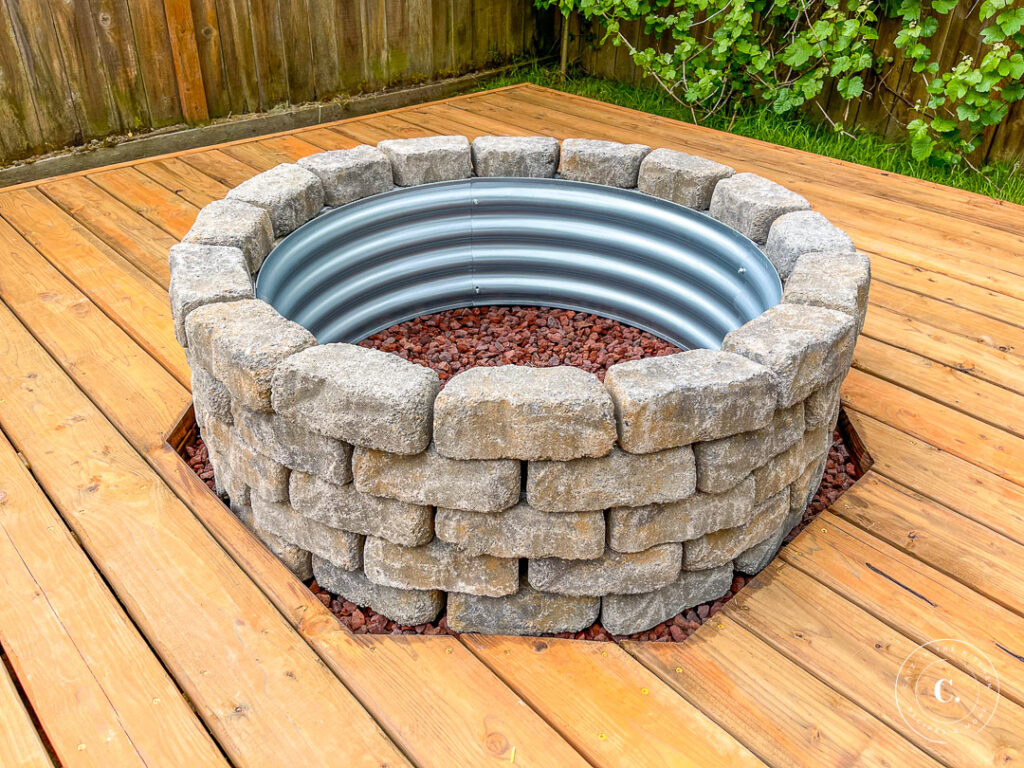
With the ring complete, the deck itself was essentially done. I would have to seal it before winter set in, of course, but we used the deck and fire pit all summer as it was, bare pressure-treated wood and stone. The galvanized ring and lava rock held up brilliantly to numerous camp fires, untold hotdogs, and myriad s'mores.
Because of the galvanized steel ring on the inside, the stone on the outside never really got particularly warm, a real boon for families like ours with little ones running around. I had to learn to build a fire, of course. With a gas-powered fireplace in my home, I've never really had a reason to be good at that. Kindling is quite key, as it turns out.
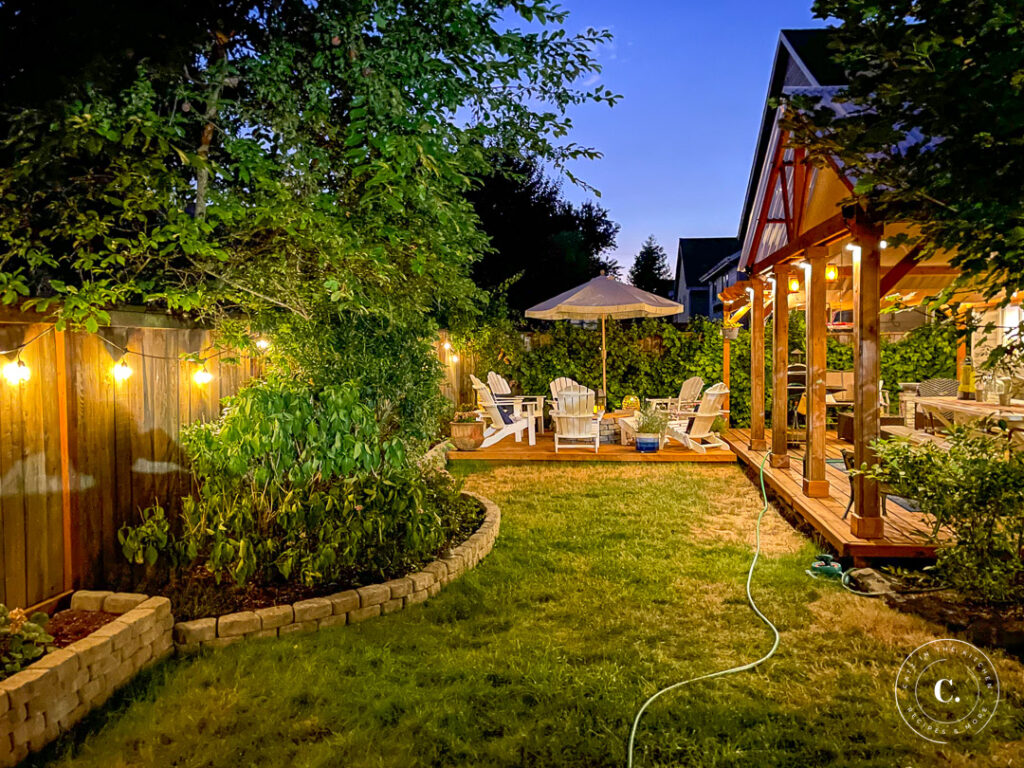
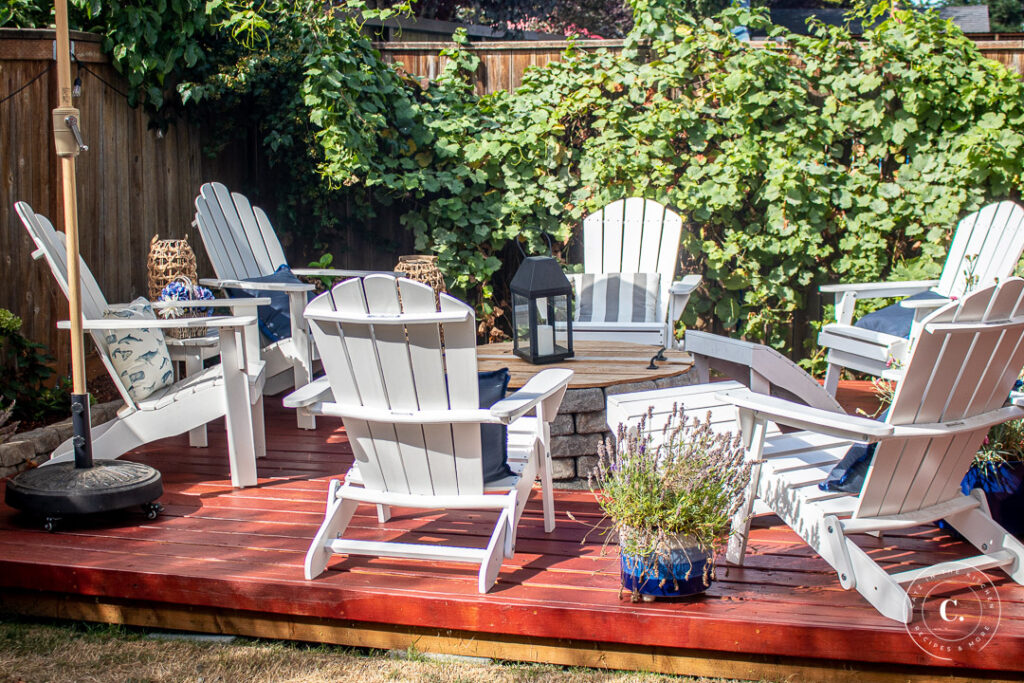
Chels has insisted on bistro lights for the fence line, so between those, the lighting we already had on the deck itself, and the solar-powered LED lanterns I found on Amazon, I'll admit the night brings a fairly picturesque scene to our humble suburban backyard. I would love to have 5 or 10 or 20 acres, but until I do, I'll settle for making the most of the 0.17 acres I've got. This extension brings the total deck area to almost 500 square feet, which is certainly plenty of space to grill, entertain...or make s'mores and read a book.
I would love to have 5 or 10 or 20 acres, but until I do, I'll settle for making the most of the 0.17 acres I've got.
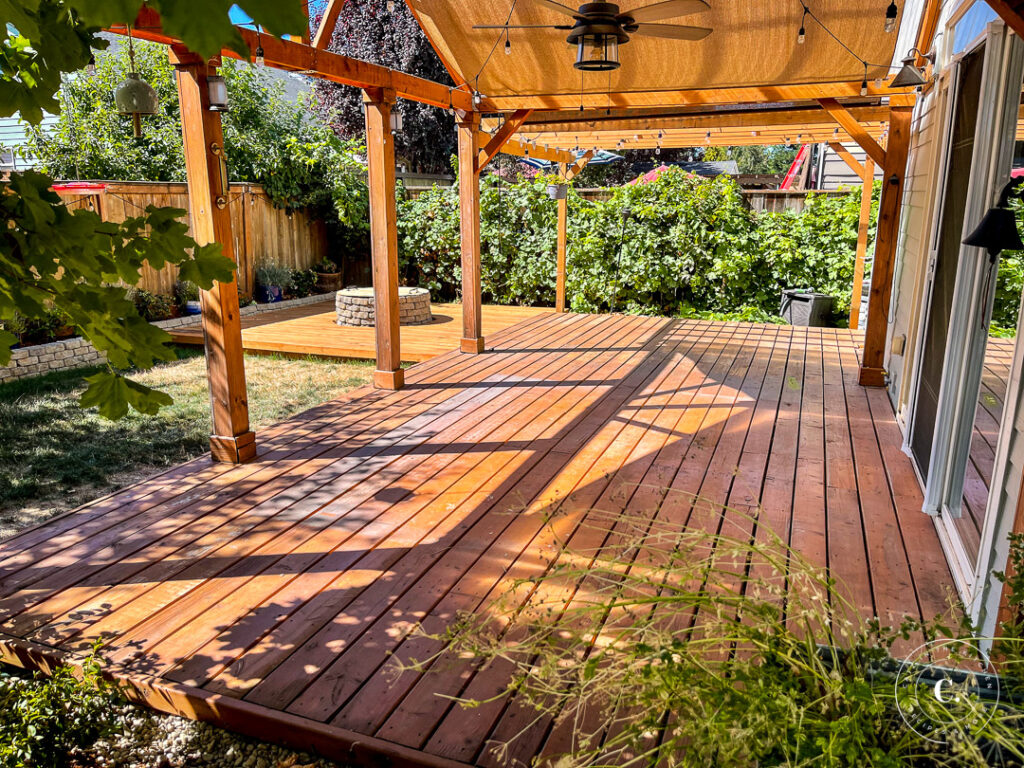
As is typical, I suppose, we've covered the entire space with white Adirondack chairs. Say what you will about use of space, but I have enjoyed those Adirondack chairs many a summer morning, and many a summer night. They're quite perfect for sipping freshly brewed coffee and reading Proverbs, and they're equally attuned to savoring brisket and reminiscing.
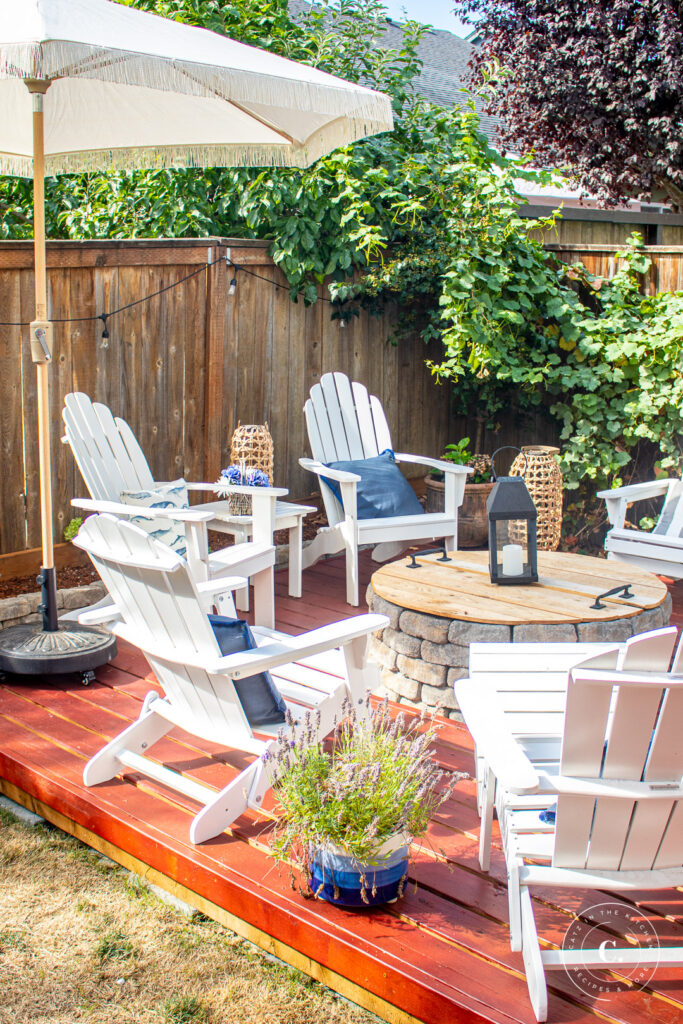
I eventually did seal the new deck with a redwood finish that was, frankly, redder than I would have liked. Ah, well. It will wear off and need to be re-covered in a mere four years or so.
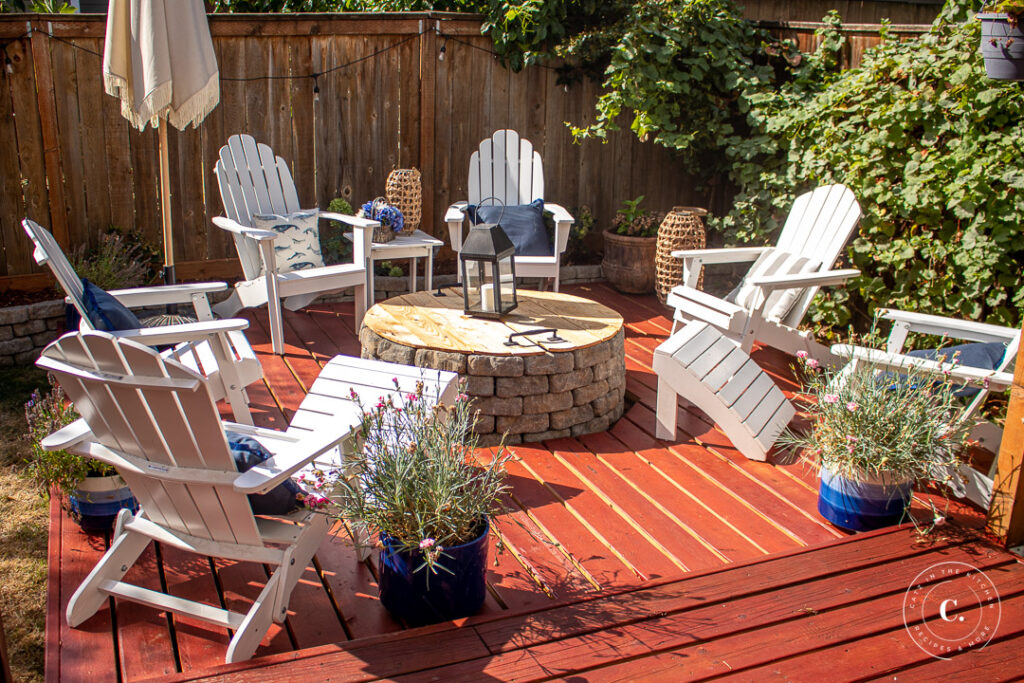
I also built a cover for the fire pit out of fence-post cedar, which you can see in the picture above. I'm hesitant to provide instructions for building that, as I'm not sure it will last the winter. I want to rebuild it from stronger materials using pocket joinery. Once that is done...I can update the post and share it with you.
In the meantime, this floating deck became out summer refuge. We hung out here in the shade of the grape vines and the umbrella when the heat was too intense. We consumed smoked blackberry cobblers and Reese's peanut butter cup s'mores. We read and talked and even slept. What more can you ask from an outdoor living space? The amount of use we got out of this floating deck this summer was frankly far beyond my expectations. It made every muddy, wet May day worthwhile. And next spring, I think it will help push these colickly days into the rearview as well.
The amount of use we got out of this floating deck this summer was frankly far beyond my expectations.
DIY Floating Deck & Fire Pit
We're sharing our experience building a floating deck & fire pit, a quite simple project if you've got a little extra space in your backyard!
Materials
- 37 12-ft pressure-treated 2x6's
- 4 12-ft pressure-treated 2x4's
- 80 3-in x 8-in x 4-in concrete retaining wall blocks
- 20 12-in x 12-in concrete step stones (pavers)
- 1 5-lb box 2 ½-in star flat-head wood deck screws (approx 435 screws)
- 2 1-lb boxes 3-in star flat-head wood deck screws (approx 146 screws)
- 2 10-oz tubes landscape adhesive
- 1 roll 4-ft x 100-ft heavy duty weed barrier landscape fabric
- 15 0.5-cu ft bags red lava rock
- 36" galvanized fire pit ring
- Wood preservative
- Wood deck wash
- Waterproofing deck stain
Tools
- Trench shovel / spade
- Level
- Measuring tape
- Utility knife
- Impact driver w/ T-25 star bit
- Square
- Paint brush
- Circular (skill) saw and/or miter (chop) saw
- Rubber mallet
- Carpenter pencil
- Paint roller and tray
- Large scrub brush
- Caulking gun
Instructions
- Measure and mark area for floating deck. Use spade to clear any grass and level area as much as possible.
- Cover cleared and leveled area with landscape fabric, overlapping each row somewhat. Lay down pavers around outside edge to hold fabric in place.
- Using 4 12-ft 2x6's, create square frame for deck. Cut two of the 2x6's down to 141" to compensate for width of boards, creating a true 12-ft x 12-ft square. Use 3" deck screws to fasten together, three screws to a joint. Use carpenter's square and measuring tape to make sure angles are 90 degrees, and that measurement from corner to corner is approximately equal.
- Place level on framed boards to ensure square frame is level. If not, adjust pavers and/or continue to flatten underlying soil.
- Cut six additional 12-ft 2x6's down to 141" to create beams to run lengthwise inside square frame. For center beams, cut as needed to form square opening for fire pit. If you are using a 3-ft ring, your six beams for the center section will be approximately 45" long each (see photos in post above). Measure, cut, and install four corner braces (ends will need to be cut to 45-degree angles), as pictured above, creating an octagonal opening for the fire pit.
- Lay remaining 12-ft 2x6's perpendicular to beams, securing at each intersection with two of the 2 ½" deck screws. Space approximately ¼" apart as you work across the deck surface. For center deck boards, cuts will need to be made to frame the octagonal opening, and the final deck board may need to be ripped down to the correct width using a table saw (alternatively, an additional 2x4 may be purchased and used to slim down any overhang).
- Seal exposed cut ends around octagonal opening and ripped final deck board using wood preservative.
- For deck time, attach 12-ft 2x4's to outside edge of deck, all the way around, using deck screws.
- Fill octagonal opening with lava rock, level as much as possible, and center galvanized ring in opening. Lay bricks around ring to create first layer, spacing slightly as needed to complete ring. Using caulking gun, lay a line of landscaping adhseive atop first ring of bricks, following manufacturer's instructions. Lay second layer of bricks, alternating placement over the first. Continue in this manner, using landscape adhesive to keep each layer in place, until five layers have been added, just surpassing the top of the galvanized ring.
- If desired or needed, use deck wash to clean deck surface, and then apply waterproofing deck stain of your choice according to manufacturer's instructions.
Notes
- Please see more detailed instructions in body of post above
- All material quantities are estimates
Recommended Products
As an Amazon Associate and member of other affiliate programs, I earn from qualifying purchases.


Troy Sartain says
Thanks for sharing your experience. I'm about to embark upon a similar project, though much larger (per the wife!), and will definitely keep in mind a lot of things you talked about. I appreciate your attitude and apparent Good Word reading habits.
Joshua Rief says
Thanks for reading and for the comment, Troy! Best of luck in your project! Well worth the effort, in our experience. And, yes, outside on the deck is my favorite place for morning devotions and time in the Word. Looking forward to warmer spring weather so I can resume that treasured tradition!
Megan says
What were the dimensions of this deck? :)
Joshua Rief says
Hi, Megan - this one is 12 ft by 12 ft. Thanks!
Autumn Rose says
We are keeping this an an option for a project we are doing. Can you tell me how your wood held up with the heat?
Joshua Rief says
Hi, Autumn - Thanks for reading, and good luck with your project! I'm pleased to say it's held up really well! Here in the PNW, I was more worried about non-stop moisture, but we hit triple digits a few times during the summer, and had no issues, thank goodness.