We did a makeover of the newel post at the base of our stairs. It cost about $20 in building materials, took about two hours, and we love it!
Alright, this little project, which cost less than $20 in building materials and took me about two hours, was on my to-do list for...about three years? Sometimes it's ridiculous how long it takes to get around to the little things. Now, in retrospect, it's probably for the best - we put in a stone entryway to replace the laminate flooring we had there, and I would have had to tear out the base of this newel post to do that if I'd not put it off so long...but I can't really say I planned it that way. If you were to just go buy yourself a newel post, a basic one like this would probably run you about $150 or so. So you save a little money by doing it yourself, and also avoid the hassle of demoing the old post and having to securely install the new one, etc...
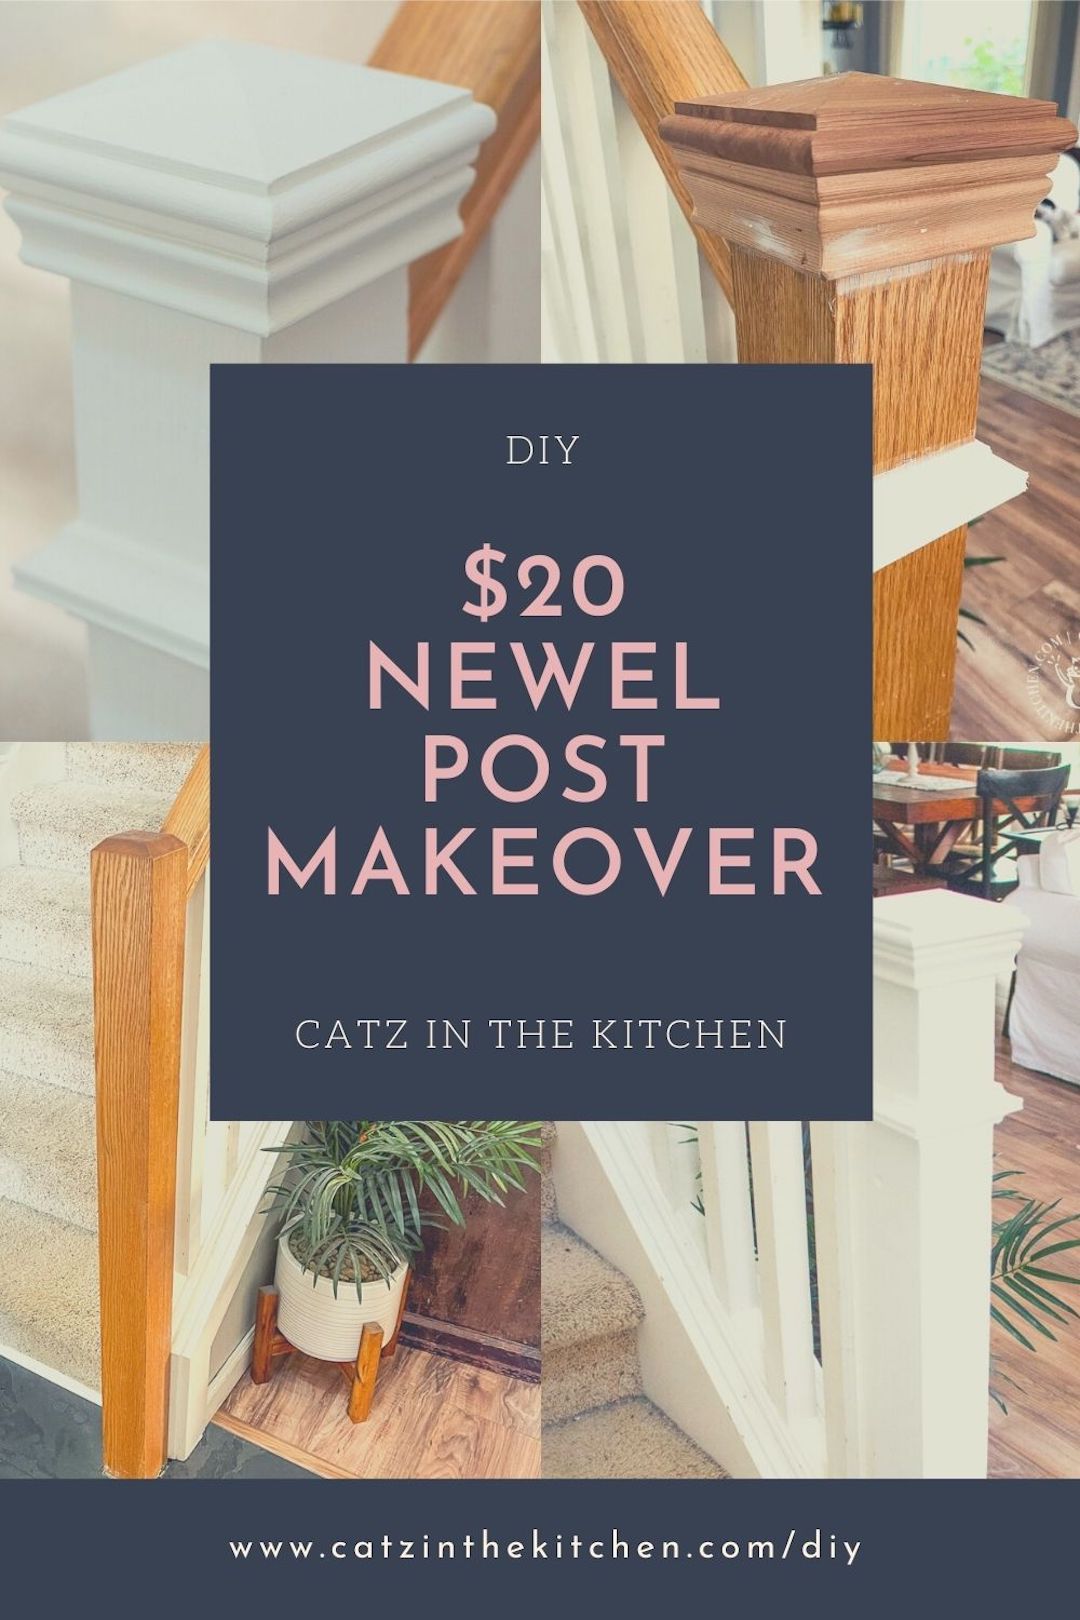
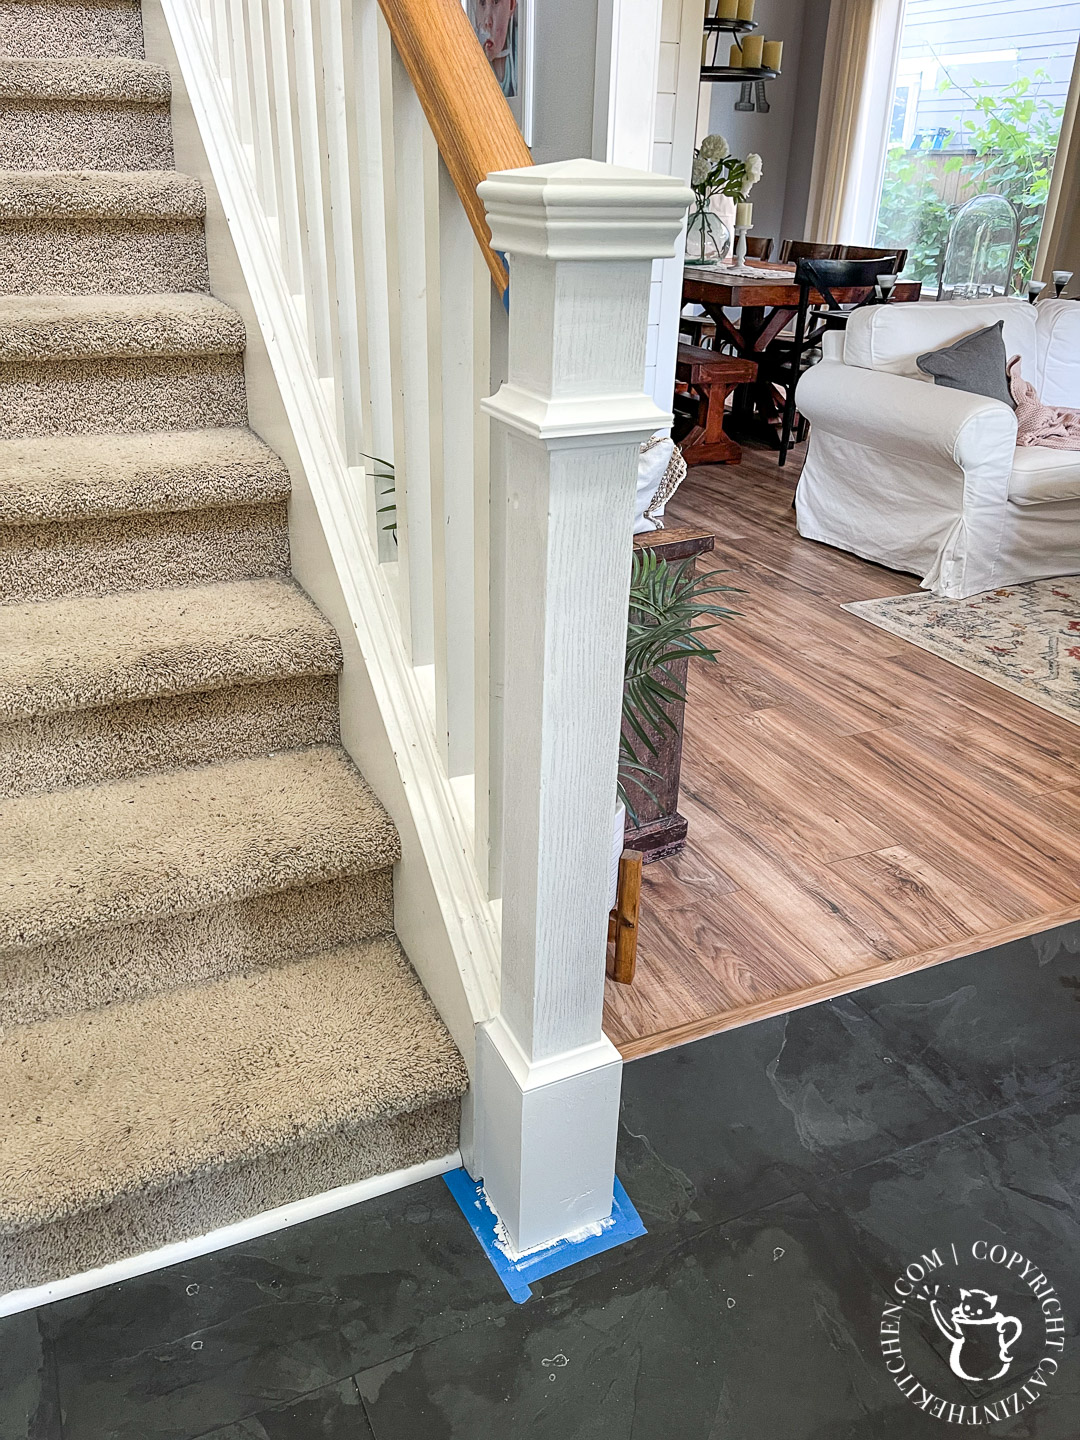
Okay, when our home was built back in 2005, along with about 15 or 20 (my estimate) other houses in the same phase of our housing development, the builder chose to leave the newel post at the bottom of the staircase a plain 4x4 post. I mean, it's not totally plain, I suppose - it was chamfered a bit and sealed, but rather unadorned, very boring - definitely no character. This is typical for a cookie-cutter home in a housing development, of course, and a lot of our DIY projects here at Catz have been about enhancing that builder-grade finish into something with a little more character.
With the newel post, I wasn't looking for anything ostentatious, or something that would look totally out of place - our house is still our house. It's not a country estate with a hand carved winding grand staircase, and the newel post didn't need to give that impression.
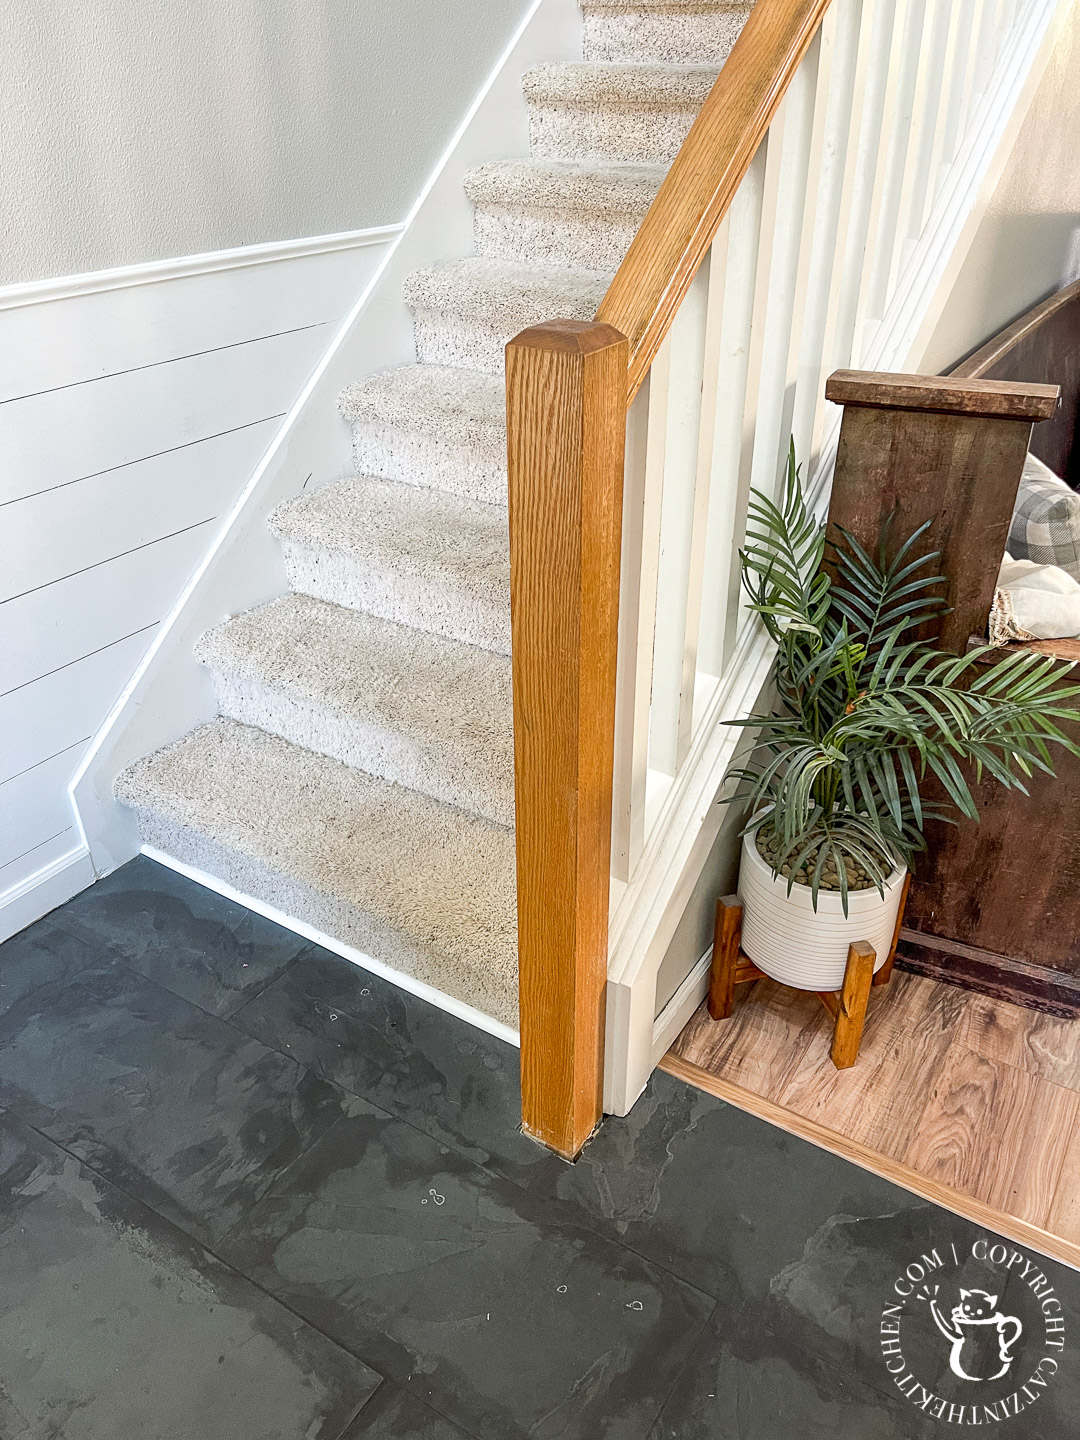
But a little character would be nice.
Before we go any further, I’ll give you my standard disclaimer about my own DIY abilities and the purpose of this post. First, I’m an amateur! That will be obvious as we go forward, I’m sure! My goal here is not to instruct you on every aspect of how to execute a similar project, but merely to share my experiences, what seemed to work well and what didn’t, what resources I found helpful, what I would do differently, and so on, in an effort to make your experience better and easier should you embark on a project of your own! Naturally, any DIY project you take is always at your own risk, check your local building codes before you start, etc, etc – you know the drill (no pun intended).
I took some inspiration from a few different posts people have put up on this subject - Remodelaholic has a great tutorial on what they did, as does The Painted Hive and Beneath my Heart. All of these were slightly more elaborate than what I wanted to do, but gave me the ideas and inspiration - as well as confidence that it was an easy, approachable project (which is really the reason I write DIY posts here!).
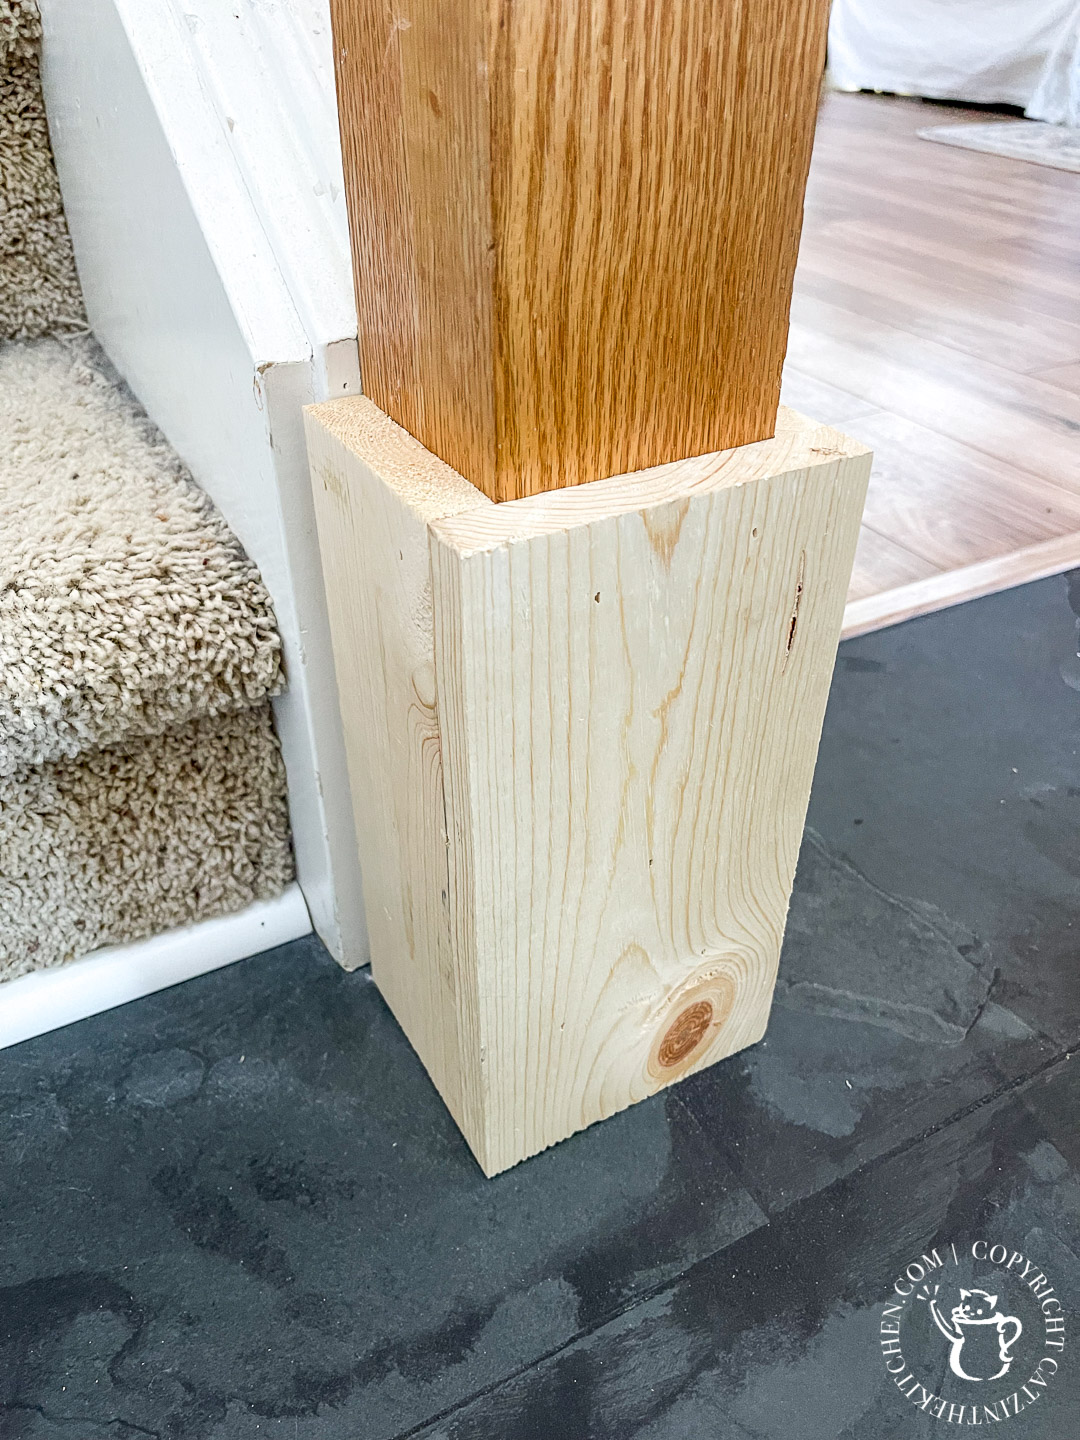
I started with the base. One pine 1x6 board is all I needed here - and really only a small portion of that! With the wild lumber prices of May 2021, I was glad I was only buying a single six-foot 1x6! I did also use a scrap 1x4 I had laying around in the garage, for two reasons - to use it up, of course! And also to avoid having to get out the table saw for just two small cuts. Your measurements will be custom to your space, of course, but for me, I was trying to bring the base up to about ¾ of an inch below the existing molding on the backside of the post, which was around 10 inches.
The 1x4 was the same width as the newel post (3.5 in), so after cutting to the right length, I tacked them onto the sides of the post with Liquid Nails and my Ryobi cordless nail gun (not sponsored - sadly - I just love it!). Because the board was so short, I was able to trim the width of my 1x6 down to 5 inches (newel post width of 3.5 in + the two side boards at ¾ in each) using my miter saw (generally would recommend the table saw for this, of course!). I tacked the 1x6 onto the front the same way as the sides.
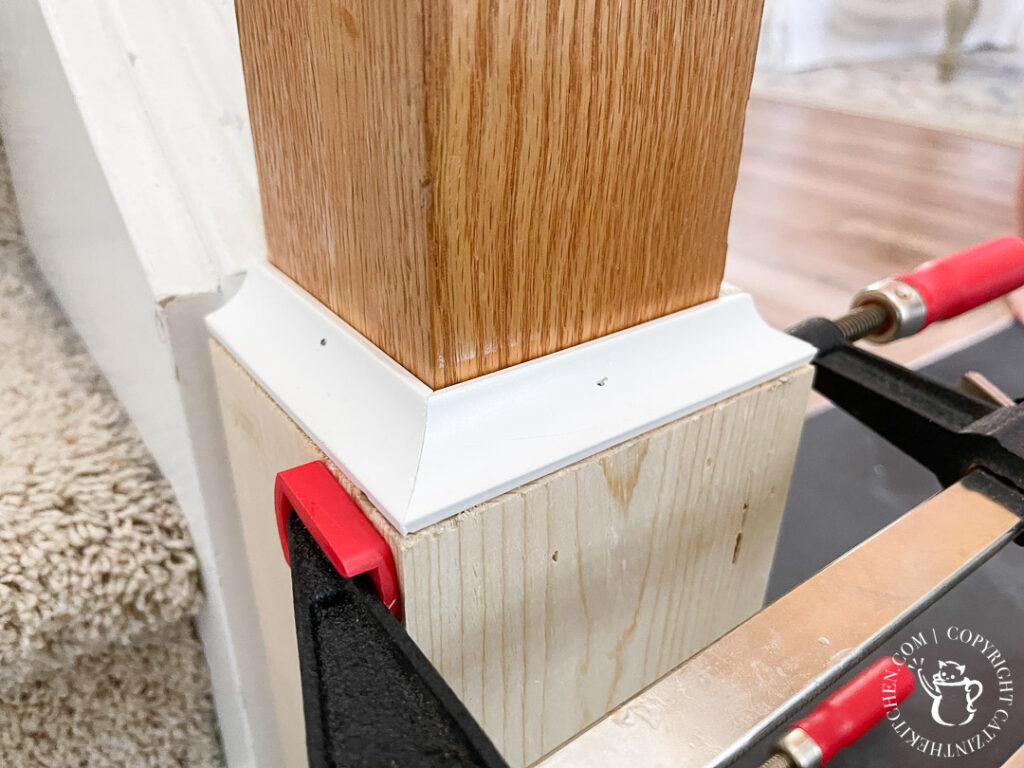
After throwing a couple of bar clamps on the base just to be safe, it was time to top it off. I used ¾ inch cove moulding for this little decorative touch. This stuff is super cheap at Home Depot (and I would guess anywhere else). I only needed one 8-foot section for this project, and it was about $3. Getting the corners right for a little project like this is always challenging for an amateur like me, but with material this cheap, I just hack away at it until I get it right... I tacked these little guys on with Liquid Nails and my nail gun as well (sensing a theme here).

Moving right on up the post and sticking with the cove moulding, I added a little decorative accent about 6 inches below the cap. This is a very basic flourish, but it adds a little visual interest to the newel post itself. I simply cut four pieces of the cove moulding, all the same length (as the post is square), and tacked them onto the post "upside down," followed by four more pieces "right side up."

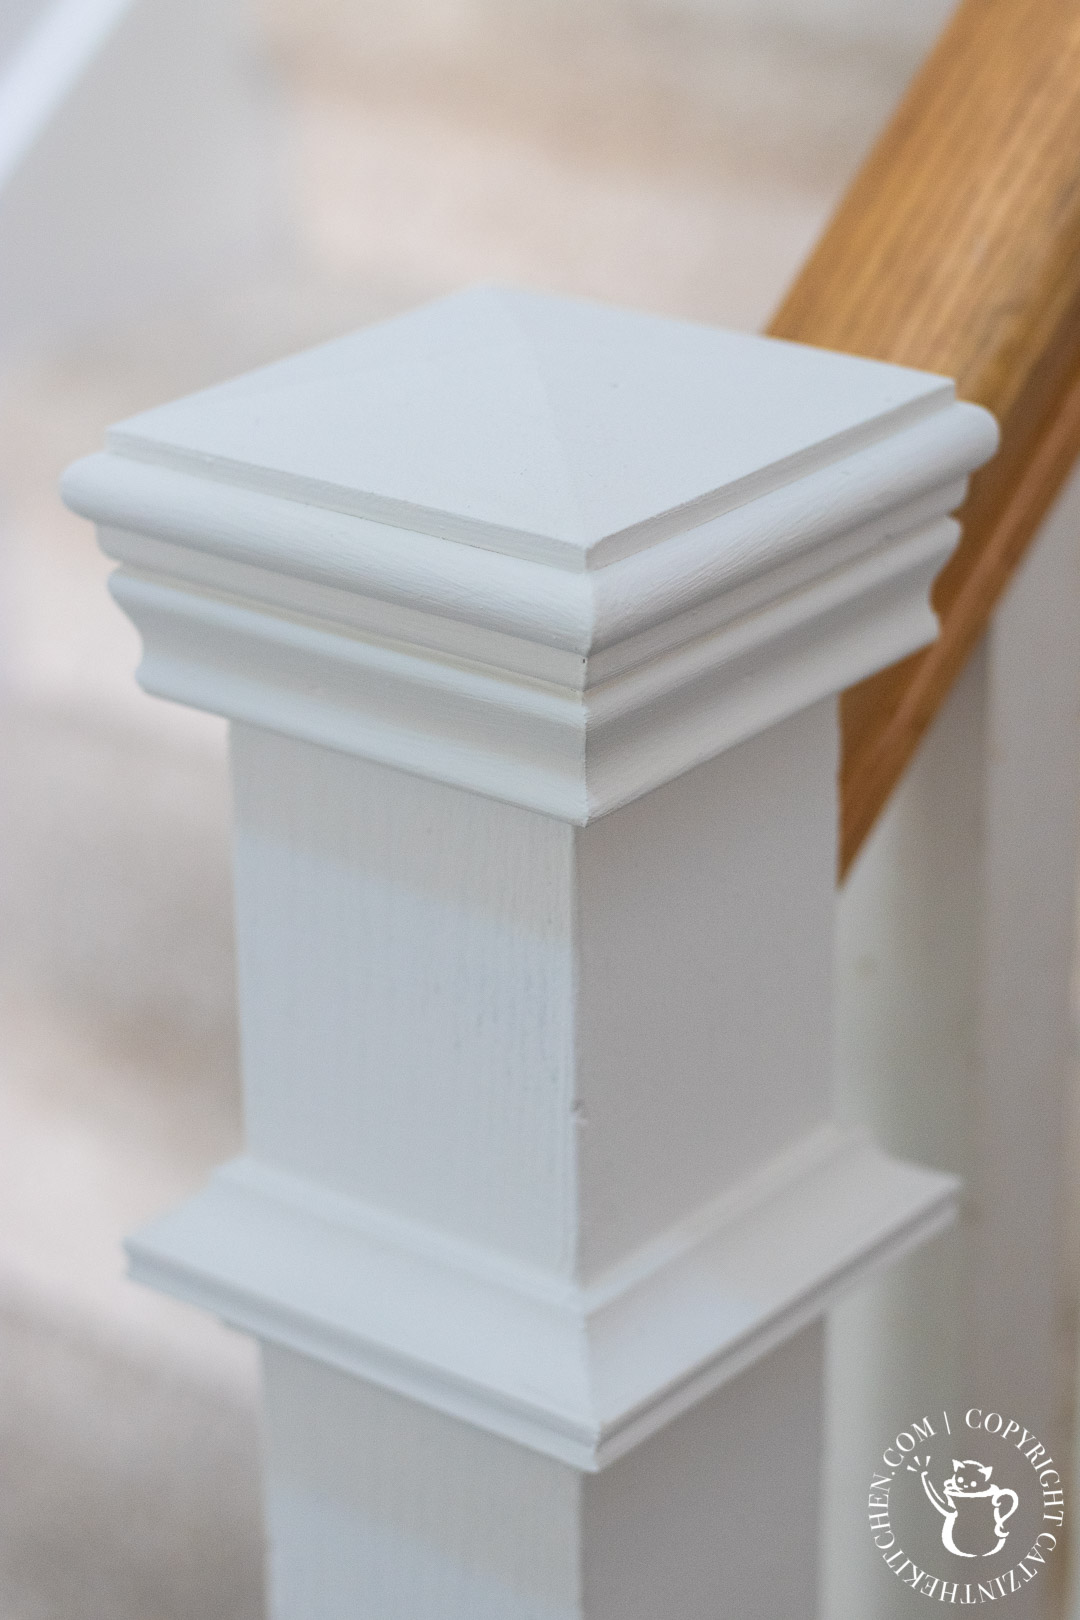
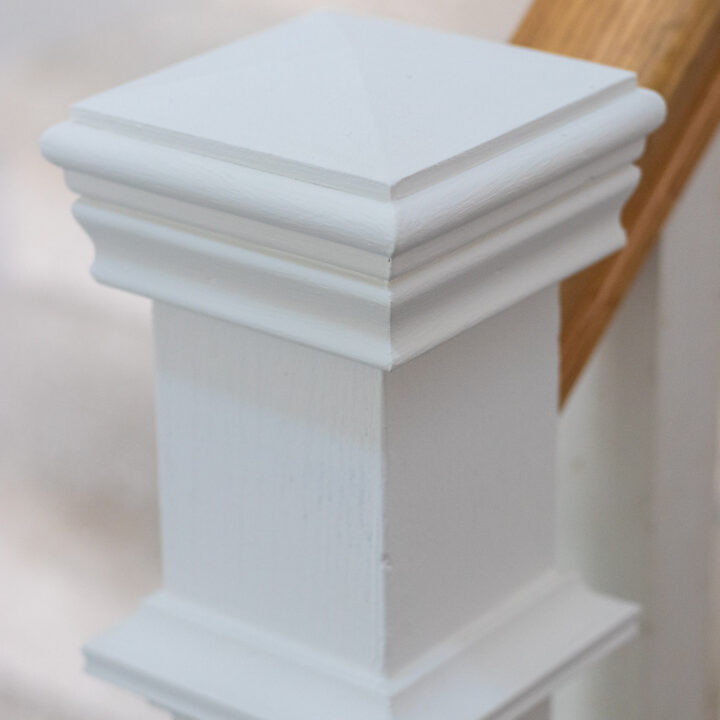
For the cap itself, I toyed around with the idea of building something custom, using the same layering techniques I used on the base of our round dining room table. But...I was also curious if there was an easier way. I had this idea rolling around in my head that I might be able to find something that would work among the outdoor fence post caps that are pre-made using cedar. So, one day a few weeks ago, I wandered down the outdoor fencing aisle in Home Depot and found this beautiful little cedar fence post cap. It was essentially exactly what I wanted to build myself, and it only set me back about $9.
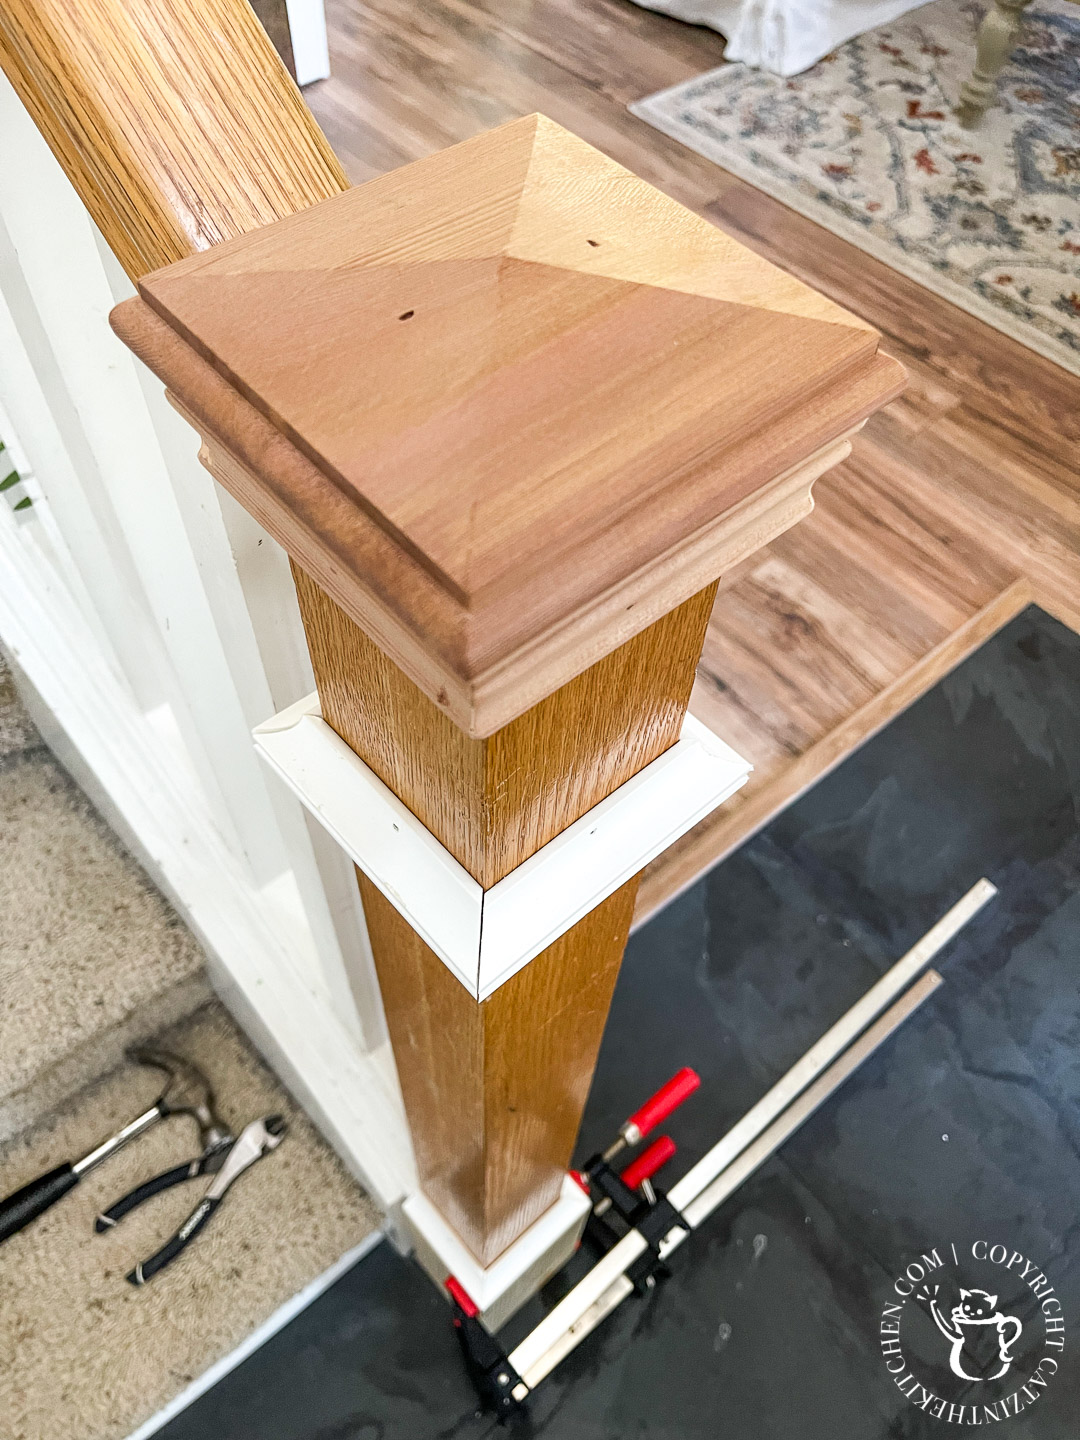
Installing the cap? Literally just a matter of tacking it on using the same glue and nails method as the rest of this project. And that's it. Could not possibly be easier, and gave me exactly the look I was going for. All that was left was caulking, sanding, priming, and painting. (I did drive Chels and Grace crazy by leaving the unattached cap on the top of the newel post for a couple of weeks - they would grab it or brush up against it and it would wobble around or fall off...I thought it was funny.)
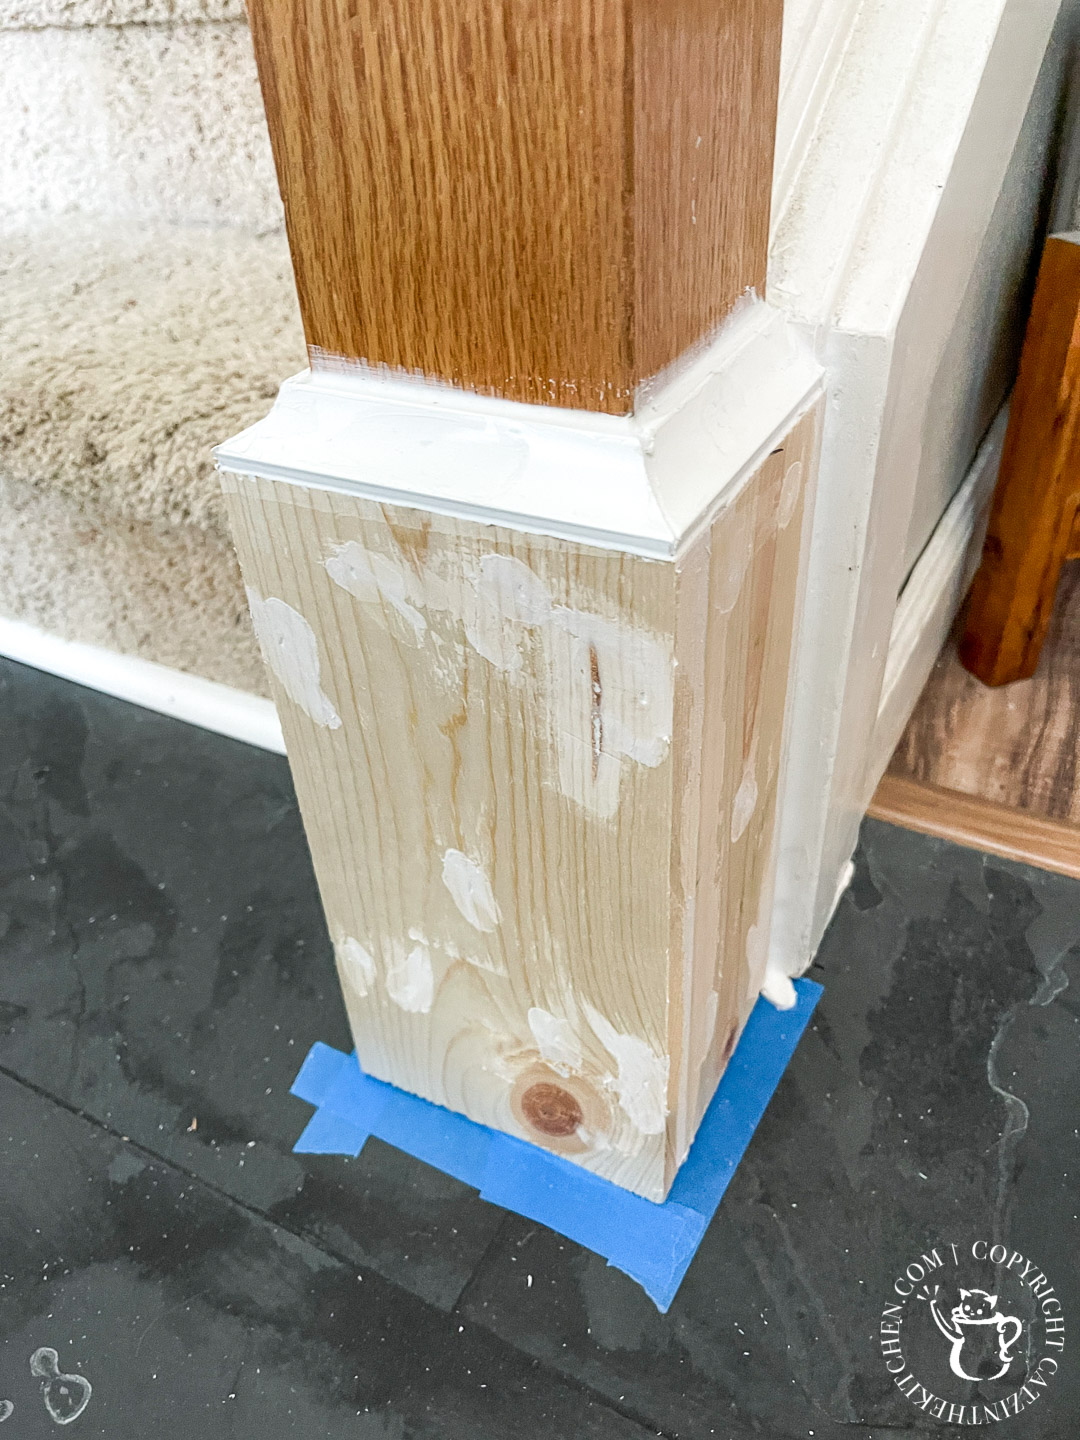
This was a pretty straightforward caulking job (and nothing like the insane boatloads of caulking I went through for our built-in library wall project, thank goodness!). Filling in gaps between boards and pieces of moulding, dealing with nail holes, and things of that nature. After drying and some light sanding, I was ready to prime it all.
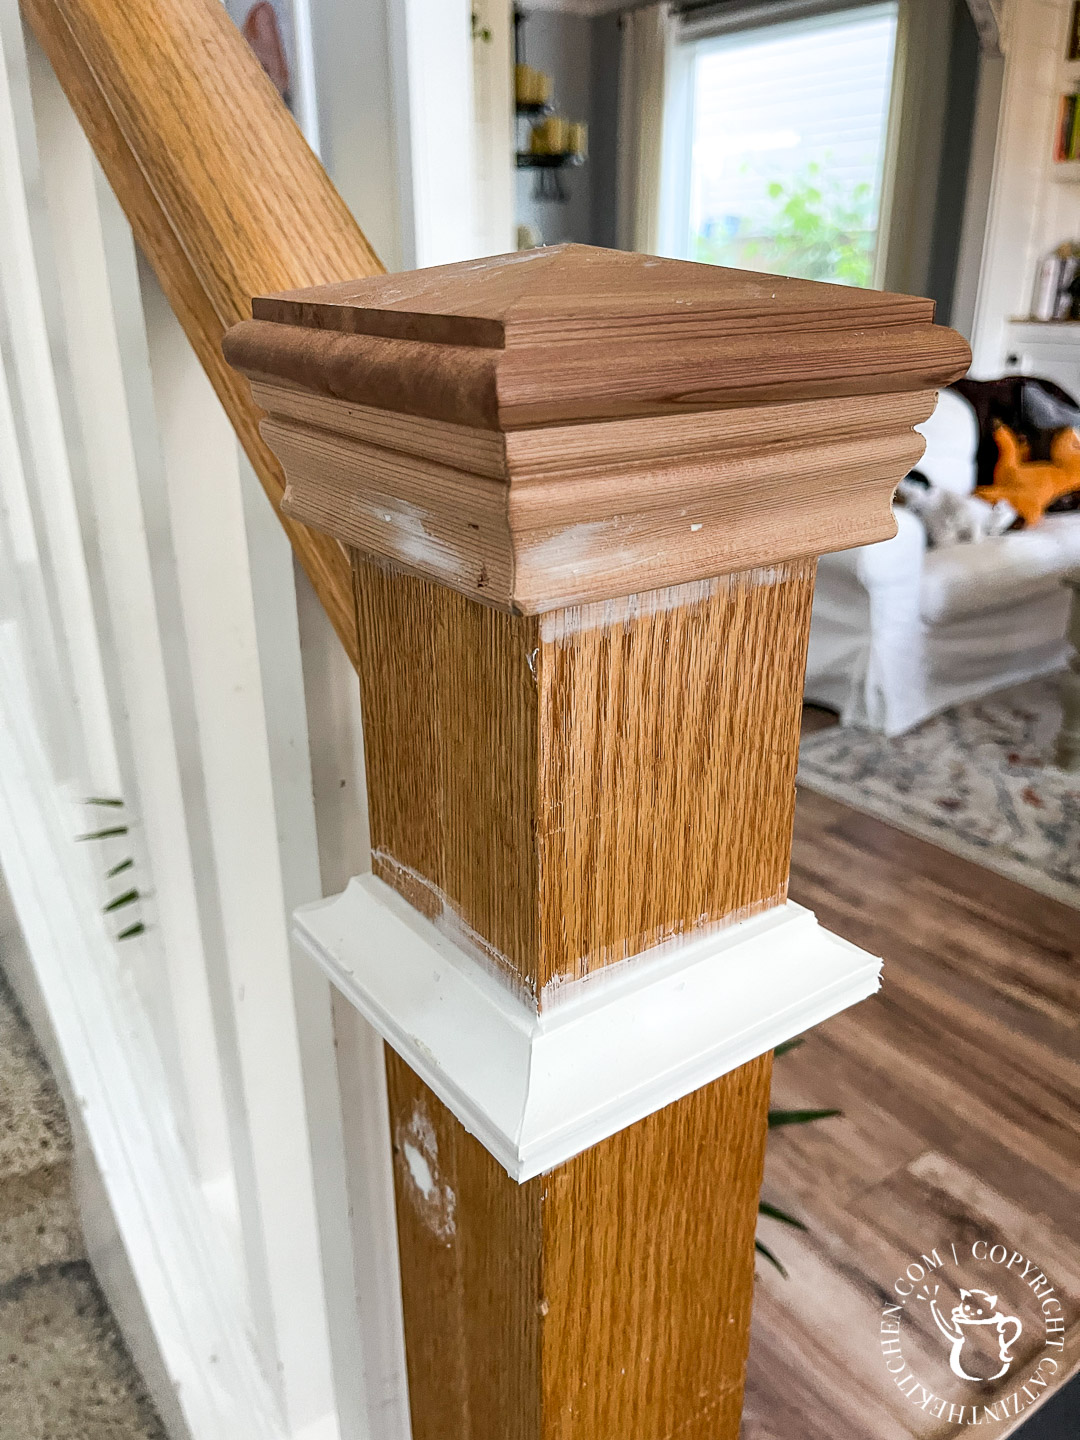
I don't always prime my painting projects, so why this one? Two main reasons. One, I was planning to use a light paint color (Alabaster) over the "orange" oak post, and two, with this many different materials (oak post, pine base, PVC cove moulding, cedar cap), I wanted to at least give the paint a chance to look somewhat uniform. Paint looks different on different surfaces, of course, and I hoped the primer base would help even things out.
And you know what? I think it did a pretty dang good job! I used Kilz 2 primer for this job. The above is after one coat, and the below is after a second coat.
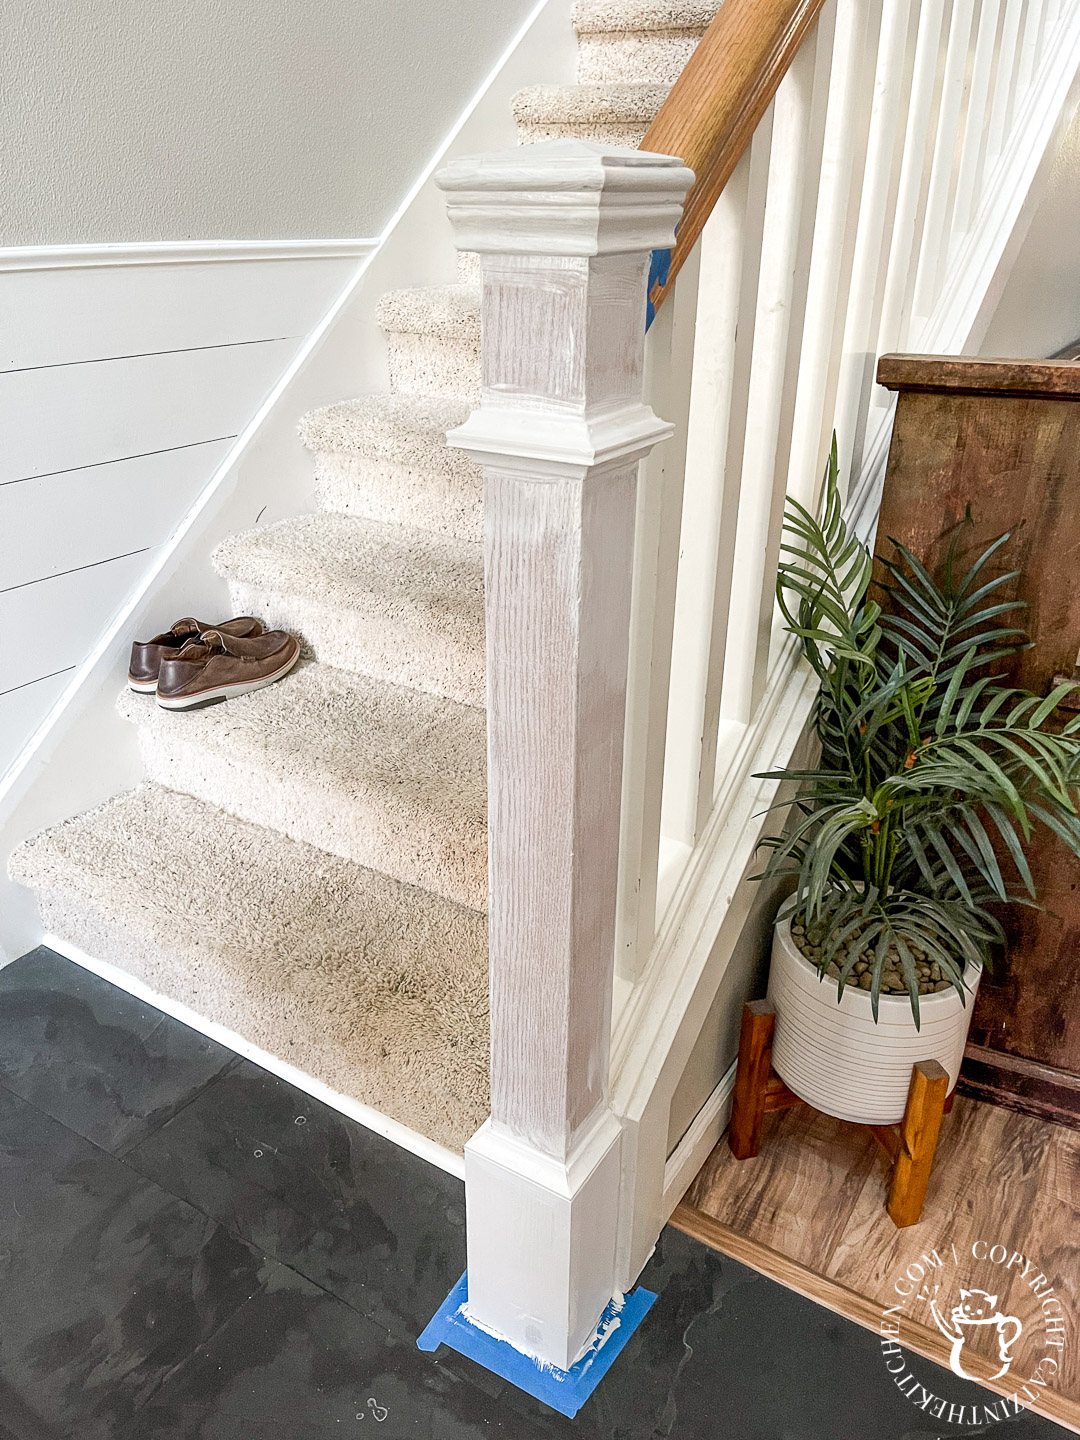
Naturally, all that was left to do was paint! Two more coats of Sherwin-Williams Alabaster, which we've sort of adopted as a replacement trim paint in our house as we go through and update various rooms, and we were all set! I used a mini-roller and angled brush for this job. The grain of the oak post still shows through very slightly, but overall, I'm super happy with the finish.
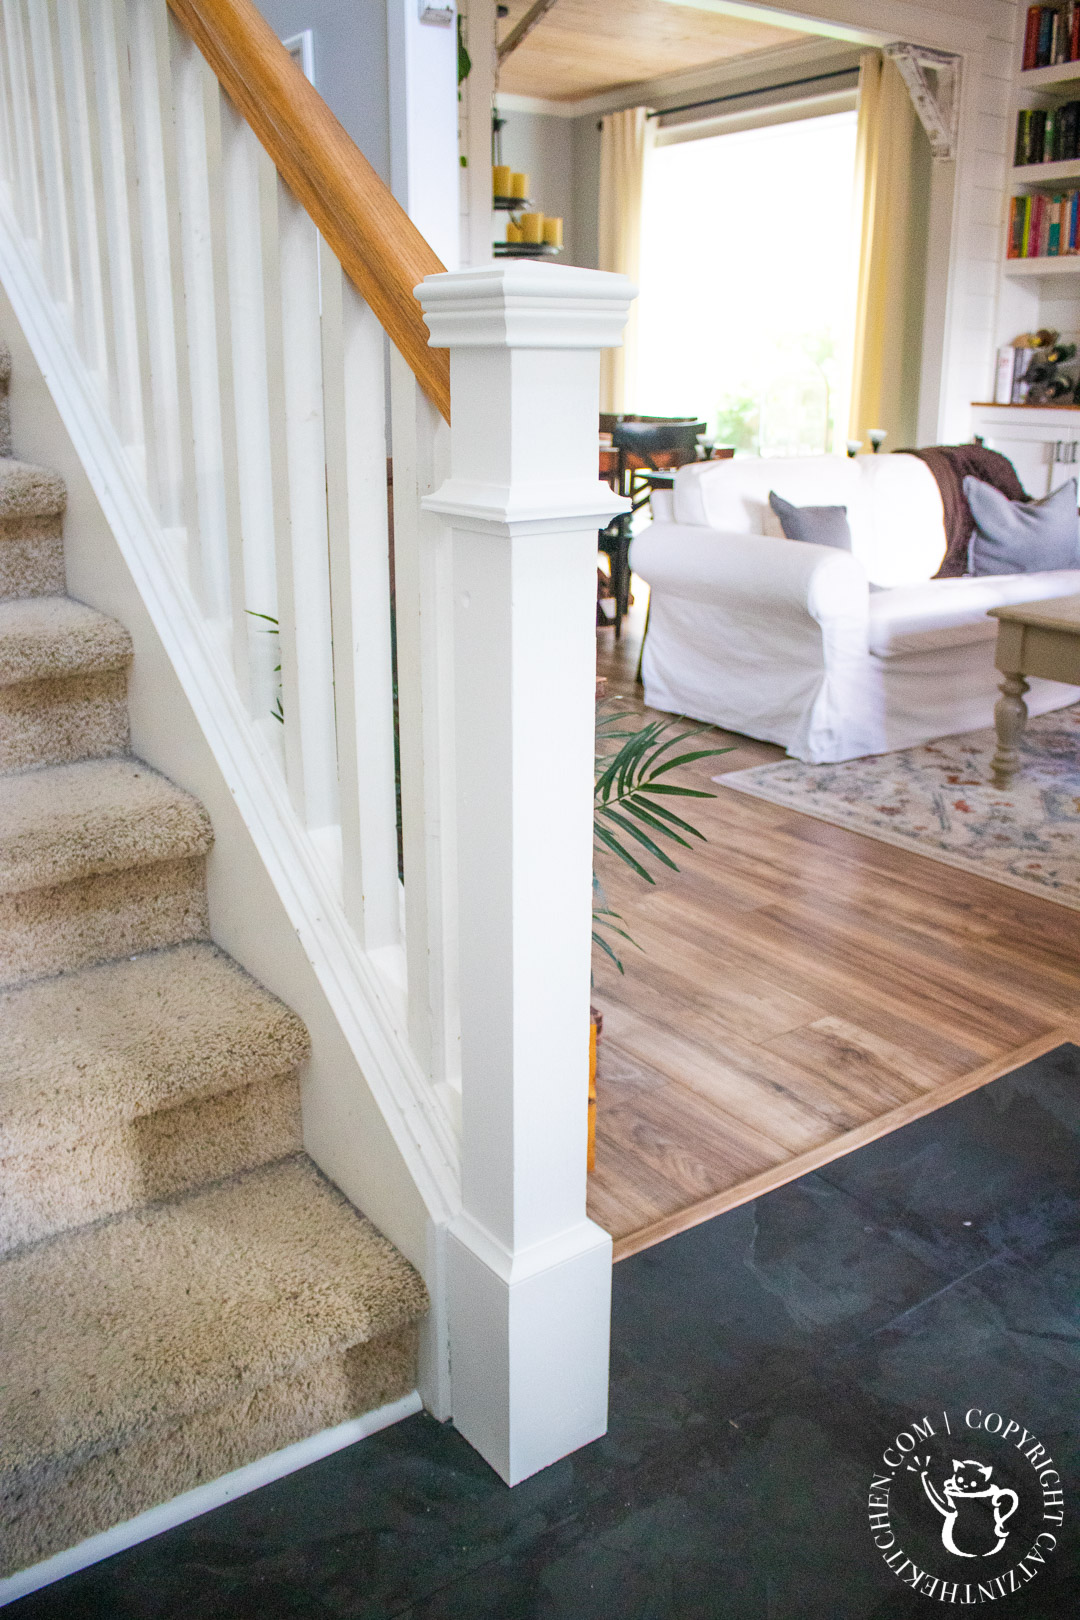
So, here it is - about $18 in materials, and a couple of hours in time, and we've got a much more finished-looking newel post at the bottom of our stairs. At some point, we'll get around to refinishing the banister, removing the carpeting, and just generally reworking this staircase, but at least now it makes a slightly better impression when you first open the door! Not curb appeal, but...entryway appeal? Is that a thing?
DIY $20 Newel Post Makeover
We did a makeover of the newel post at the base of our stairs. It cost about $20 in building materials, took about two hours, and we love it!
Materials
- PVC Inside Corner Moulding
- 1 1x6 Common Board (6 ft)
- Post Cap
- Wood glue or construction adhesive
- Primer
- Paint
- Nails
- Painter's Tape
- Caulking
Tools
- Hammer or nail gun
- Miter saw
- Measuring tape
- Level
- Paint brush
- Small paint roller
- Fine grain sandpaper
- Small putty knife
- Caulking gun
Instructions
See detailed instructions in post.


Leave a Reply