As part of our ultra-low-budget kitchen refresh, we're sharing our DIY experience painting our kitchen cabinets with white milk paint!

We've just completed an ultra-low-budget "refresh" of our kitchen, which ran us about $500 all-in. This post about painting our kitchen cabinets with white milk paint is the first in a series of about five articles sharing our learnings and experiences from this little project, which would be an easy, affordable one to tackle in any kitchen that needs a little breath of fresh air! In fact, if you already have the painting supplies and aren't changing the hardware, this part of the project should be under $100!
This project should be under $100!
Chels and I have always enjoyed the kitchen in our current house. We purchased our home about five years ago, when it was about ten years old. Due to the relatively recent build date, aside from a few typical early-2000's red and brown accent walls, nothing was particularly dated or out of style. The kitchen itself isn't huge, but it has lots of cabinet and counter space. Since moving in, we painted the walls, and, not by choice, replaced almost all of the appliances (one by one, they all went out - the microwave, the faucet, the oven, the dishwasher...the fridge is hanging in there, but showing ominous signs of giving up the ghost!).
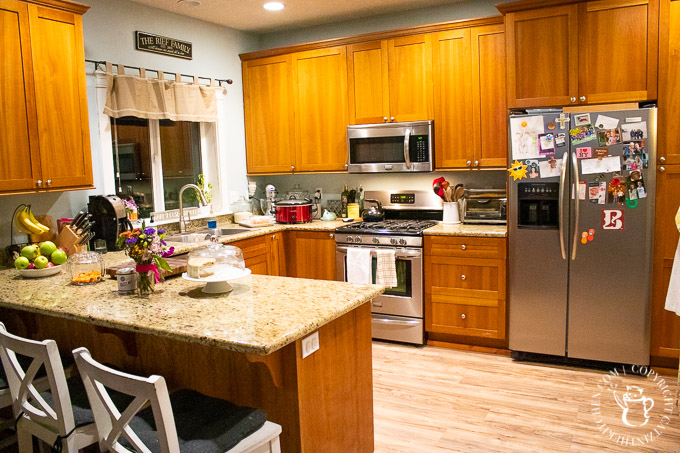
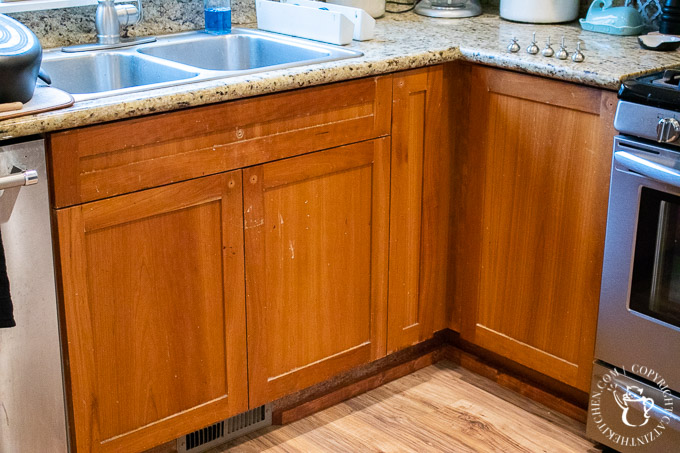
But let's face it - we're food bloggers with four kids, and we spend A TON of time in our kitchen. As the years went by, we found ourselves wishing it was a little brighter, a little airier, and maybe had a bit more of that farmhouse style feel that we love (and that also happens to be very popular these days!). In addition to these "wants," the bottom set of wooden kitchen cabinets were pretty beat up. The previous owner had a dog (or dogs?), and it's probably safe to say that our crew did a bit of damage to them as well. Hard to capture the scratches and gouges on camera without sharing tons of boring pictures, but here's one to give you an idea.
But let's face it - we're food bloggers with four kids, and we spend A TON of time in our kitchen.
It came down to either refinishing the existing wood, replacing the cabinets, or painting them. We weren't in love with the color of the original wood anyway (it's pleasant, but we wanted to go lighter), and the cabinets worked just fine, so replacing them seemed outrageously expensive and wasteful, so we decided on Door #3 - painting the cabinets.
It seemed like an intimidating project for some reason. We've tackled some pretty big DIY projects, but everything we'd heard about painting cabinets indicated it was:
- incredibly time consuming
- involved lots of sanding, spraying, cleaning, masking...
- very challenging to get right
We happened to be down at a favorite local shop of ours, The Rustic Shed, discussing with the owner a recent not-totally-positive experience with chalk paint, and she asked if we'd ever considered trying milk paint...we hadn't. She shared her uses of milk paint for refinishing furniture, and said she'd heard good things for cabinet painting as well. We did a little research, and decided to do a test...we picked up some milk paint and painted the small under-sink cabinet in our guest bathroom.
It was amazing.
Based on what we learned from our reading and conversations, we did minimal prep work - removed the cabinet doors, did a bit of light sanding, some quick cleaning, and three coats of milk paint using a foam roller and a simple slanted brush.
She asked if we'd ever considered trying milk paint...we hadn't.
The Prep
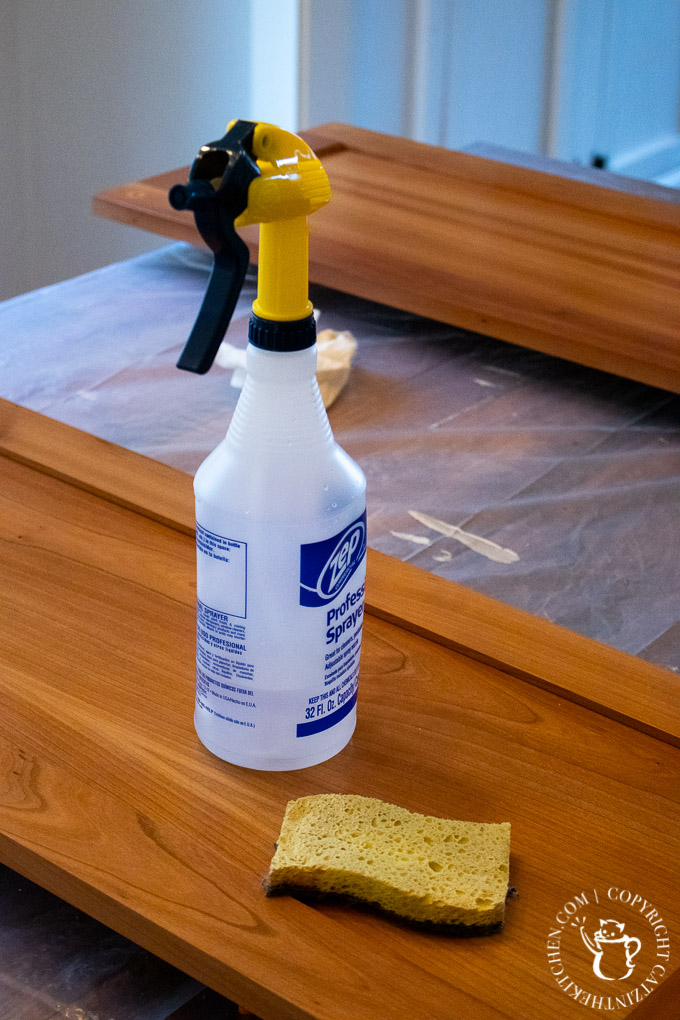
On the recommendation of the local shop owner I mentioned earlier, we used a simple solution of denatured alcohol and water in a spray bottle, along with an old kitchen sponge, to clean the cabinets. This did a great job of removing the 15 years worth of grime that had built up in certain places!
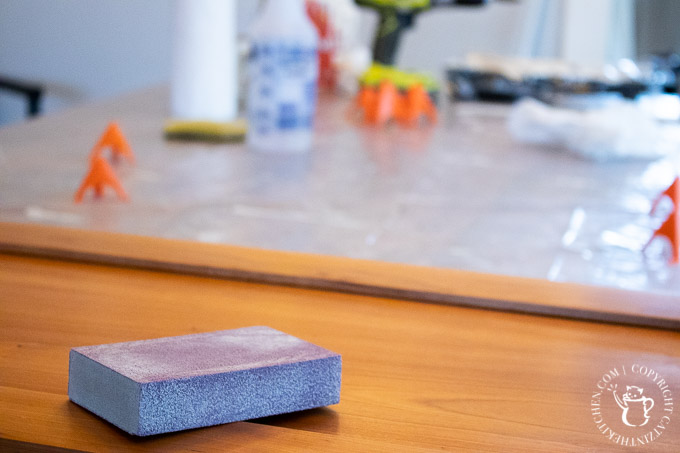
I used a fine grain sanding block for the majority for of the quick sanding that I did, though I did have to resort to my electric sander for the cabinets that were more beat up. The sanding was really just a quick hit here - just enough to very lightly rough up the surface of the doors.
The Painting
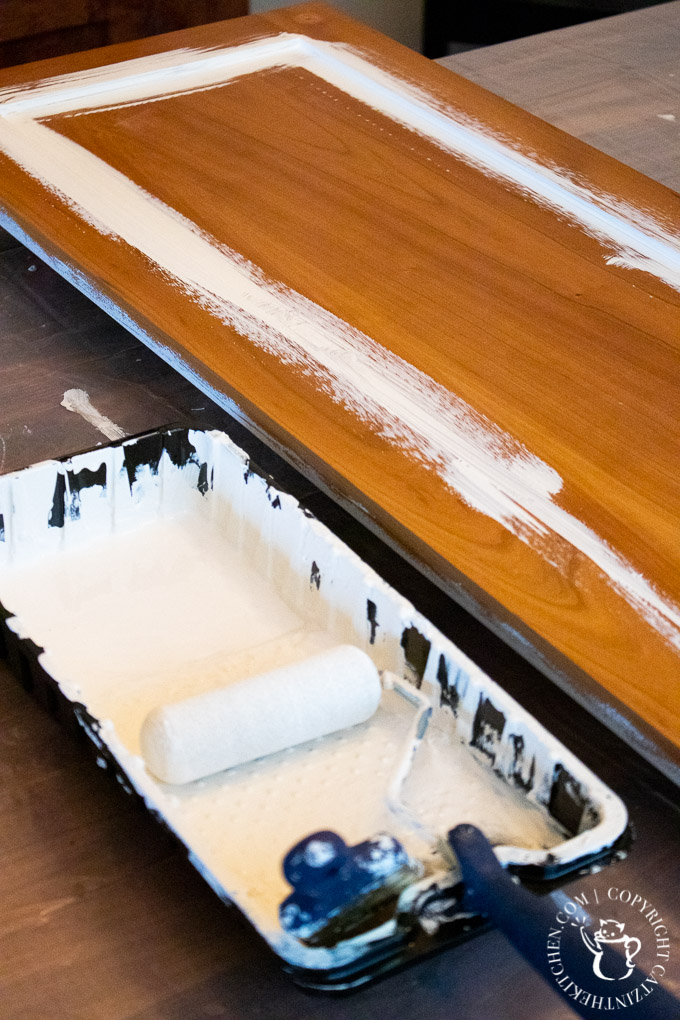
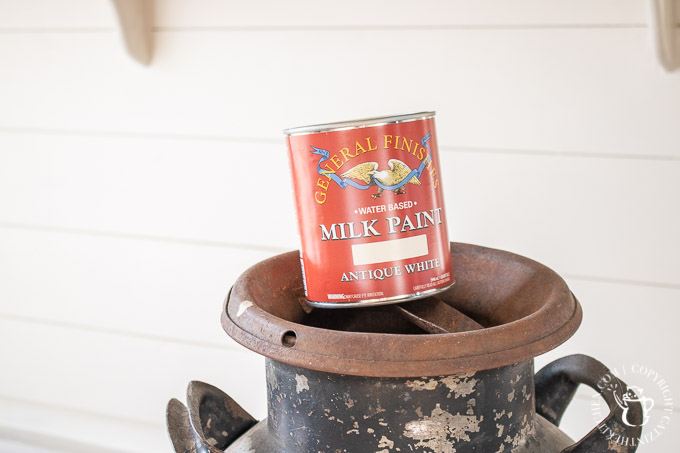
For the main event (that would be the painting...), we started with a simple slanted brush, filling in the corners and joints - the parts that would be hard or impossible to reach with the roller. Our local shop carried (and recommended) General Finishes milk paint, so that's what we used - we decided on Antique White, which ended up being exactly what we were looking for - it's a calm, relaxed white with a slightly aged look to it (as the name implies), rather than a blinding white that could run the risk of coming across rather sterile.
It's a calm, relaxed white with a slightly aged look to it, rather than a blinding white that could run the risk of coming across rather sterile.
I've done a fair amount of painting over the years. Nothing compared to a commercial painter or someone in that line of work, of course, but interiors and exteriors, furniture, oil paint, spray paint, chalk paint, etc...milk paint is a little different than everything else. It's not as different as, say, latex vs. chalk, but...different. It's just a little thicker, has a bit more of an underlying texture to it.
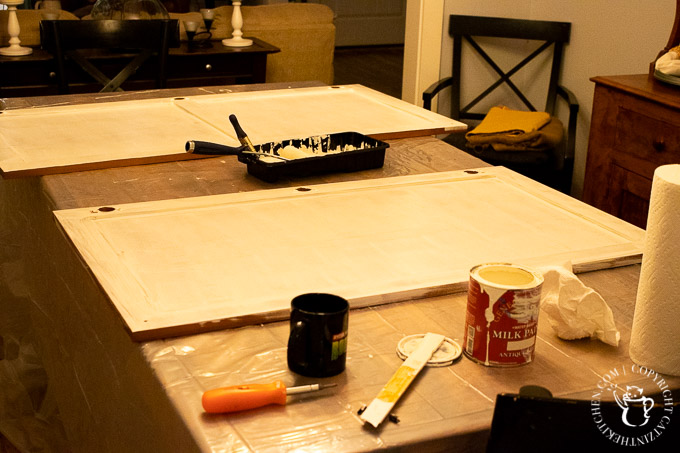
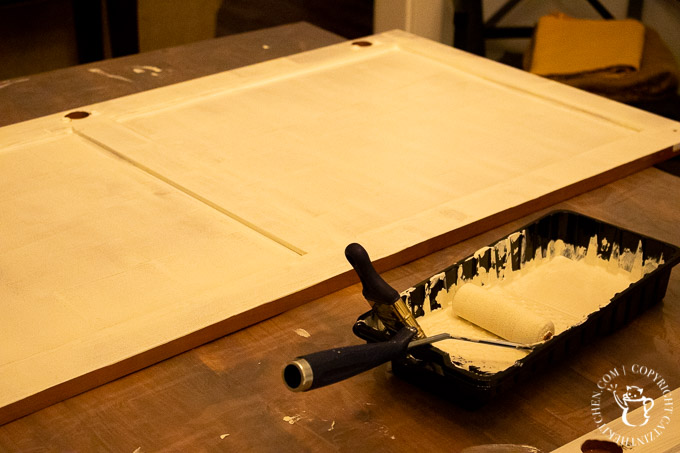
For this project, I took our "formal" dining room out of commission for a couple of weeks. It's right next door to the kitchen, minimizing the transport of the cabinet doors around the house (and the overall disruption to our family!). The cabinet doors took three coats each to get that solid, brushless texture we were going for. I used the foam roller on the raised trim, the center pieces, and all of the edges.
If you scroll up a few pictures (to the one of the sanding sponge), you can see the little painters' tripods I used to elevate the cabinet doors while painting the backsides of each. These little orange "traffic cones" are amazing! I didn't discover them until shortly before starting this project, and now I'll never paint smaller pieces like this without them - so great to keeping things elevated with minimal surface contact.

I started on one side of the kitchen and just slowly worked my way across to the other side, re-attaching the cabinet doors as they dried (I tried to let each set dry overnight), and working on the trim around the cabinets while the doors were drying out in the dining room. This was both a mentally encouraging way to go about it (you get to see progress right away!), as well as another way to minimize the disruption to our family - no removing everything from the cabinets, and just one set of cabinets or drawers under work at a time.
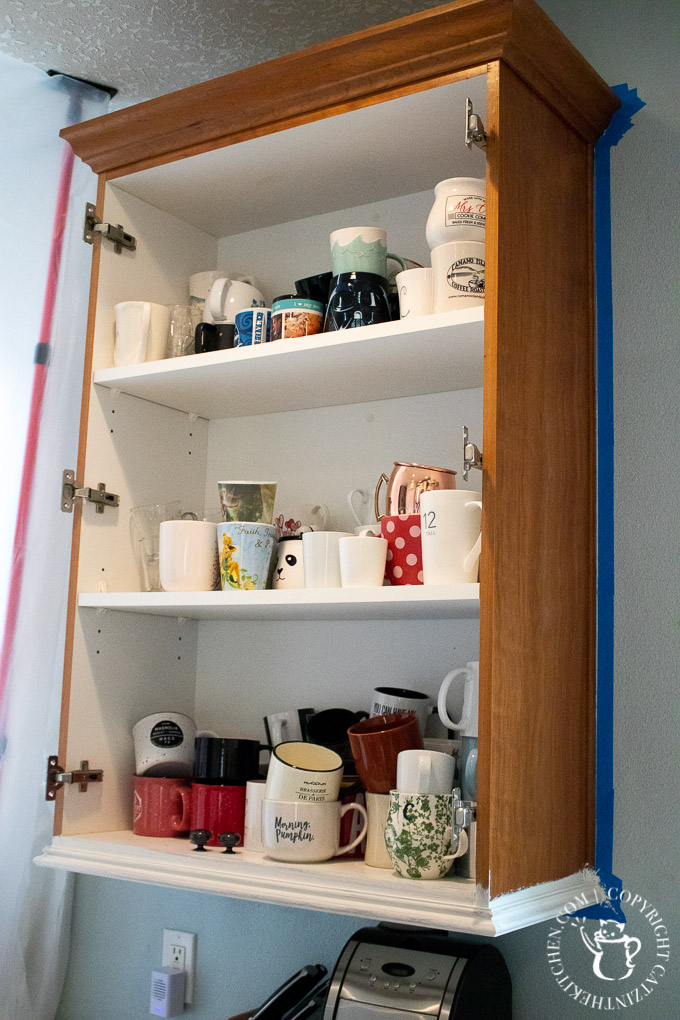
I should be clear that in the picture above, the clear sheet to the left is not some elaborate masking job - just after I started this project, we discovered dry rot in the back wall of our house, so that clear sheet is the "temporary wall" keeping out the November elements! This picture is, on the other hand, a good example of how "un-disruptive" we were able to be as we went through the cabinets - you can see here that I just left all of the coffee mugs right where they were!
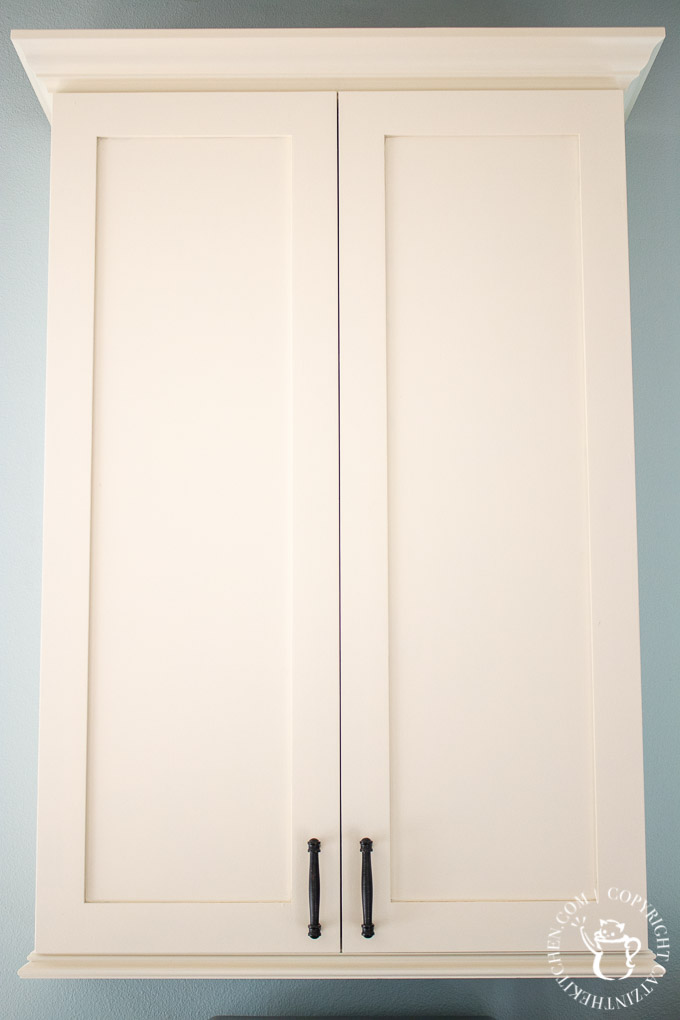
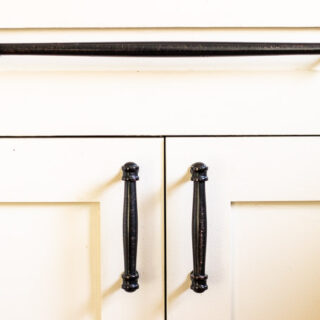
When it came to the hardware, at first I just put back the silver knobs that had already been there (so we could use the cabinets!). Next, for some quick contrast, I tried spraying those same knobs with some black metallic spray paint. Not a great choice for high contact surfaces! Finally, we found a set of hardware we liked at Home Depot, the black pulls you see above and below. One thing I liked about this set is that it came in a variety of lengths, so we could use shorter ones for the upper cabinets (~3 in), slight longer ones for the larger drawers below (~5 in), and really long ones for a couple of the really wide drawers (~ 12 in), which would create a little visual variety while still matching nicely.

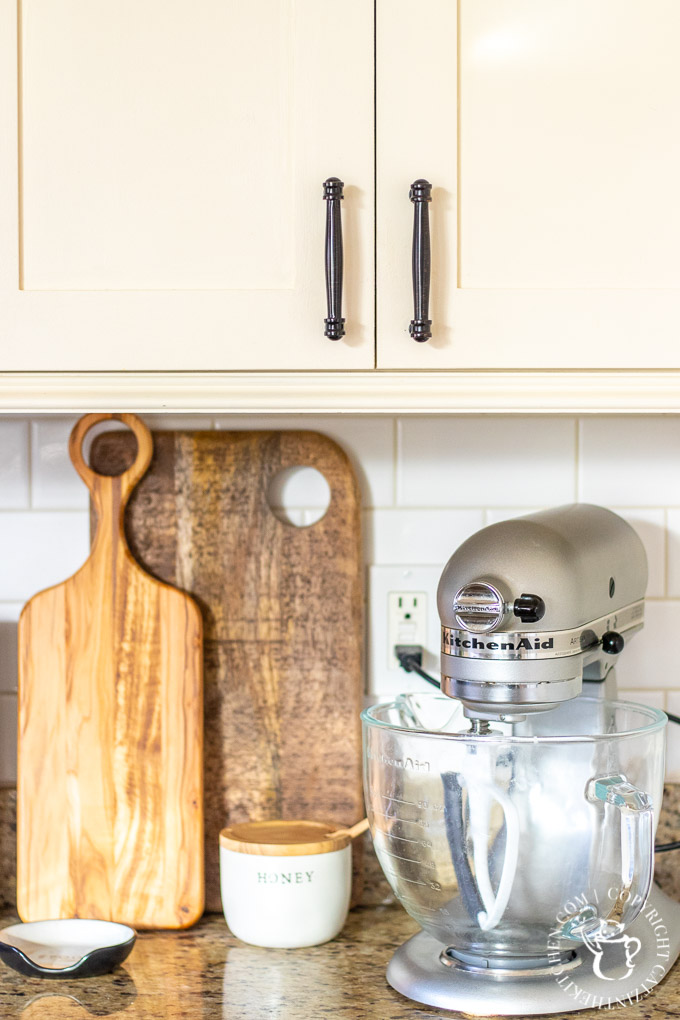
As mentioned above, we used the Antique White color, which is definitely an off-white - a very pleasant off-white, and exactly what we were hoping for. You can see a little more clearly in the pictures below the contrast between this color and the truer white of the backsplash (which we added after painting the cabinets - another post on that to follow soon!).
And that's pretty much it! I would estimate that we spent about three weeks working our way through this painting project, cleaning and sanding as we went, un-mounting and mounting the cabinet doors along the way, and, of course, dealing with our other major dry rot repair at the same time, so certainly could have been done faster!
You might be asking - why no topcoat?
You might be asking - why no topcoat? The company that makes the paint actually doesn't recommend one for the white colors, for two reasons - one, the paint apparently has a built in seal as it drys, and two...discoloration. If you've ever tried putting a sealer over white paint, yeah, this can definitely be a problem.
How has it held up over time?
We finished painting the cabinets back in November, so we've lived with them now for about four months. How have they held up? Pretty good! We're a family of six, and a food blogging family of six at that, so the kitchen gets near constant heavy use. I have uncovered a few nicks here and there, mostly on the surfaces you would expect (the lower cupboards that the kids use!). The good news is, with painted cabinets, the fix for such nicks is easy - just get out a brush and dab on a bit of paint. Before we painted them...no such luck. Nicks and scratches were there to stay.
But overall, we've been extremely pleased with the finish. Very easy to clean, very durable, and very easy to touch up when needed. And it totally transformed the overall look and feel of the kitchen! So light and bright now!
Before...
After...
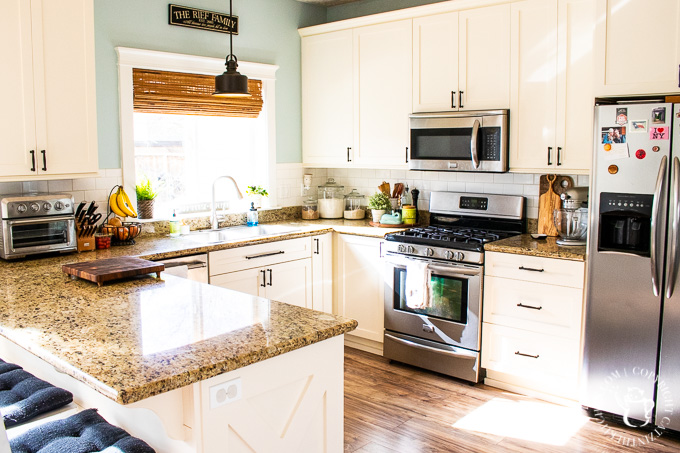
You might notice a few other changes in the picture above - the "x" on the end of the counter, the shiplap on the bar, the tile backsplash, the window treatment, and the lighting fixture - we'll blog more about some of these changes soon!
DIY: Painting our Kitchen Cabinets with White Milk Paint
As part of our ultra-low-budget kitchen refresh, we're sharing our DIY experience painting our kitchen cabinets with white milk paint!
Materials
- 1 gallon milk paint
- New cabinet hardware, if desired
- solution of denatured alcohol and water in a spray bottle
Tools
- painters tape
- drop cloth
- 2 in slanted paint brush
- screwdriver or drill (for removing and reinstalling hardware and hinges)
- fine sandpaper and/or sanding block
- 6 in foam roller and tray
- painters' tripods
Instructions
- Remove screws holding cabinets to cabinet hinges, leaving hinges attached to cabinet box (not doors). Remove cabinet harware.
- Clean cabinets using solution of denatured alcohol and water in a spray bottle, and then sand lightly.
- Mix milk paint thoroughly, and begin painting by using slanted brush to paint any detailed parts of doors that roller will not easily reach or cover.
- Using foam roller, smoothly paint flat surfaces and edges, smoothing out paint applied by brush where possible. It is likely that two to three coats may be required - follow paint maker's directions for time between coats, etc.
- While paint is drying, mask cabinet boxes using painters tape, clean using denatured alcohol solution, and paint using slanted brush.
- When completely dry, re-mount doors on hinges and replace hardware.


Michelle says
Thanks for sharing this project. It looks great! Where did you purchase your pull-up window shade from?
Joshua Rief says
Hi, Michelle - we ordered it from Home Depot, actually! They custom cut them to various widths and ship them to you. Thanks!
Molly Hughes says
What do you use to clean your finished milk paint cabinets? We're in the middle of painting ours now, and I just realized I had no idea about the after-care of these cabinets.
Also, did you have any issues with cracking paint? we have one area above our stove top that cracked, and I'm not sure why. We did light sanding and denatured alcohol for prep on this area like the rest of the kitchen, and this was the only problem zone. Thanks!
Joshua Rief says
Hi, Molly - thanks for the comment, and I hope you are loving the way your project is turning out! Here's what General Finishes has to say about cleaning the cabinets: "After your finish has cured, the best way to clean is with a water-damp rag. If your surface requires deep cleaning due to grease or grime build-up, add a speck of a strong dish detergent, such as Dawn or a bit of vinegar to your damp rag."
We've pretty much followed that advice so far - a damp rag has worked well. We've used a Mr Clean Magic Eraser (lightly!) a couple of times as well.
For the cracking, we have had a bit of that as well, though not anywhere noticeable, thank goodness. My understanding is that changes in temperature and humidity can be the cause, though I suspect the underlying (previous) finish is causing ours. I've been just touching ours up here and there, but, in my opinion, the great thing about painted cabinets is in a worst case scenario, you just take down that door, sand and strip it, and re-paint it!
Nathan says
Would you suggest using a primer paint first at all . I see other blogs suggesting a primer paint. Thanks.
Joshua Rief says
Hi, Nathan - I think it depends on your surface. General Finishes specifically says on their website that a primer is not needed for milk paint, but I could see it helping on a particular rough surface, perhaps.
Jmartinez says
I came across an article about General Finishes Milk Paint while looking for a simple solution to painting my oak kitchen cabinets. What attracted me most was that I wouldn’t have to sand or scrape off the finish on the cabinets. I also didn’t have to use primer.
I absolutely love this paint. I didn’t have to sand or prepare the cabinets other than washing them down with TSP. After painting, I finished them off with General Finishes High Performance satin top coat.
It’s been two years and they still look great.
I highly recommend General Finishes milk paint for painting any wood surface.
Joshua Rief says
That's great to hear! I have to agree - it's ideally suited to this purpose. Just picked up another can to work on the bathrooms! What color did you use?
Judy Martinez says
I used Linen for the cabinets and Milstone for the island.
Kristin says
I have recently been trying to refinish my kitchen island with this paint. I’m having a terrible time with it. I chose the Snow White color and am having serious sheen problems with it. It was going okay until I started using the foam roller. Now the sheen on our shiplap around the island is just awful. So uneven in natural light, and I’m also having texture and sheen problems in other places. I feel like I’ve ruined it at this point. Do you happen to have any suggestions?
Joshua Rief says
Hi, Kristin - wow, I'm so sorry to hear that! We've never worked with anything other than the Antique White, so it's hard to say if there's a difference in the finishes of the individual colors, but we loved the very light, smooth texturing the foam roller gave us with that shade. How many coats have you done, and what was underneath it? Have you tried getting in touch with General Finishes?
Mary Jane burrell says
Can you tell me what the color of your kitchen wall is over the sink? I love it and am stuck trying to find a new color for my walls.
Joshua Rief says
Hi, Mary Jane! Thanks for reading and for the comment. You know, someone asked that same question on another post in this series, and I had to go find our old paint chips because I couldn't remember (we painted it when we first moved in). Looks like it was "Tradewind" from Sherwin-Williams. Hope that helps!
Dana Boltax says
Hi. I am a avid fan of General Finishes Milk Paint. I use it all the time. You left off one of the most important steps of furniture/cabinet painting PRIMING. Priming provides the necessary foundation for a long lasting finish.
You mentioned after four months you already have nicks on your cabinet. Had you prepped properly, you probably would not have those nicks. If you go to the general Finishes website they give you step-by-step instructions on using all of their products
I would just hate for somebody to read your blog, follow your directions, have a bad outcome, and then blame the product.
Proper prep is everything. Like building a house. You can use the finest building materials, but if you don’t have a good foundation, your house will fall down.
Joshua Rief says
Hi, Dana - thanks for your feedback. It's obviously a subject you're passionate about, and appreciate very much you taking the time to share your experience. However, I would point out that one of the main reasons people use General Finishes Milk Paint is because it does not require primer.
Here's a direct quote from their website:
Primer is a great idea in many cases - I totally agree, and have used primer for many projects. GF does sell a stain blocking primer, of course, especially for those situations when you need to take something dark and paint it light, where a primer is invaluable. The big appeal to milk paint for many, myself included, however, is that GF Milk Paint generally doesn't need it (nor do they recommend it). And for clarity - I love the milk paint finish on our cabinets! It's an incredibly high traffic area for our family, and takes a hard beating every single day. I doubt there is any paint on earth that would not show some nicks after a few months in our kitchen! :) I love this milk paint, keep using it on other projects, and recommend it to everyone!