As part of our ultra-low-budget kitchen refresh, we're sharing our DIY experience adding farmhouse crossbucks to the end of our kitchen counter bar!

We’ve just completed an ultra-low-budget “refresh” of our kitchen, which ran us about $500 all-in. This post about adding "crossbucks" to the end of your kitchen counter is the second in a series of about five articles sharing our learnings and experiences from this little project, which would be an easy, affordable one to tackle in any kitchen that needs a little breath of fresh air!
The first post was about painting our kitchen cabinets with white milk paint, and we used that same milk paint to finish the crossbucks in this post as well. I'll be super honest and say I'm not thrilled with the photos here. I was working on this little project while we had contractors in our home replacing dry rot in the back wall, plus it was November, which means very little good light for indoor photos! At any rate, maybe I'll try to update them this summer!
About this project - this is one of the simplest, cheapest, easiest, and fastest projects I have ever taken on. All in, it was maybe an hour of my time (not counting waiting for paint to dry...). I used "discarded" MDF from Home Depot (boards that have been cut to the wrong length, marked up, broken, etc), so my total materials cost here was about $7. Yep. A fun, decorative farmhouse-style accent in your kitchen for about the price of a good burrito. Or a plate of street tacos. Maybe a small chimichanga.
But what's the deal with crossbucks? This is purely decorative, of course - there is nothing practically added to your counter space by putting in this little farmhouse-inspired touch. The classic farmhouse / barn crossed braces that adorn doors, gates, fences, and a wide variety of other wooden devices, have found themselves very popular in home decor over the last decade or so (in my own personal observation - we also used this technique on our farmhouse baby gate), and for us, they are simply a way to add a little character to an otherwise completely flat, blank piece of trim at the end of the kitchen counter. (If you had a little more room to work with than we do, you could turn this "counter end" into a shelf for cookbooks - love that idea!)
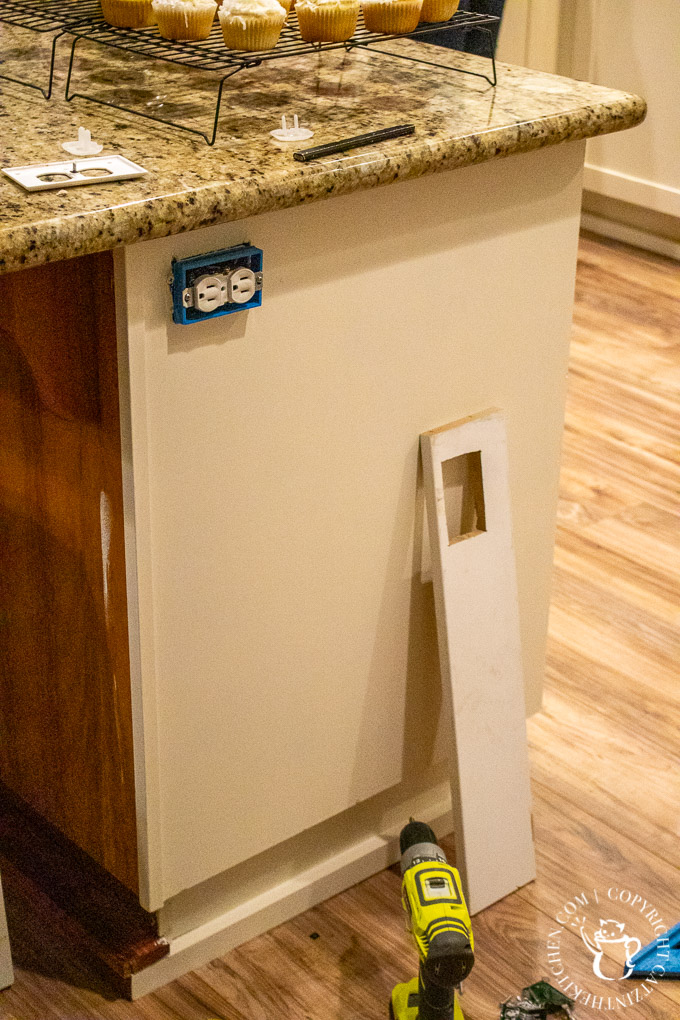
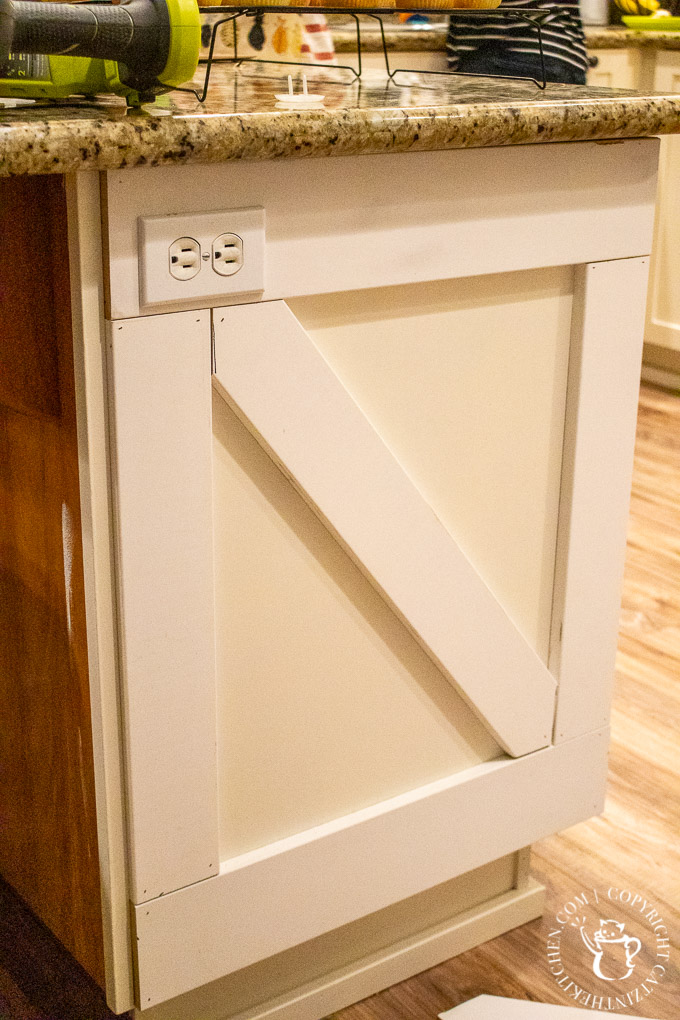
Let me just point out that those are Eden's snowball cupcakes sitting on the counter. An excellent and festive way to sustain oneself while DIY'ing. As you can see above, I went ahead and painted the end of the counter "bar" with the Antique White milk paint (three thin coats). We have a very convenient outlet installed at the end of the bar (hello, Friday morning pancake griddle!), and while I love having it there, it did create the additional complication of sitting right in the middle of the top piece of trim. A spacer for the outlet (turn off the power first!), a jig saw, and a drill made quick work of that, and I had a piece of MDF ready to drop into the space.
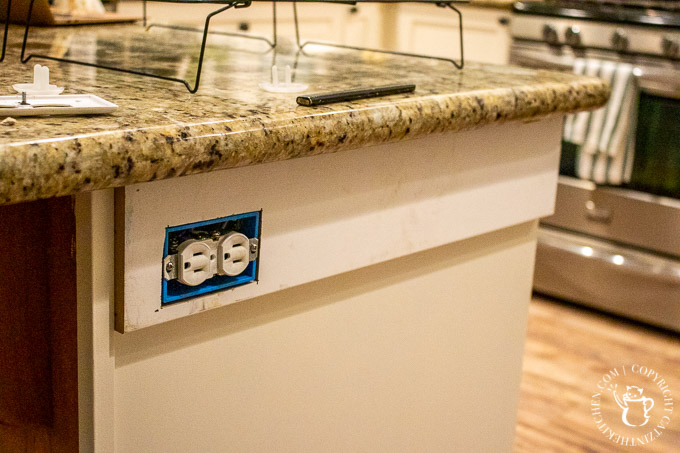
It doesn't need to be flawless, if you happen to run into this same issue - the outlet cover will usually hide the imperfections of the fit. The bottom piece was much simpler - cut to length, and throw it up. I used Liquid Nails and my Ryobi cordless brad nailer (Not sponsored! Sadly...) to affix these pieces of MDF to the side of the counter.
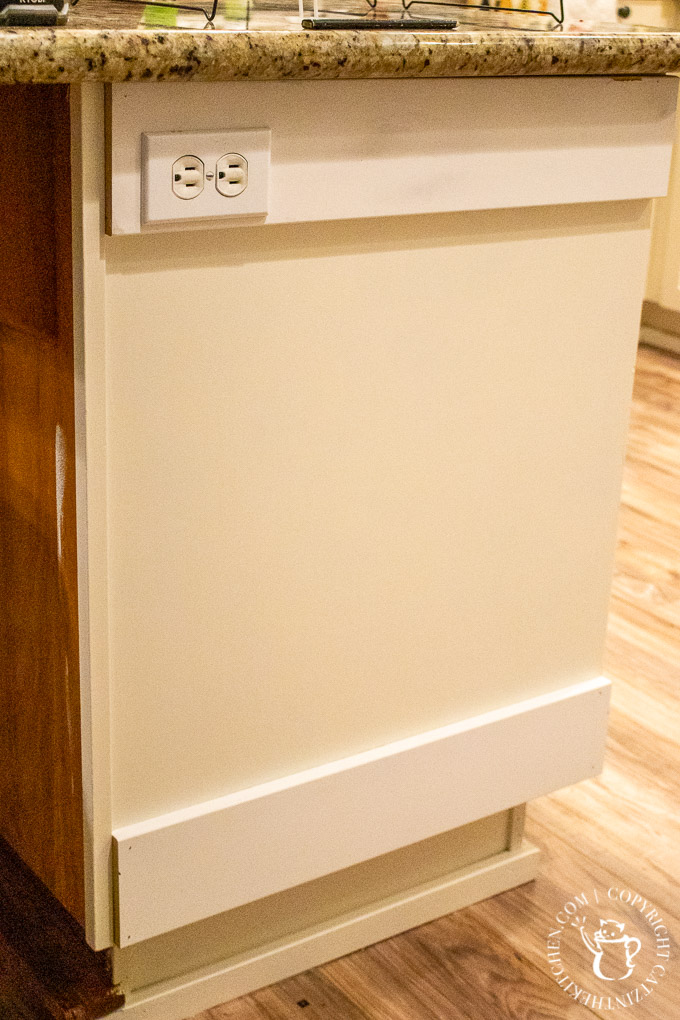
Important to note here that in my case, I used 1x6 MDF for the top and bottom pieces, but 1x4 for the remainder. Why? When I measured and sketched it out, it seemed to give the right balance for the space I was working with. Your space may be different - a little wider, and I would have used 1x6's all around.
Once the vertical 1x4 pieces are cut and mounted, you're ready to put in the "X". I'll be honest - I didn't stress getting all of the lengths and angles perfect. Close, yes, but not flawless. I knew I would be doing some spackling and caulking anyway, so I figured I would be "prettying it up" at that stage.
I held up my uncut 1x4 to the space and used my speed square to approximate where the corners would fall. Once I had cut one end, I held it up again for the other. Again, not flawless - you can see the gaps here. But close enough for this purely decorative project.
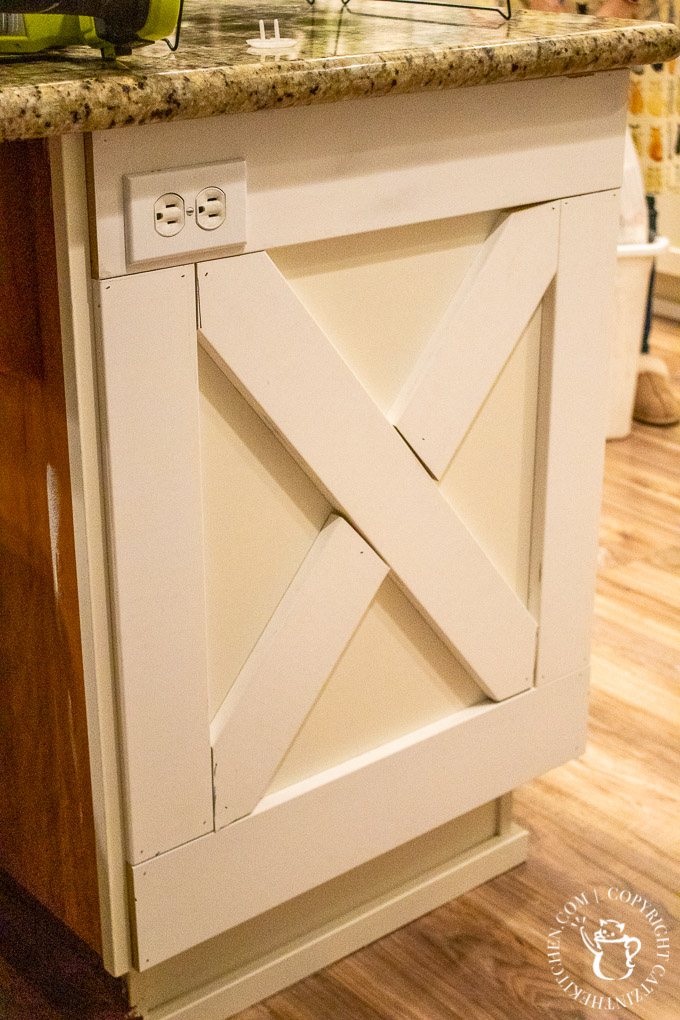
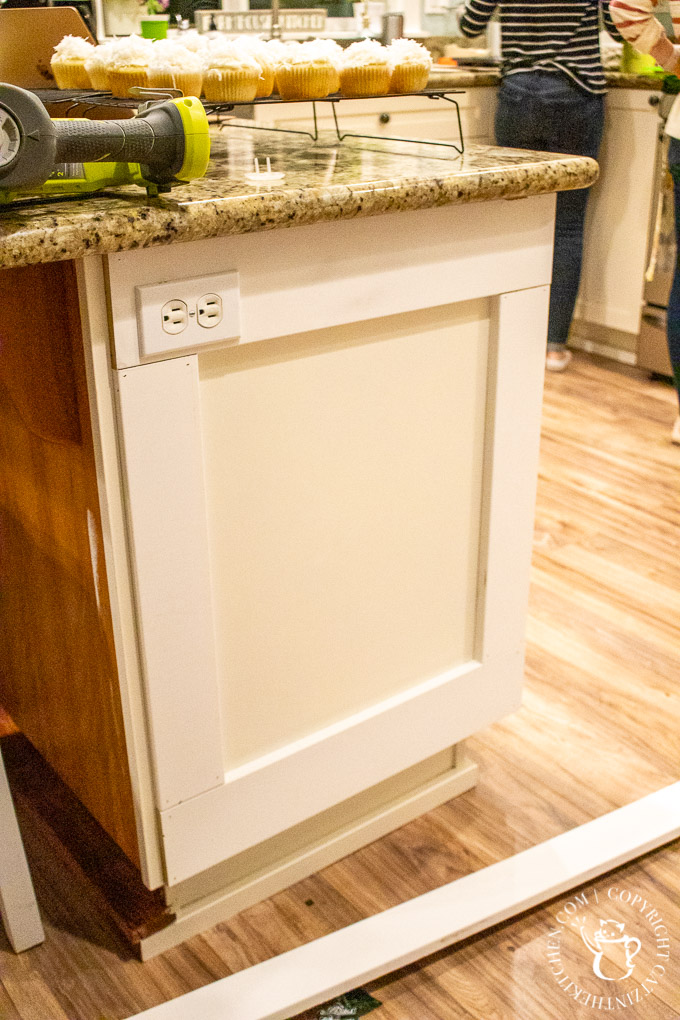
Once these were all tacked in and ready to go, I broke out the spackling and the caulking. I used spackling for the bigger gaps, lightly sanded when it was dry, and then caulked all of the joints - where the boards came together, where the MDF met the counter trim, etc. Because this would all be one color and (hopefully) look built-in, I wanted it to be free of obvious seems and joints.
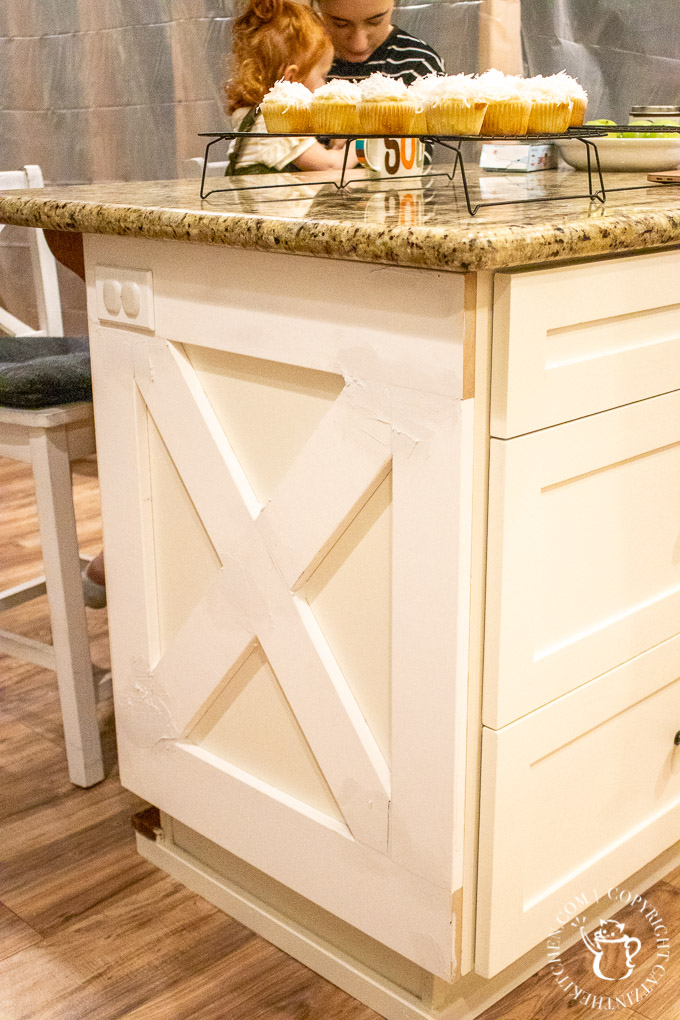
And that's it! After the caulking was dry (about 30 minutes for the stuff I use), I was ready to paint. It took a couple of coats to to make the seams and gaps really disappear, and I think the end product turned out pretty good. I'm still (six months later) debating whether or not to paint the electrical outlet cover. I think I will. It's funny how you can knock out a project like this in an hour or two, but then need six months to handle the finishing touches...typical.
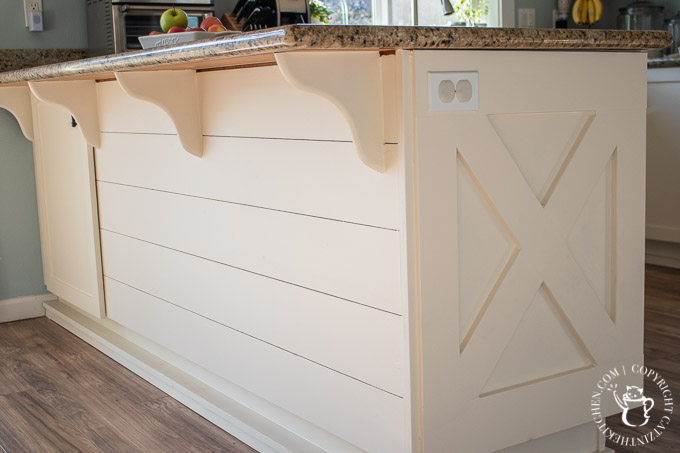
But there it is - it's subtle, blends in with the rest of the cabinets and the counter, but adds a little character in just the way we had hoped. If you decide to undertake a similar project, I hope our experience here is helpful! Next, I plan to write about that "shiplap bar" you can see on the left side of the counter in the photo above. Stay tuned!
I’ll make the same disclosure I’ve made in the past – I’m an amateur! That's obvious, I’m sure! My goal here is merely to share my experiences, what seemed to work well and what didn’t, what I would do differently, and so on, in an effort to make your experience better and easier should you undertake a project like this on your own! Naturally, any DIY project you take is always at your own risk – you know the drill (no pun intended).

DIY Farmhouse Kitchen Counter Crossbucks
As part of our ultra-low-budget kitchen refresh, we're sharing our DIY experience adding farmhouse crossbucks to the end of our kitchen counter bar!
Materials
- 1 6ft 1x6 MDF board
- 1 8ft 1x4 MDF board
- 1 qt paint
- spackling
- caulking
- brad nails
- Liquid Nails
Tools
- miter saw or skill saw
- jig saw
- caulking gun
- brad nailer (or hammer)
- paintbrush
- masking tape
- Fine sandpaper or sanding block
Instructions
- Paint flat surface of counter end trim, if needed.
- Measure, cut, and mount 1x6 boards for horizontal trim pieces at top and bottom, using Liquid Nails and brad nails.
- Measure, cut, and mount 1x4 boards vertical trim pieces on either side, using same method as above.
- Measure, cut, and mount 1x4 pieces for center "X", using same method as above.
- Use spackling to fill any gaps, sand lightly until smooth, and then caulk all joints and areas where MDF meets counter trim.
- When caulking is dry, paint MDF to match underlying counter trim.
Notes
Quantities of materials will vary based on the size of counter trim you are working to cover.


Susan Dugdale says
I like the end of the counter barn door style. It's a nice look which I don't think people would expect. I also like the shiplap. Good job❗
Joshua Rief says
Thank you, Susan! Much appreciated!