Catz in the Kitchen

  • Home
  • About
  • Recipes
    • All Recipes
    • Healthy
    • Italian
    • Mexican / Latin
    • Gluten-Free
    • Vegetarian
    • Grilling
    • Desserts
  • DIY
  • Featured
  • Contact
menu icon
go to homepage
  • Home
  • About
  • Recipes
    • All Recipes
    • Healthy
    • Italian
    • Mexican / Latin
    • Gluten-Free
    • Vegetarian
    • Grilling
    • Desserts
  • DIY
  • Featured
  • Contact
search icon
Homepage link
  • Home
  • About
  • Recipes
    • All Recipes
    • Healthy
    • Italian
    • Mexican / Latin
    • Gluten-Free
    • Vegetarian
    • Grilling
    • Desserts
  • DIY
  • Featured
  • Contact
×
Home

Homemade French Fries

March 23, 2010 By Chelsia Rief 8 Comments

I think I've mentioned before that I am a potato girl. I love Potatoes...always have. I think I inherited that from my dad (step-dad)...he is the same way. I also love French Fries...but I hate ordering them from fast food places (except BurgerVille) because I know they are not the most healthy thing. The deep fryer is a horrible way to cook things...except that everything always tastes so good after being cooked in a deep fryer. But since I love Fries...I wanted to learn how to make my own.
The whole French fry thing was a graduated process for me. I had to really learn which seasonings I liked with them first, because I wasn't just going to salt them to death. So I tried different seasonings with frozen french fries...Ugh...now that I make fries pretty well now, I hate to admit that I bought that frozen stuff. But I did. But let me just tell you what I do now.

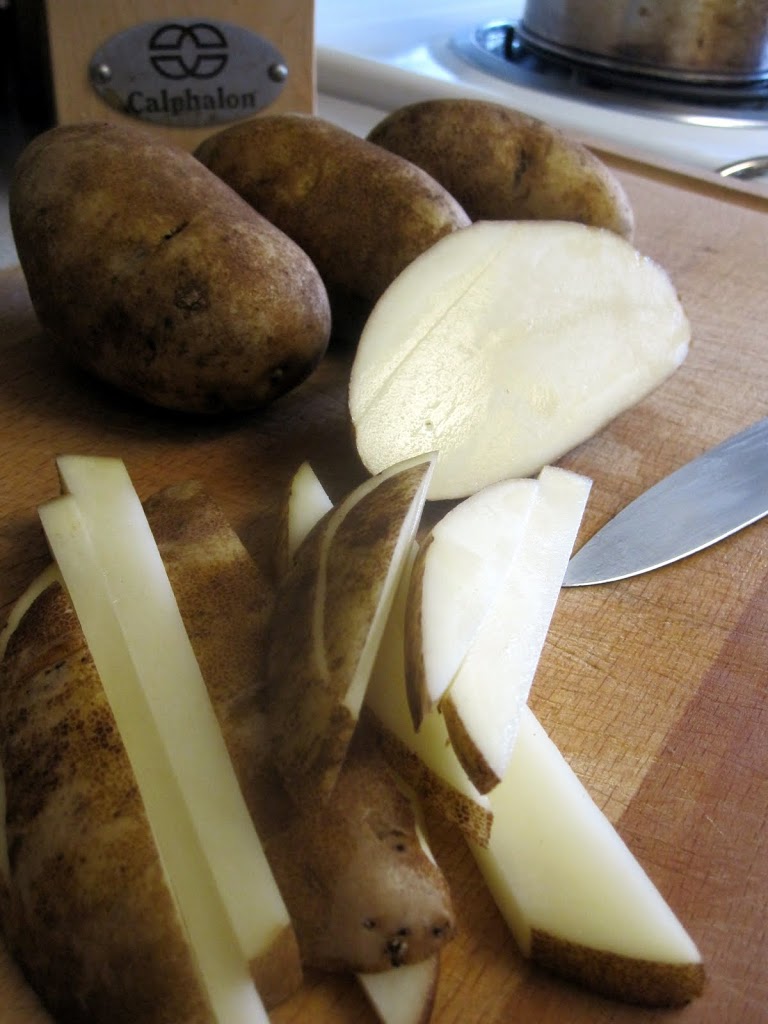
Obviously, you need to wash the potatoes. So do that. I use normal baking potatoes but eventually someday, I would like to make sweet potato fries. It just sounds good to me.  So give the potatoes a good scrub...if your lucky like me...you may have one of those potato scrubby things with the bristles, they are wonderful.   Then I pat them down to wipe off the extra water....I hate cutting slippery wet potatoes...your going to lose a finger that way. As a rule of thumb...( no pun intended) I use a potato per person...and I count little Eden because she loves my fries. but if you feel once you've got your fries all sprawled out on your cookie sheet and it doesn't look like there will be enough...by all means...cut  more. I cut the potatoes in half length wise and then again down the half of one of those sides and I just start cutting them like your cutting french fries. If some of the potatoes are really long or big... shorten them a little bit...( I leave the skin on btw, because I love the flavor) or cut them anyway you want...they are your fries after all, and no one is going to judge you!
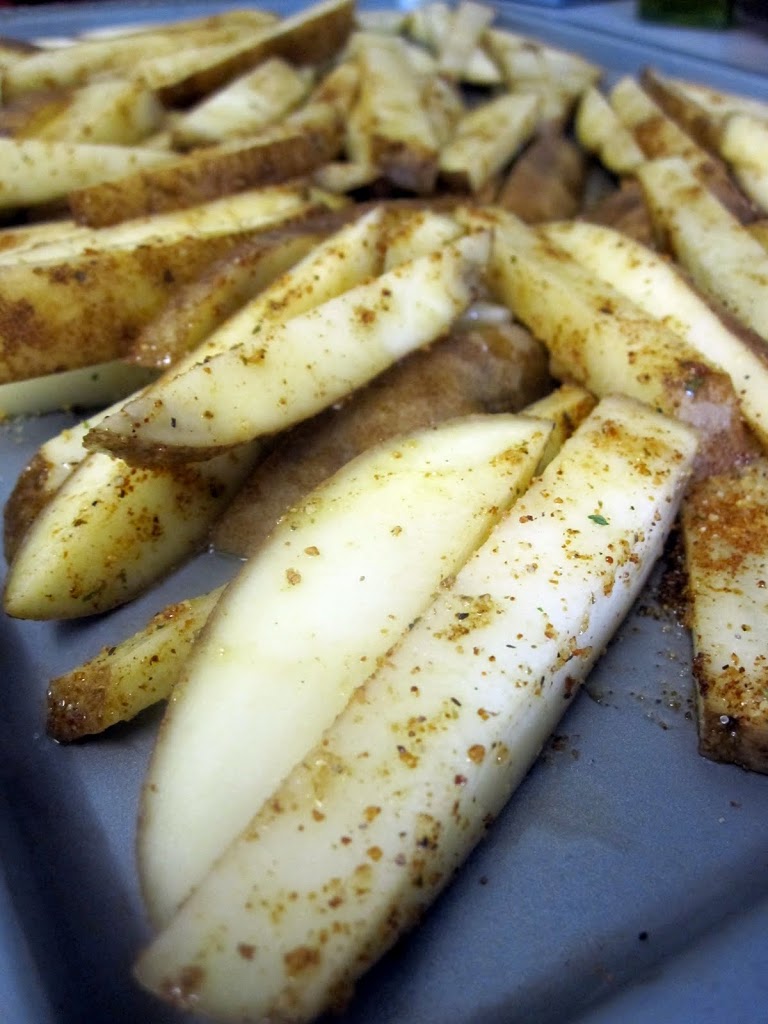
Once you have all your fries cut into their fry strips...it's time to season. I generally start with some garlic powder ( I don't measure any of this) I just shake the containers until I'm happy with where the seasonings fall over the fries. Then I add some grill seasoning...I love the smoky flavor of it. And then I continue to do the same with Paprika and Pepper. I leave the salt for last...because I'm not big on the salt. But just scatter enough to your preferred liking. Once all the fries are seasoned...drizzle some EVOO on all over. Once the evoo is on, your going to get your hands dirty. So take off those rings and dig in. Mix with your hands all of the fries around so that all of the seasonings have been coated to all the fries.
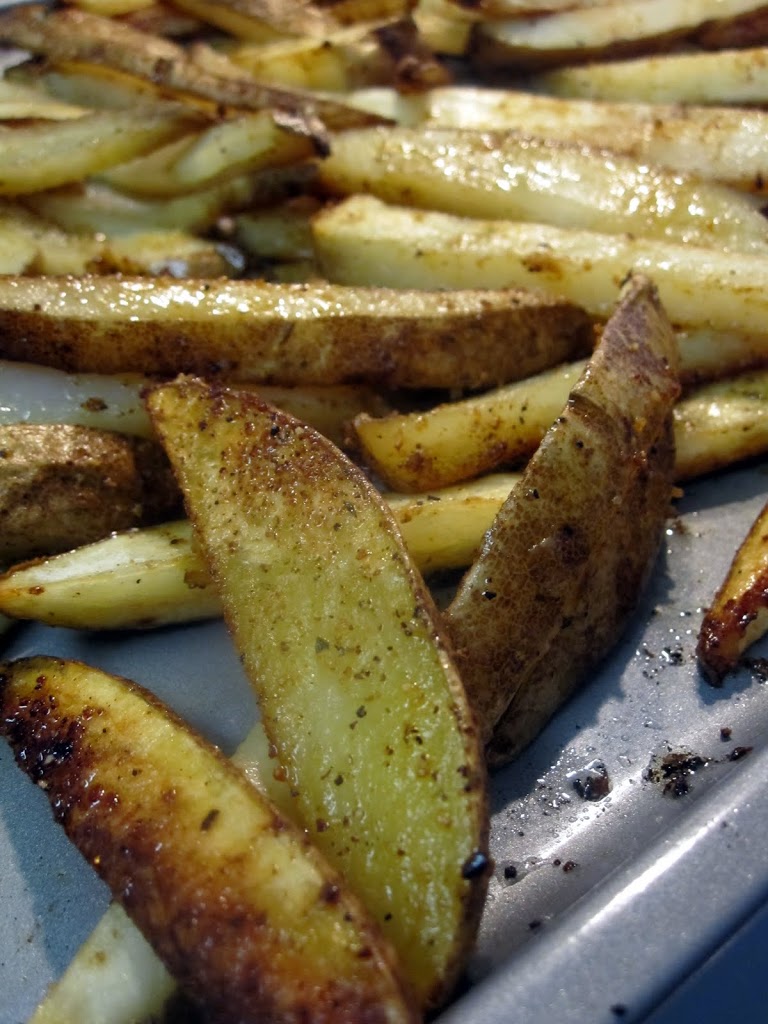
Once all this is done...all you need to do is pop them into the oven. I throw mine in on 450 for 20+ minutes. 20 minutes is the least amount of time...but depending on how many fries you have cooked up...they may need to go longer. If you want, you can open the oven at the half way mark and take a spatula and toss the fries around...the fries most likely will stick a little but doing that will prevent it a bit. My homemade fries go perfectly with a Burger and Hotdogs or any other food that fries go nicely with. Just make sure you don't make the mistake that I almost always make. I always forget that potatoes seem to be one of the longest cooking vegetables ever. So start them first. Get that oven pre-heated and throw those fries in the oven as soon as you can. That way...there is no waiting when the rest of the food is done. A fork should be able to poke through the fries with ease...and when that happens your good to go. I hope you enjoy them. They are very, very tasty!

Homemade French Fries

Homemade French Fries

Yield: about 50 fries
Prep Time: 10 minutes
Cook Time: 20 minutes
Total Time: 30 minutes

The deep fryer is a horrible way to cook things…except that everything always tastes so good after being cooked in a deep fryer. But since I love Fries…I wanted to learn how to make my own.

Ingredients

  • 4 baking potatoes, cut into French fry strips
  • Garlic Powder
  • Pepper
  • Grill Seasoning
  • Paprika
  • Salt
  • Extra Virgin Olive Oil

Instructions

  1. Preheat oven to 450, and get out a large cookie sheet. Wash and cut potatoes into French fry strips. Once all potatoes are cut, spread them out on cookie sheet and start seasoning with all the spices listed above, to your taste.
  2. Drizzle evoo on top and mix to coat evenly.
  3. Bake for 20 minutes. Add additional baking time as needed to achieve preferred tenderness.

Notes

The number of fries you get from this recipe will depend on how you cut your potatoes, how large your potatoes are, etc, so the nutrition information and yields here are general estimates.

Nutrition Information:
Yield: 5 Serving Size: 10 fries
Amount Per Serving: Calories: 236Total Fat: 6gSaturated Fat: 1gTrans Fat: 0gUnsaturated Fat: 5gCholesterol: 0mgSodium: 262mgCarbohydrates: 40gFiber: 4gSugar: 2gProtein: 5g

Nutrition information isn't always accurate.

© Catz in the Kitchen
Category: Side

GUEST BLOGGER - Tacos de Pollo Delicioso!

March 18, 2010 By Chelsia Rief 3 Comments

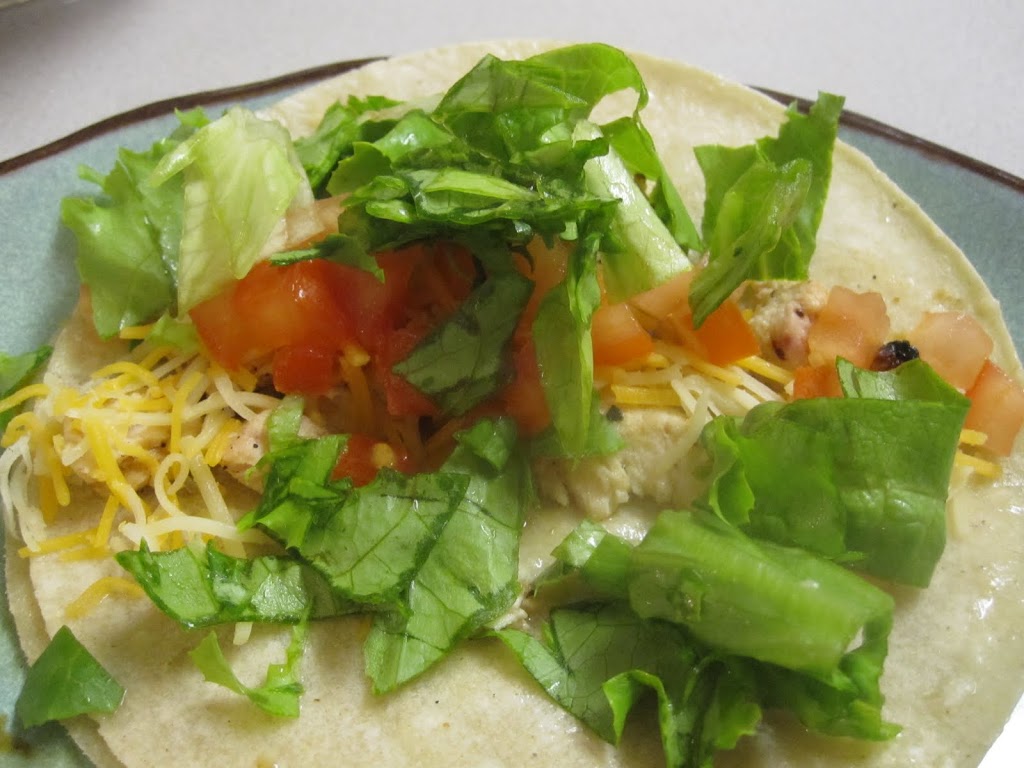
Well, good evening. I, Joshua Rief (AKA Chels's husband), am a humble guest to this particular blog (although you can check out my more typical literary endeavors at jsrief.blogspot.com), and I join you tonight to share my personal culinary specialty: tacos de pollo delicioso (AKA delicious chicken tacos)! No more AKAs, I promise (maybe). 


As Chels has no doubt shared with you, we love to cook together. Occasionally, however, I also cook on my own. When that happens, it inevitably involves a couple of key ingredients (if it's not breakfast, and it usually is) - the barbecue, many cheeses, meat, food of Latin origin, and lots of very hot oil. Either that or food of Tuscan origin. And, again, that's when it's not breakfast. So, really, there's no rhyme or reason to it. Could be hotdogs. Drop the inevitability. The only certainty is that I will burn myself. Everytime. Ah, the sacrifices we make for the things we love. 


So, tonight, I fired up the grill when I walked in the door. Es muy importante to preheat the grill properly. Normally, if I turn it on when I get home, by the time I have changed out of my suit and into sweats and a t-shirt, it's ready to go. Chels was kind enough to marinate two generously-sized chicken breasts in our favorite mesquite lime marinade for an hour before I got home. As soon as I had el pollo on the grill, I prepared the essentials. By this, of course, I mean that I set the mood. Again, es muy importante. Your creation will reflect the mood in which it was created, so pay as much attention to this as your ingredients, temperatures, etc. With Pandora steadily cranking out the Fifties jazz (i.e., Sinatra, Martin, Nat King Cole, and, of course, Mr. Buble), you're well on your way, but it doesn't end with the music. Don't cook in a dirty kitchen - that's crazy-making, and fast. In this case, Chels had the kitchen sparkling before I even got there, but even if she hadn't, cleaning it first is well worth the extra five minutes. Next, Chels poured us both a small glass of Barefoot Sauvingon Blanc (if you're not already aware, Barefoot is a boon to aspiring wine aficionados on a budget), and I got to preparing the ingredients. 


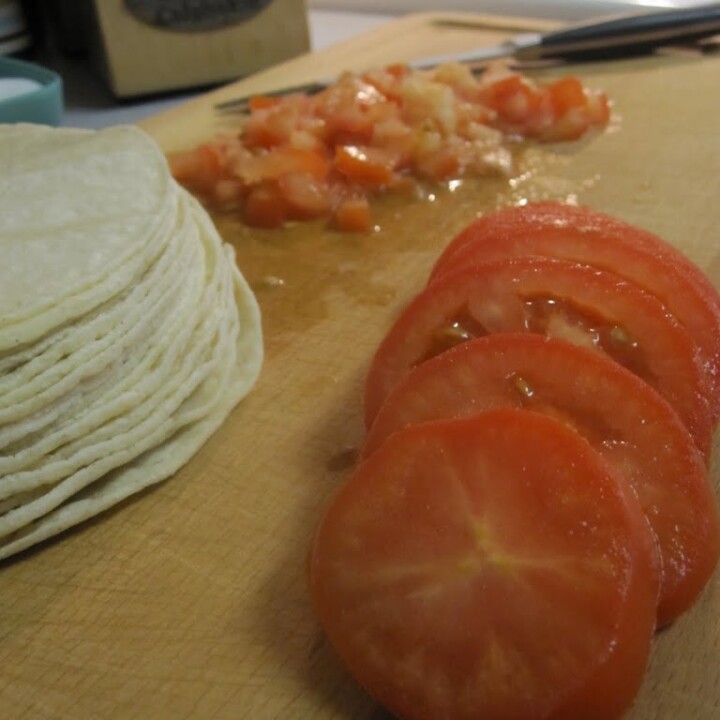
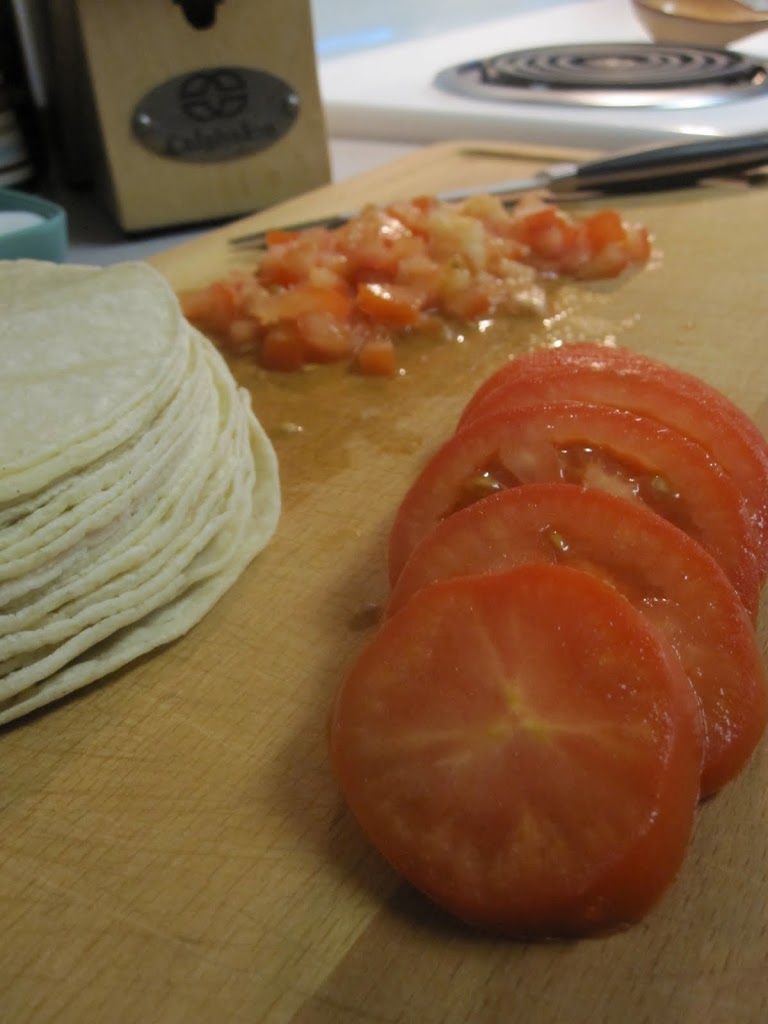
Now, if you think that the ingredient preparation is the beginning of the cooking process, you are gravely mistaken, at least where Mexican food is concerned. No, no, dear reader, we remain in the mood-setting stage. Once there are bowls of beautifully bright red diced tomatoes (I prefer Roma, but that's your call), stunningly crisp and fresh green leaf lettuce, and tantalizing white and orange Monterey Jack and Cheddar cheeses available at your beck and call, then, my friends, you are ready to move on to the cooking. Truly, these bowls of brightly colored ingredients set the mood as much as Sammy Davis and Mack the Knife. Additionally, there is something inherently relaxing about prepared ingredients ready and just waiting to be doled out upon some delectable creation. 

Now that the ingredients are ready to be distributed, the cutting board is re-cleansed in preparation for its impending date with some lightly seared chicken breast. Additionally, it's about now that I place a high-walled frying pan on the stove top and begin to heat about a quarter inch of oil in it. Vegetable oil is definitely best (don't even think about canola oil!), and a medium-low heat setting (4 out of 10) is perfect. While the oil heats (and no doubt prepares itself to injure me grievously), it's time to retrieve the chicken.


El pollo has spent about six minutes on each side out on the barbecue, at a medium-high setting. The use of medium-high, versus traditional medium, sears the outside and eliminates all pink on the inside, while at the same time leaving the tender white meat inside soft and moist. Re-introduced to my best of friends the cutting board, the chicken is quite ready for some tender dicing with a very large and very sharp chef's knife (just the sort of thing that will one day claim my fingers, no doubt). I recommend slicing the chicken into strips initially, and then dicing it across. And, don't kid yourself, there is no possible way you can avoid eating some at this point. It simply isn't going to happen, so save yourself a lot of time and self-loathing and just do it. Unfortunately, this is also the first time that the aroma arrives. Unfortunately, you say? Isn't aroma part of your precious "mood," you say? Had a bit too much of the afore-mentioned Sauvingon Blanc, you say? Au contraire, gentle reader. Because when the aroma arrives, so does everyone else who happens to be residing in your humble abode. The kids you may be able to fend off effectively, but do the same to your spouse at your own peril. Now that half your supply of chicken has mysteriously vanished, we move on.

The oil is hot at this point, so use extreme caution (somehow I never retain that piece of advice). You can't tell, of course, because oil is evil and wicked that way. If you are tempted to dip your fingertips in to test the heat, please do so, but sign this liability release waiver first, many thanks. Now, at this point, the preparation accelerates alarmingly, so before I continue, I always make sure that the family is gathered and ready to eat, the table is set, etc. Additionally, you will require a plate with two paper towels on it. Have another two paper towels ready to place on top of these, as well as a large lid of some kind to cover it all with. More on this later. 
 
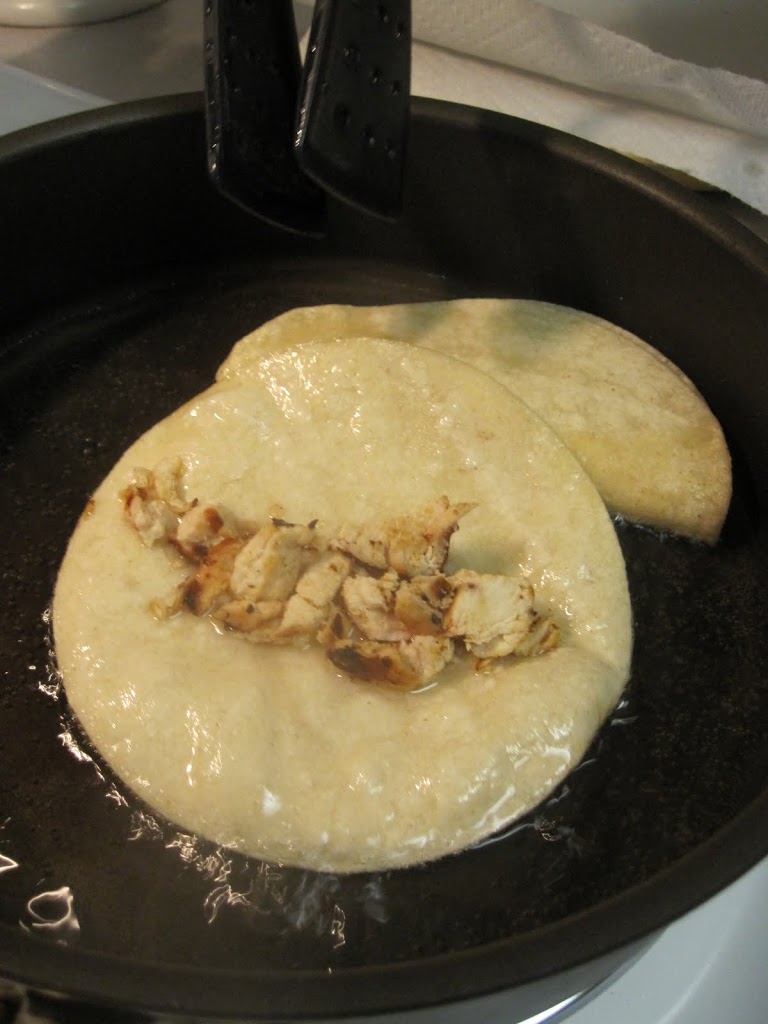
I use six inch white corn tortillas (Costco, $4 for 100 - seriously). After doubling them up, I place them in the oil. If my pan is big enough, I place two (actually four - doubled up, as you may recall) next to each other. After about five seconds of bubbling in the oil, the diced chicken goes in a line down the middle of the tortillas. Another five seconds, and then I fold them over the chicken into a more traditional taco shape (finally!). If you're wondering, I'm not doing this with my fingers - I really was joking about that (although I get burned anyway). Rubber-tipped tongs are perfect (Ikea!). Another five seconds folded over, and you're ready to lift each taco up individually, tip it slightly to let the excess oil run out, and place it on the previously prepared plate topped in paper towels ("Ah-ha!" you say!). Immediately cover the tacos with the remaining paper towels, and cover them with the lid ("It all makes sense now!" you say!). 


You really can't get more than four done before they must be served. Four at the most. Four is pushing it. The key here is serving them hot. If you don't serve them hot and fresh out of the pan, dump them down the garbage disposal or feed them to your dog. Seriously. Well, maybe not the dog, as the oil content might not be great for Fido's digestive system. Same with the garbage disposal, actually. Okay, fine, eat them, but they won't be as good. Point made?


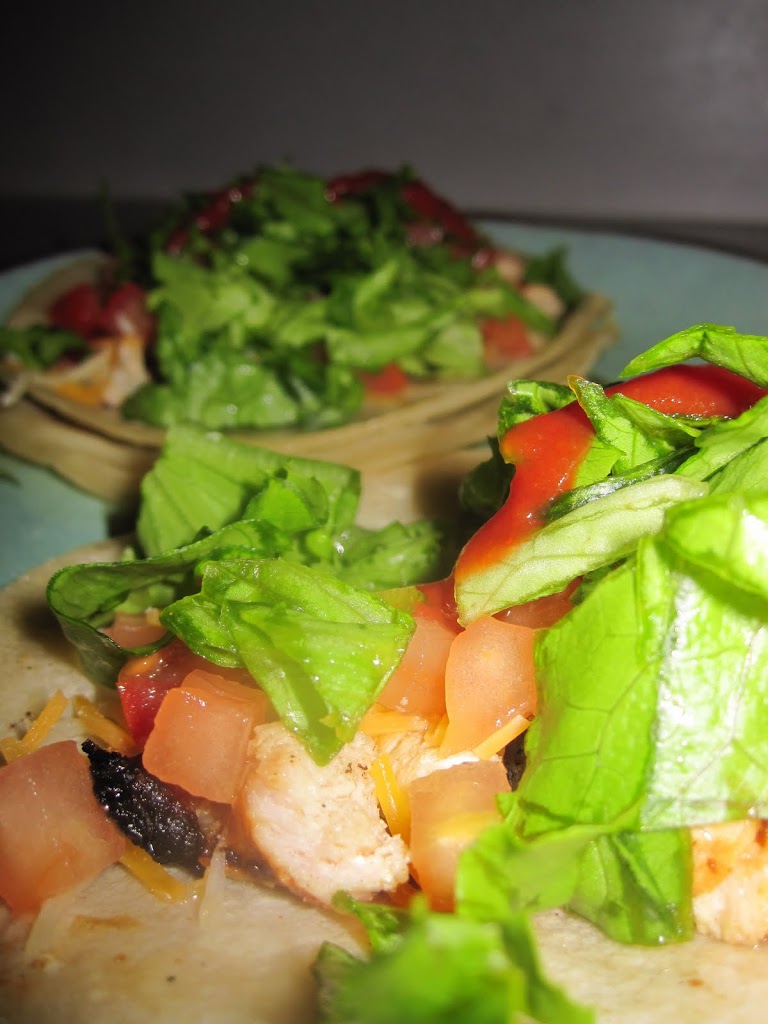
Place the tacos two to a plate, and open them back up. Top generously, in the following order (no messing with this...): cheese (generously, remember), tomatoes (lots and lots - they furnish the moisture here), and lettuce (need I really say it? Generously!). They are delicious if you stop here, but I personally recommend topping the whole thing off with La Victoria Medium Chipoltle Taco Sauce. Chels uses La Victoria's Mild Red Taco Sauce, so each to his (or her) own. At this point, you're ready to eat - but don't forget, you've only made four. Based on past experience, you will remain chained to the stove as your many minions clamor for more. I can't emphasize strongly enough that, much like good waffles or pancakes, they must be eaten fresh out of the pan, even if it results in an evening of indentured servitude. At the end, you will be rewarded with four tacos of your own, so it will all be worth it. Make somebody else do the dishes. 

Well, that's all there is. Obviously, you're welcome to use other meats (we've done steak), but chicken seems to be the best. Add refried beans, Spanish rice, etc for a full meal deal. Excellent with cerveza, water, Mexican Coca-Cola (real sugar cane!), or Kool Aid (haha, just kidding). Enjoy! My family definitely does, down to my adorable and occasionally adventurous five-year-old, Grace. Eden still sticks with a cheese quesadilla. Soon enough, she'll graduate. 
 
Until we meet again, beunas noches!


Morning Madness

March 11, 2010 By Chelsia Rief Leave a Comment

I have a confession...I'm somewhat of a pampered woman...well...maybe to be a bit more honest...I am quite spoiled by my husband. It's true...I am. But I think even before I married Josh, I was pampered in one way or another. My mom spoiled me a bit too. Just a bit though ;) But here is another confession...the coffeemaker...stumps me! Yes, there it is...I am constantly being outsmarted by our stupid and expensive coffeemaker.

I have to have coffee every morning...but it's on my terms of when I am ready for it. And Josh has always been the one to make it for me. If not him, then it's Starbucks or Peets Coffee or back in the day, my mom. I knew that you had to put water in the thing...and press buttons but since I'm being honest...I've always been to lazy to really learn. Okay, there I said it...I'm lazy! *phew* I feel so much better getting that off of my chest, haha. When I was pregnant with Eden...especially the first few months, I was tired...so Josh bought me one of those cup warmers that just plugs into the wall. And every morning before he left for work...he would make my coffee the way I liked it and leave it on my cup warmer so it would be right there when I woke up-he is so sweet isn't he? After months of using it, it kind of gave out and the warmer thing wasn't making my coffee warm. So I had to start zapping it. And it's been this way up until the last few months.

Although I love coffee dearly...I also love to drink sweet coffee and I cannot drink Josh's bold strong flavors. It's just not what I grew up on and it's to strong for me...meaning I have to put several teaspoons of Sugar in the coffee to sugar it up enough. So, Josh has been buying me my own special flavored coffee. I get to pick the flavors and it's so fun. And I don't even mind the crazy looks I get from people as they pass me in the coffee aisle and they see me with my nose in grinder sniffing the different scents, it is kind of funny if you see me do it.  Anyways, every morning, Josh will make his coffee and then proceed to clean the coffee maker out again just so he can make me my special coffee. I had been using Beans...up until this week. We had to buy the pre ground stuff because it was on sale and when I woke up early in the morning, I wandered into the kitchen to press the on button on the coffee maker and there was a weird sound I was not using to hearing. And I couldn't understand why it wasn't working. So I called up Josh in a panic and ( I didn't yell) I frantically demanded why I didn't have coffee in the coffeemaker. Josh of course started laughing at me which made me more frustrated and he explained about the different lights and buttons on the coffee maker and that I needed to press the on button once...when I told him I did that and it made a weird noise he explained that I must of hit it twice in my frustration. So I hit the button once and nothing happened...no noise no nothing. Again he laughed, and said, "give it a moment." So I did...and low and behold if I had been more patient I would of seen that coffee really was brewing.  The next morning...I forgot what to do...hahaha, yes I know, I get confused easily I'm really a blonde on the inside. So I had to call him again and he said the on button...press it....oh yeah, I remember now, Heehee.  So yesterday morning...I knew that I had it all figured out now and there was no way I was going to call Josh and bug him. I simply press the on button and wait patiently (not my strong suit).  The coffeemaker started making it's coffee making noises and when it beeped (informing me it was ready) I walked into the kitchen, oh so proudly. I take the carafe out of the coffeemaker...and it's Hot Water only!? I start to panic for a moment....I did everything right. I pushed the button and waited patiently. Josh must of screwed up, finally! Hahaha, yes I was rejoicing slightly that it wasn't me that did something incorrect. So I called him up and I said...so I made my coffee this morning and imagine my surprise when I went to pour it and there was only hot water in the carafe....and he started laughing again and he said," Your Right! I did everything else this morning except put the grounds in the coffeemaker." So after explaining to me what to do and where to fill the water up and where to put the beans...I had coffee brewing 10 minutes later.

It's a funny story...it just goes to show what an idiot I am most of the time and what I do to constantly embarrass myself even when no one is even around me.

Kitchen Item of the week: The Veggie Peeler

March 10, 2010 By Chelsia Rief Leave a Comment

It always plays out the same way...I walk to the kitchen drawer that holds 97% of all my utensils and my hands quickly find it...not because it's easily accessible, but because of it's very noticeable color. I am talking about my Pink Kitchen Aid Vegetable Peeler. Yes, I have a pink kitchen item!!! Not only is it a Kitchen Aid...a brand which I love and adore...but mostly because it s my favorite color.

I only acquired my veggie peeler maybe a year and a half ago...another little gift from my mommy...this one I believe was my Easter gift, LOL- yes occasionally I will get Easter Loot...I firmly believe your never to old for the Easter Bunny...or rather any excuse to receive a gift, hahaha!

As much as I do love my peeler...I will only use it on carrots. I've been told they work on potatoes...but for whatever reason I am as uncoordinated as they come and I can not master the skill it takes to peel a potato...so I prefer to use a good old knife for my potatoes...yet another skill I am working on. I've watched my mom many a times peel potatoes with knife and I always will continue to stare at her ease and capability when it comes to sliding the knife down a potato or any other think that needs to be knifed. The woman has skill and boy is she fast. I remember watching her slice bananas for a fruit salad when I was little I recall telling her to slow down because I was afraid she was going to slice a finger off. Obviously, she knew what she was doing because all of her fingers are still delicately intact. Thank Goodness!

But my Peeler...Oh I do love, slices the skin off my carrots so quickly and so perfectly and before I know it, I have a gorgeous orange, slightly crooked carrot in my hand. It probably is a tool, you can live without...but now that I have one...I can't remember what I did before, LOL! And that's the item of the week :)

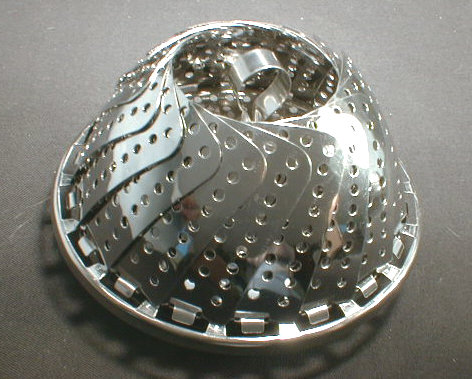
Kitchen Item of the week: The Steamer Insert

March 3, 2010 By Chelsia Rief 4 Comments

My mom and I have a lot of discussions about cooking. I go to her for pretty much everything because she is without a doubt the most fantastic cook I've ever met. We trade recipes-correction, I drain her of all her recipes as she put it recently. We talk about kitchen gadgets and different ways to cook things...and she always has a list of helpful suggestions. I look forward to these talks.

A couple of years ago, we were having this conversation about kitchen gadgets and we started talking about Steamer Inserts. I didn't have one, so I was asking some questions and I must of said something like," Hmm, I need to get me one of those at some time." Well she was listening because that year for Christmas, I got a Steamer Insert in my stocking. As thrilled as I was...I was also filled with fear. How the heck did I use it? For whatever reason, this metal gadget scared me.

Finally, a couple months ago, I decided to just get over my stupidity and try the thing out. I had dinner over at my parents house and my mom made these amazing red potatoes with garlic powder and butter and I asked her how she cooked it and she said, she steamed them...so that was the catalyst that made me confront my fear. I decided to try it out with broccoli...I've always boiled my broccoli before and I've always hated doing it that way because it takes some time and it's easy to let them cook to long...which completely defeats the purpose of eating broccoli. It's a healthy veggie and if you cook it to long, it's mushy and not that beautiful vibrant color of green that I so love. So I tried it out, I put a little bit of water in the pot, put the steamer inside it, plunked the cut up broccoli inside, seasoned it, and then put the lid on. Within maybe 5 minutes, I had perfectly cooked broccoli! I was sooo excited that I got over that stupid little fear of an unknown utensil that I now use at least once a week.

I firmly believe that it is one of the best inventions that you can have at your disposal in the kitchen. What could be better than something that expands to fit pots and helps veggies not only keep their beautiful color, but their rich flavor as well.

There will be no cooking blog tonight or tomorrow morning as I will not be cooking dinner tonight: I'm having dinner at my in-laws as kind of a farewell to one of our friends who is moving across the country to be with his soon to be wife.

Swai with me...

March 2, 2010 By Chelsia Rief 4 Comments

Growing up, fish was a regular meal at dinnertime. I guess it was one of the perks to having a grandfather who was always fishing and having a father who preferred fish over beef any day of the week. I grew up loving fish and never understood why others didn't. I guess that's also why one of my favorite memories was me and my dad fishing up at Blue Lake in the Middle of May. Our families would go up there every year and rent A-frames with my grandparents and my Aunt and Uncle and we would have a blast. My dad and I would always take our little boat out onto the lake and catch rainbow trout and then, later we would have it for dinner. Soooo good!!! As a parent, it's important for me to instill the same healthy eating habits with my kids. I want them to get excited about fish. But unfortunately, fish (other than canned Tuna) is not a cheap meal.

I first had the fish called, Swai last May when we took Grace down to the beach for a few days for her birthday.  One of my Grandmother's friends drove to Tillamook to get the fish and later came back to our beach house and made us an amazing feast, and ever since then, I've been craving it. But it's hard to find...not as hard as it was maybe a year ago, but still it's not in all stores. It's a relatively new fish to the seafood market and it comes from Vietnam. The great things about this fish is the flavor and the price. The flavor is light and delectable. The price...cheap! Our grocery store was selling it for $3.99lb and we were able to get two beautiful fillets.

I would of cooked this meal much sooner since we had bought it on Saturday, but with the weekend activities, it had to take the backseat. And now, I've come down with some sort of stomach bug which is no fun and though I was able to get all the chores done today, cooking fish was the last thing I wanted to do. I wanted to just lay in bed. But I knew the fish had to be cooked or it would go bad, so while the kids were napping, I searched out inspiration and found myself completely caught up in my movie Julia & Julia and by the end of the movie I was looking forward to cooking my dinner tonight.  Per the instructions of my mom (who has cooked this fish more than once) I felt more than ready to jump in. I started with my side dish first though. I knew it would take the longest because I was going to fix my roasted parmesean potatoes so I quickly got busy cutting up my potatoes into wedges and seasoning them with garlic powder, salt, Paprika, Parsley, and mixing it throughly with some EVOO before sprinkling some Parmesean Cheese over them. This recipe was a concoction of mine and one I don't make often enough for the family. I kind of always forget about it.

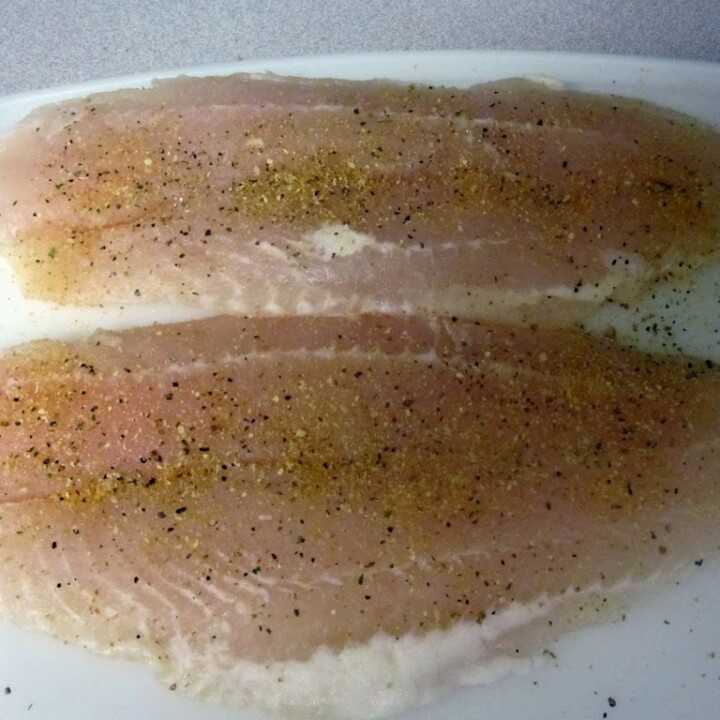
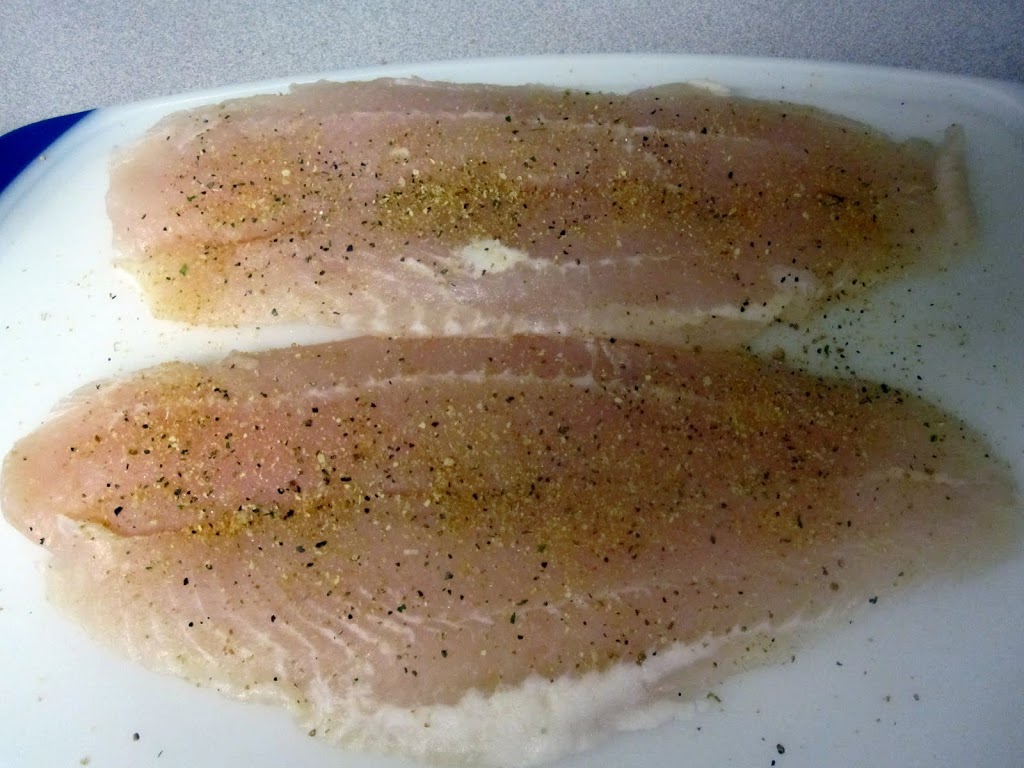
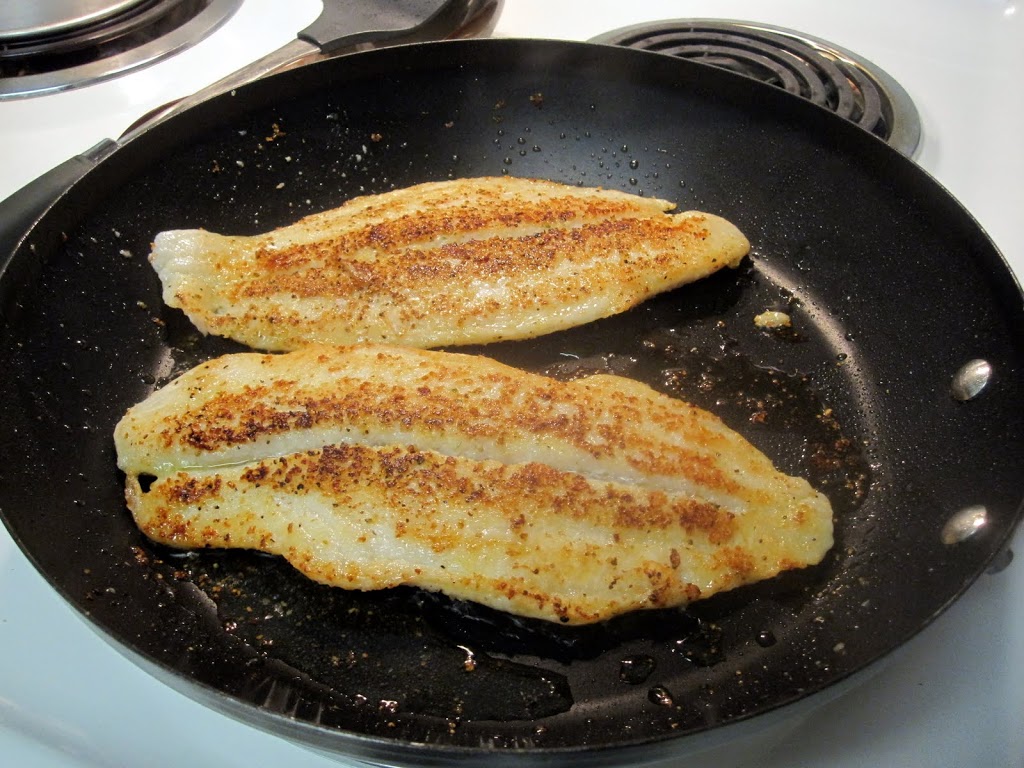
I had Josh pick up some broccoli for me on the way home and once I had them washed and cut up and placed in the steamer, I got busy on the fish. After washing the fish off and patting it dry with a paper towel, I sprinkled it lightly with salt, then I added Garlic Powder and Lemon Pepper. Laying it seasoned side down in the frying pan with some Evoo- I just had to wait till it was time to flip it, which gave me plenty of time to set the table. Normally, that would be Gracie's job, but she was doing a good job of entertaining Eden for me. Once I flipped the fish though, both of the girls ran into the kitchen and inhaling the aroma. It smelled amazing!

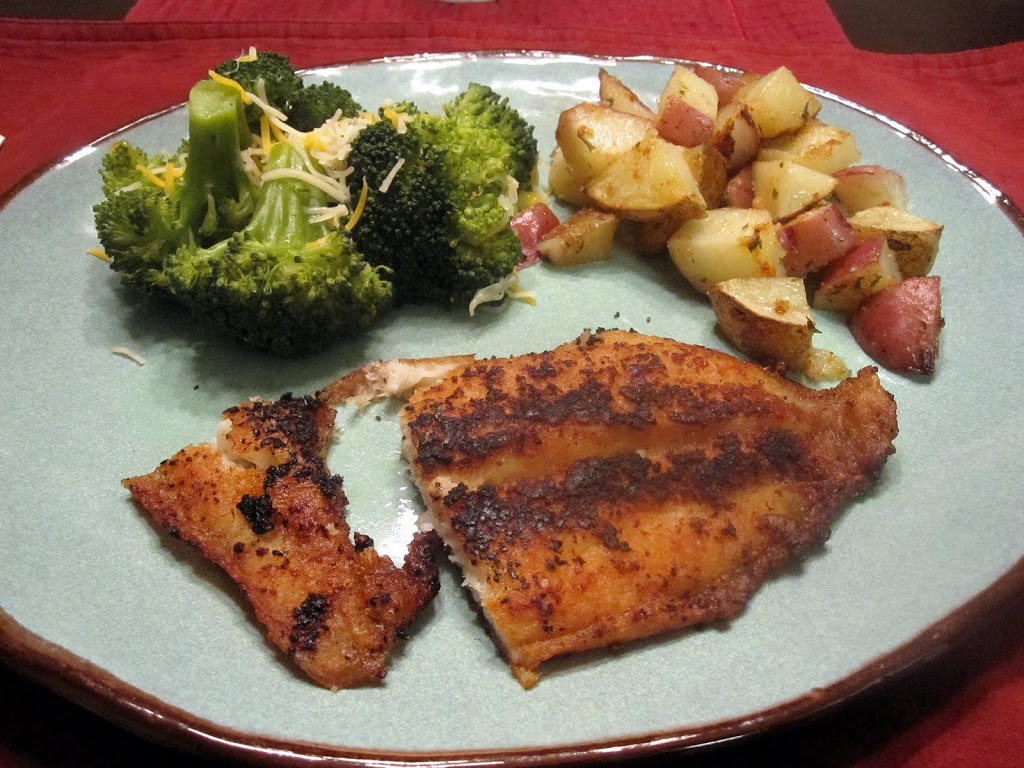
Dinner was coming along so nicely, that I even entertained the idea of making a dessert, but Josh told me to hold off...which is fine, because I can make the dessert for later in the week when I make one of the new Italian dishes I'll be trying out. As I predicited the potatoes took longer than the fish, but only by about 5minutes so once the were done I started serving our plates up while Josh started divvying up the fish. The finished product looked amazing and tasted even better. Grace was in fishie heaven, Josh was chowing down, Eden was munching on potatoes and I tasted the sweet victory of not over cooking the Swai and wasting our money.

Swai Fillets
Swai
salt
lemon pepper
garlic powder
evoo
Rinse the fish off and pat dry. Once dry season lightly with some salt. And then more liberally with the Garlic Powder and Lemon Pepper and place season side down in a frying pan with a decent amount of EVOO. You don't want the pan to hot so a medium heat is good.  On the top side of the fish repeat all the seasoning and flip when browned on the bottom. Cook for about 4-7 minutes on each side and is done when the fish has a nice white flake to it
Enjoy
Roasted Parmesean Potatoes
Potatoes-whatever you have on hand and enough to feed everyone. I used two baking potatoes and 2 red potatoes
salt
Parsley
Garlic Powder
Paprika
Evoo
Parmesean Cheese
Dice the potatoes into wedges, leaving the skin on. Season the potatoes with Salt, Garlic Powder, Paprika, and parsley. Pour evoo over the potatoes and mix well with your hands so that everything gets coated. Then sprinkle some Parmesan cheese over the top. Place in an oven at 450 for 20-40 minutes until softened and you could eat them with a fork. 
Enjoy 
  • « Previous Page
  • 1
  • …
  • 157
  • 158
  • 159

Welcome!

HI! We're Chels & Josh, and this is Catz in the Kitchen! Let's find love around the table, one recipe at a time!

More about us

Popular

  • If you've ever thought about turning your cement porch into a wood deck, it's surprisingly easy! Here are some thoughts, tips, & photos from our experience!
    DIY: Turning a Cement Porch Into a Wood Deck
  • Ever thought about turning your concrete slab into a covered deck? It's definitely doable! Here are some thoughts, tips, & photos from our experience!
    DIY: Turning a Concrete Slab Into a Covered Deck
  • DIY Window Box and Shutters
  • DIY Under the Stairs Closet Pantry Conversion
  • DIY Home Library Built-In
  • Grilling these simple chicken foil packets is an easy, tasty way to get a flavorful, healthy meal on the table, whether you're camping or at home!
    Loaded Chicken Foil Packets

Recent

  • One-Pot Turmeric Chicken & Rice
  • Chicken and Broccoli Stir-Fry
  • Catz on the Move: 5 Nights in Paris with 5 Kids
  • Simple Baked Oats
  • Almond Ricotta Cake
  • Molasses Cookies

Footer

↑ back to top

About

HI! We're Chels & Josh, and this is Catz in the Kitchen! Let's find love around the table, one recipe at a time! Read more

Socials

Contact

  • Contact
  • Privacy Policy

Catz in the Kitchen is a participant in the Amazon Services LLC Associates Program, an affiliate advertising program designed to provide a means for sites to earn advertising fees by advertising and linking to amazon.com.

Copyright © 2025 Catz in the Kitchen

19 shares