Catz in the Kitchen

  • Home
  • About
  • Recipes
    • All Recipes
    • Healthy
    • Italian
    • Mexican / Latin
    • Gluten-Free
    • Vegetarian
    • Grilling
    • Desserts
  • DIY
  • Featured
  • Contact
menu icon
go to homepage
  • Home
  • About
  • Recipes
    • All Recipes
    • Healthy
    • Italian
    • Mexican / Latin
    • Gluten-Free
    • Vegetarian
    • Grilling
    • Desserts
  • DIY
  • Featured
  • Contact
search icon
Homepage link
  • Home
  • About
  • Recipes
    • All Recipes
    • Healthy
    • Italian
    • Mexican / Latin
    • Gluten-Free
    • Vegetarian
    • Grilling
    • Desserts
  • DIY
  • Featured
  • Contact
×
Home

Weekly Menu 1/21-1/27

January 21, 2013 By Chelsia Rief Leave a Comment

I didn't plan on taking last week off. I guess we're still very much trying to get the hang of taking care of a new baby, while juggling school and all of the other tasks we take care of. I also got sick over the weekend. That's not fun! Josh bought me some nyquil and it knocked me out last night and he had to take care of Christian all night because I was too zoncked. At least I finally got a good night's sleep!

Since I got some sleep, I knocked out the menu for the week and since baby is sleeping, here I am posting! Better late than never right?

Monday
Dinner at the in-laws
(as long as I feel up to it)
Tuesday
Grilled Two-Cheese Burgers
Wednesday
Crockpot Chicken Stew with herbed rolls
Thursday
Southwest Chicken and Cheese with Mashed Potatoes and Corn
Friday
White Pizza with Bacon
Saturday
Stuffed Bell Peppers with a salad
Sunday
Beef Stew
I've got a few other meals planned out in case we're to tired for any of these dishes. So we will see how it goes!
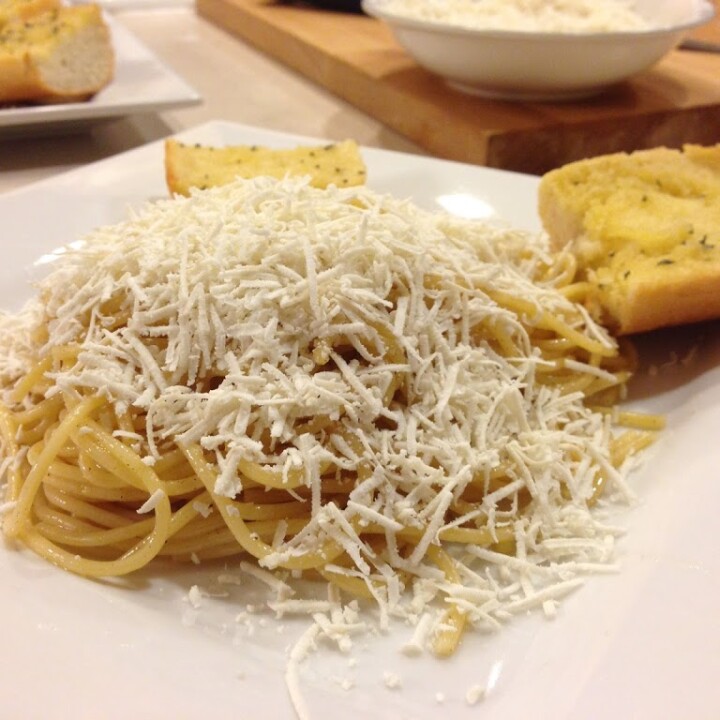
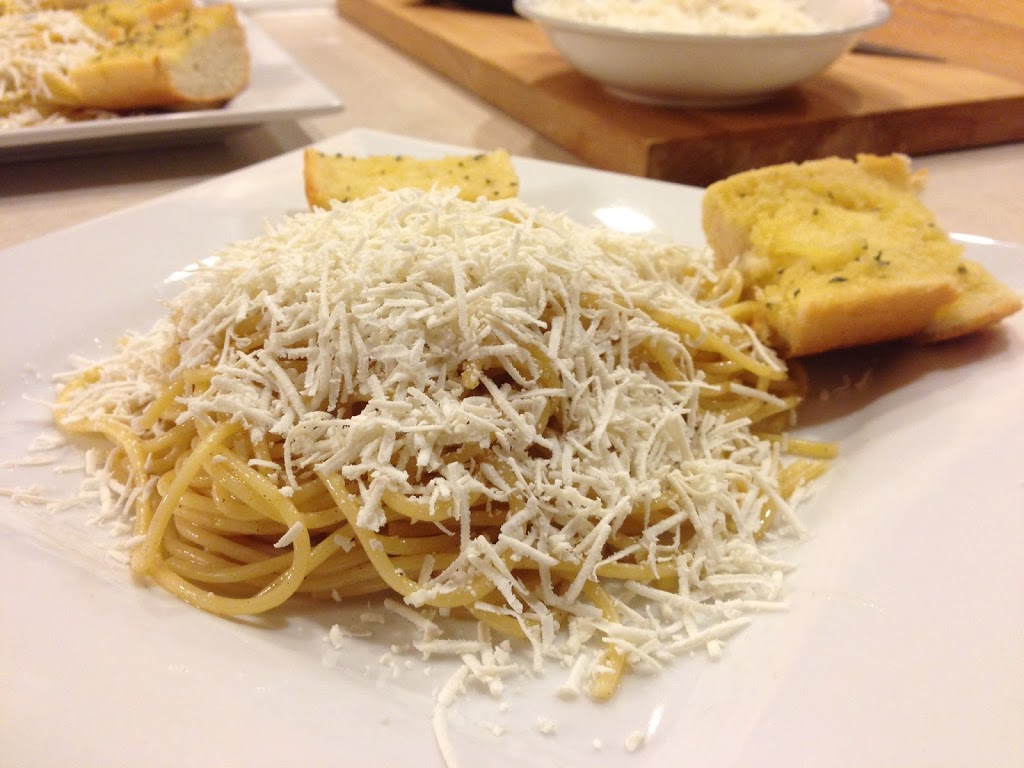
Pasta with Myzithra and Browned Butter

January 9, 2013 By Joshua Rief Leave a Comment

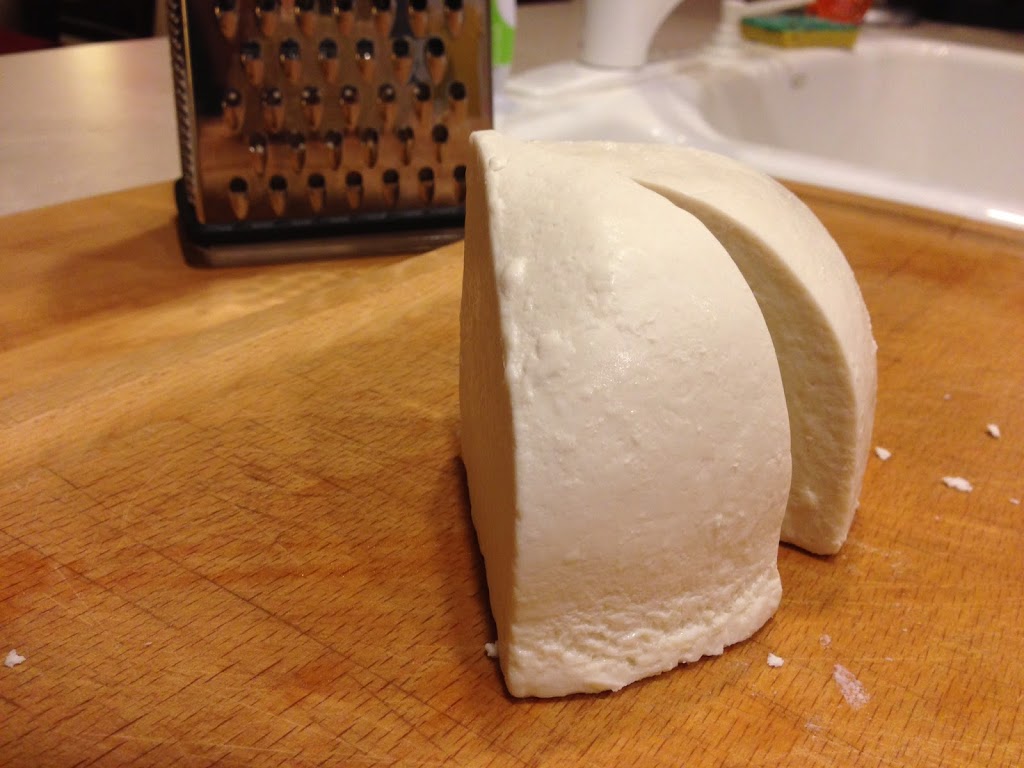
This dish owes its fame in modern times almost entirely to the Old Spaghetti Factory. In fact, in every menu at each of the chain's 40 restaurants, there is a special section that propagates a legend that Homer lived on it while composing The Illiad. No offense, but I've read the Illiad, and I'm thinking Homer had a little something else in his pipe as well. Suffice to say, it's a weird story. Regardless of whether or not the bit about Homer has any basis in fact, the cheese has an interesting enough history of its own. Myzithra (also spelled "Mizithra" or the Greek Μυζήθρα, if you prefer) has been made for thousands of years, almost exclusively on the isle of Crete, in the Mediterranean Sea, between Greece and Turkey. Depending on its salt content and the age of the cheese, it goes by a variety of Greek names. To the best of my knowledge, the most salted and most aged version of the cheese is the one traditionally used on pasta, known as anthotyros. The flavor is distinct - once you've tasted it, you'll never mistake it for anything else.

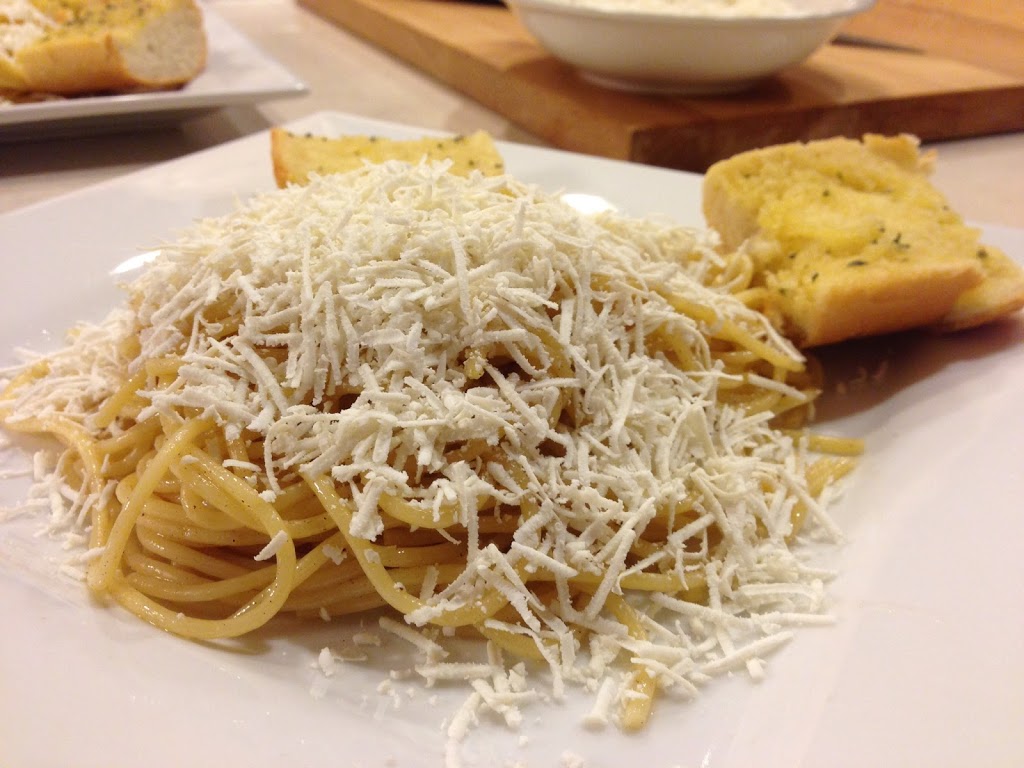
Myzithra, though, is only one part of what makes this dish unique. The other fascinating and unusual exercise one must go through before serving this Greek staple is that of browning butter. Now, browned butter has other uses, as I understand it, but I personally had never before had the opportunity to give it a shot. You know how when you cook something in butter in a frying pan, the butter will occasionally burn? It turns a dark brown color and smells rather awful, with lots of thick smoke. That's not browning butter. Browning is the stage the butter reaches right before it burns, and, in my experience, getting it there was easier than it sounded. Once the myzithra is grated and the butter is browned, your dish is basically complete. Certainly, you're going to need some pasta - spaghetti or angel hair seems to be the way to go - but it's literally that simple.

In preparing to make this dish, I had one primary goal - make it taste as similar as possible to Old Spaghetti Factory's version. I love deconstructing restaurant food, though it usually takes a number of tries to get it right. Simply put, while not all of Old Spaghetti Factory's dishes are my favorite (I'm not a big fan of their take on Fettuccine Alfredo, for example), this one is marvelous, every time. Because the only ingredients are pasta, myzithra, and browned butter, the only things you taste are...myzithra and browned butter, which needless to say, are flavors you simply don't have the opportunity to taste everyday. I looked over five or six different recipes to try to decide the best techniques for browning the butter and assembling he ingredients, and pulled a bit from each. If you look for myzithra and browned butter recipes, you will find some that add a lot of ingredients - I would advise you to steer clear. I'm sure they're quite tasty, but there's no need to add complexity here. This is a dish that is about showcasing two unusual ingredients, and enjoying them on their own.
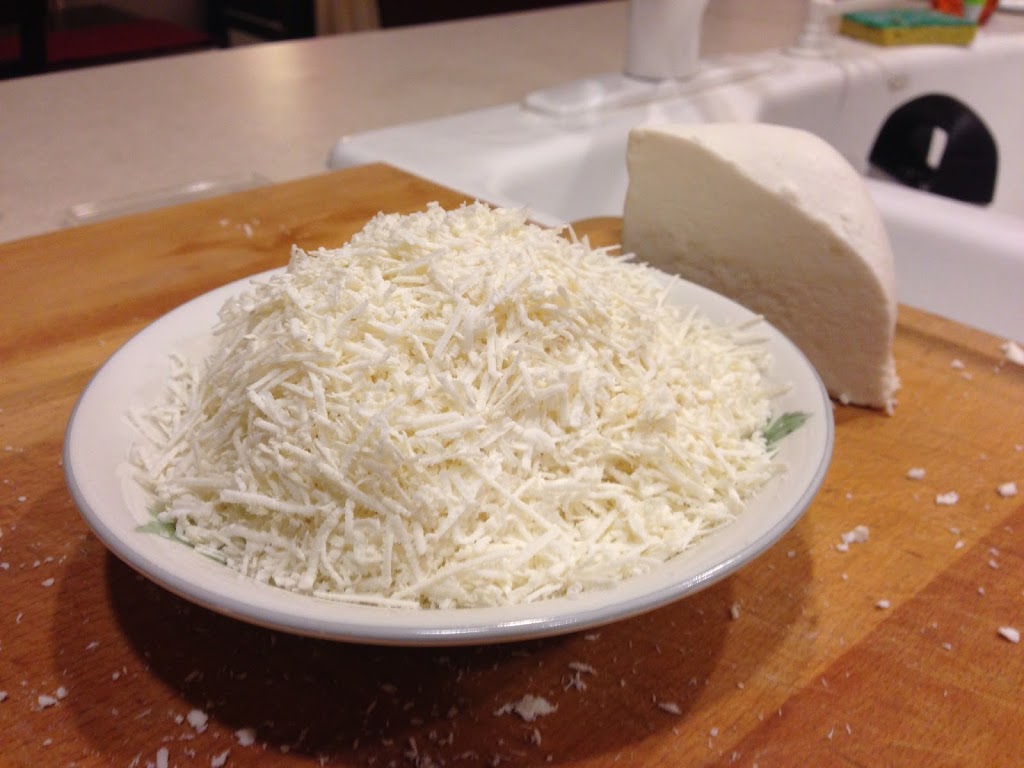
In the end, I was deeply pleased by the results. With all appropriate humility, this turned out exactly like Old Spaghetti Factory's, and Chels and I are both thrilled to be able to have this favorite whenever we like! Before we get to the recipe, here are a couple of tips. First, grate the myzithra on the small side of your cheese grater. You want the cheese to be in light, thin pieces - a bit like grated parmesan. Where the browned butter is concerned, make sure to use enough - I used sixteen tablespoons. Use a small saucepan, never (never!) stop whisking (too slowly, and the butter will burn - too quickly, and it won't brown), and as soon as the butter begins to turn a nice amber/caramel color, get it off the heat. Enjoy!

Pasta with Myzithra and Browned Butter
Old Spaghetti Factory Imitation
 
Servings: 4-6 (depending on helping size)
Cook Time: 15-20 min
 
Ingredients
1 cup (16 tablespoons) cold, unsalted butter
1 lb pasta, spaghetti or angel hair
1 to 1 ½ cups grated myzithra cheese (about ⅓ pound)
Directions
  1. Start boiling a large pot of water for the pasta, as directed on the box. While waiting for water to boil, cut butter into tablespoon-size pieces. Place butter in unheated saucepan.
  2. When water is boiling, add pasta and cook as directed. Simultaneously, turn heat under butter to medium low (if you're using an electric range, you may need to use medium). Butter will melt in less than a minute. As soon as it is mostly melted, begin whisking at a medium rate. Continue whisking constantly for the remainder of the cooking time. After a few minutes, the butter will begin to foam. After a few minutes of foaming, the foam should die down, and the butter will begin to change color. When the butter achieves an amber/caramel color, remove from heat and continue whisking for another 30-60 seconds.
  3. Strain butter into a small bowl or measuring cup through a fine strainer, leaving the dark particles in the bottom of the saucepan as much as possible. Drain pasta and return it to the pot. Pour strained butter over the hot pasta, and toss to coat evenly. Some butter will gather on the bottom of the pot - this is normal, as long as the pasta is completely coated.
  4. Serve immediately, sprinkling the top of each serving with approximately ¼ cup of the grated myzithra cheese. Suggestion: serve with a hearty garlic bread and white wine.
Note- Look for this cheese in the specialty cheese section. You can generally find it among the brie and goat cheese.

Tuesday's Tidings for January 8, 2013

January 8, 2013 By Chelsia Rief Leave a Comment

1. Christian is officially 3 weeks old as of yesterday. He wasn't impressed with how the day went at all!

2. I bought a donut pan with some of my birthday money! I cannot wait to use it!

3. I think Christian is the easiest newborn we've ever had! He barely cries!!! And he sleeps so good at night, most of the time. How did I get so lucky?

4. Can I tell you how weird it is to be able to sleep on my stomach, drink wine, lean over counters without hitting my huge belly, and hug my husband without having a stomach in the way? It's AWESOME!

5. Downton Abbey's Season 3 Premiere was the other night and it was awesome! Because we no longer have DVR, we had to watch it live, which left us going to bed later than we usually do which made the night more difficult with Christian since we lost out on at least 2 hours of sleep. A small sacrifice to pay to watch Maggie Smith and Shirley Maclaine go at it!

6. We've started watching "White Collar." We were watching "Alias" but it just seemed a little to dark for our late night feedings and diaper changes...and I just needed something a little bit happier or funnier during those hours that can drag on. So far, I really like it. But we've only watched one and a half episodes of the first season...so the jury is still out. But so far, we like it!

7. Right now, I'm living in my sweatpants. I love my sweatpants. I can finally fit into other pants, but if I'm staying home...sweatpants is where it's at!

8. Anyone try the new Vanilla Spice Latte from Starbucks? It is sooo very delish! My new fave!

9. Josh bought us tickets for Swan Lake opening night at the Oregon Ballet Theater! I am so excited! This is the ballet I've always wanted to see! I'm so excited!

10. So I finished watching every episode of Dawson's Creek a few weeks ago and now I'm onto Felicity! I love my late 90's tv shows!

Weekly Menu 1/7-1/13

January 8, 2013 By Chelsia Rief Leave a Comment

I'm back with our first weekly menu since having the little guy. I promise, I'll do an update about him as soon as I have a few spare moments to write one up. How was everyone's holidays? We had a nice time. We tried to keep it as low key as possible since Christian was only about a week old when Christmas came around and I was still very much in recovery mode. I still am, but I'm doing pretty good. Josh is being careful about making sure I don't wear myself out, which is nice.

Our church has been bringing us meals the last two weeks for dinner and it has been such a huge help to us. To just know that dinner was provided and not something we had to worry about has been amazing. But we're back in the kitchen and already dreaming up more meals Josh and I can make together. In fact, I've got a running list of ideas, and I can't wait to get started.

Monday
Ham and Cheese Quiche
Tuesday
Chicken Curry with rice
Wednesday
Black Bean and Rice Enchiladas
Thursday
(Awana Night)
Crockpot Steak and Potatoes with Green Beans
Friday
Crockpot Chicken Stew with Herbed Rolls
Saturday
White Pizza with Bacon
Sunday
Creamy Garlic Pizza with a Side Salad

Homemade Egg Muffin Sandwiches

January 4, 2013 By Joshua Rief 1 Comment

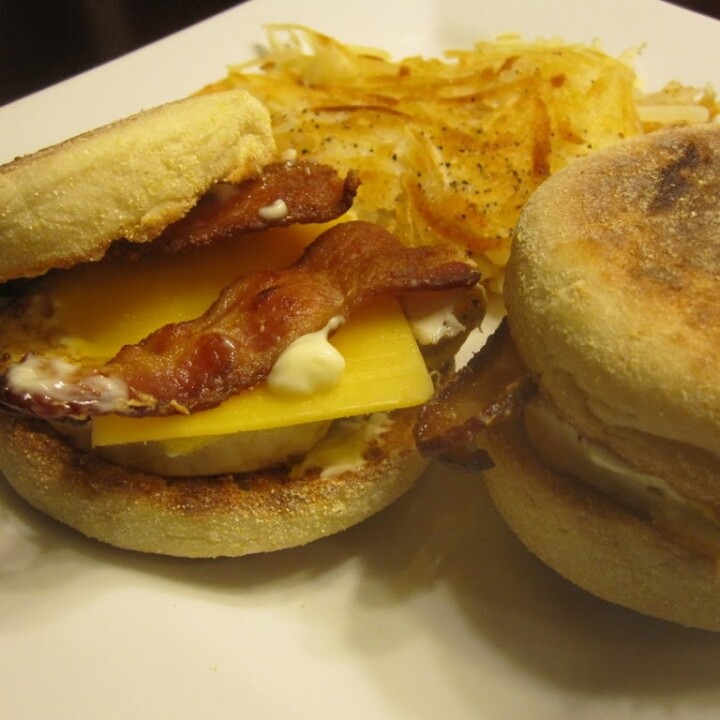
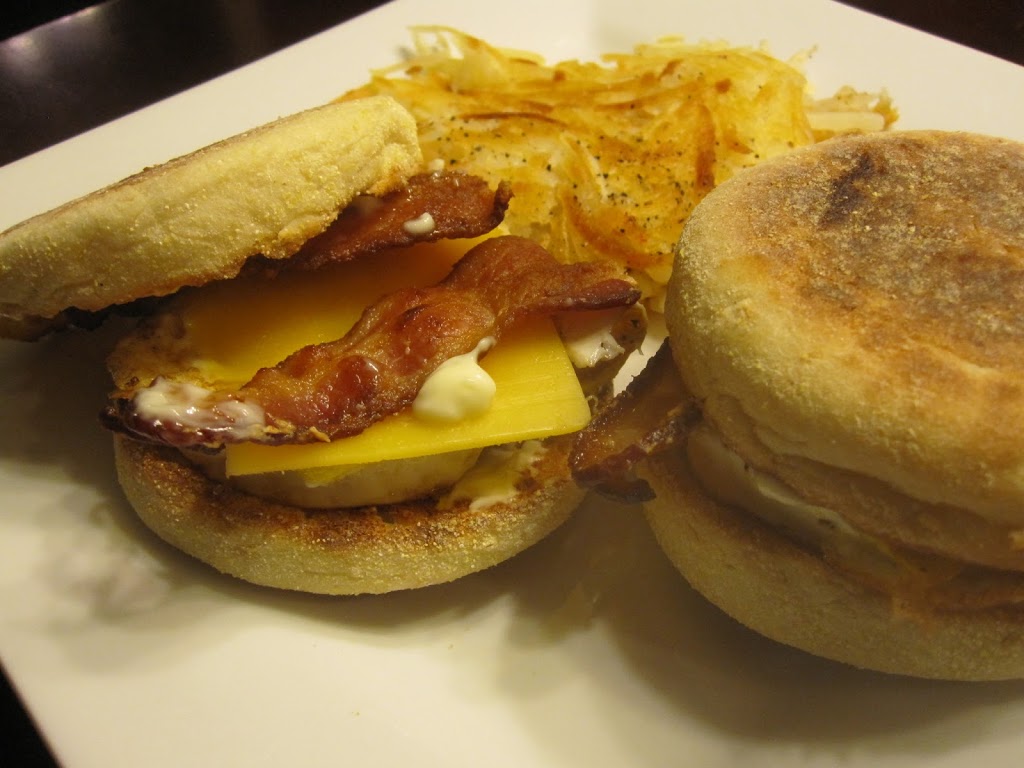
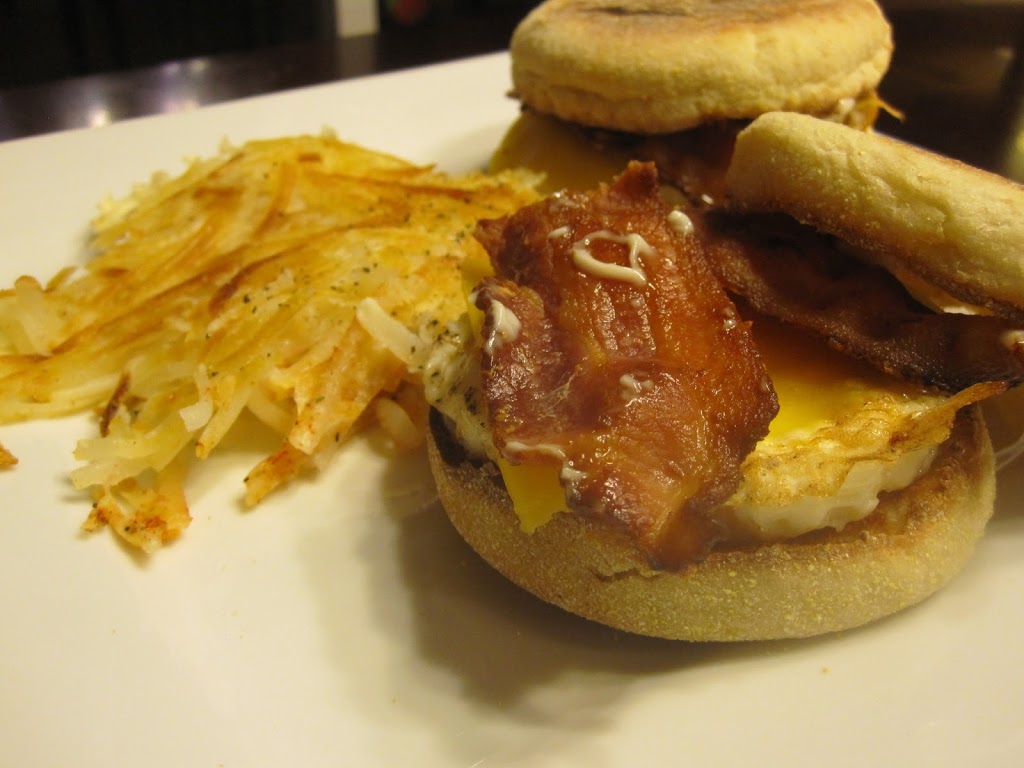
Customarily, if one is the mood for an egg muffin sandwich (the "Mc" is a McDonald's copyright), one makes a beeline to the nearest Micky D's. It's not expensive, generally pretty yummy, and probably one of the more authentic-tasting foods one will procure from the golden arches. However, let's face it: fast food for breakfast is generally not a great idea. I have no crusade against fast food establishments in general, or McDonald's in particular, but the reality is that consumption of such mass-produced meals ought to be limited to infrequent occasions. Besides, why make the trip to your local burger joint for a simple scrumptious breakfast sandwich, when you can just as easily whip one up at home?

Enter my homemade egg muffin sandwiches. Once you get the basics down (and they are basic), you can do pretty much whatever you feel like doing with the ingredients - leave off the meat, add on more meat, sub the bacon out for the Canadian variety, add a tomato, switch up the sauces, etc, etc, etc. In a couple of minutes, you can have your very own egg muffin sandwich anytime you want, without leaving the house, and without any residual guilt.

There's really one key point to this exercise. You need egg rings. Have to have them. If you don't, go and get some. I use them for everything, from little perfectly round pancakes to these sandwiches. They're pretty cheap, easy to clean, easy to use, and extremely versatile. They come in sets of two, four, or even singles, if you really want to build your collection one at a time. You can't find them everywhere, but I have seen them at Kitchen Kaboodle, among other places. The benefit to using the egg rings here is that your eggs will turn out exactly the right size, every time, and they will look incredibly appetizing - remember, appearance is important (I'm still figuring that out...)!

So, without further ado, here it is: the basic recipe for egg muffin sandwiches, which I encourage you to get comfortable with and customize - make the changes mentioned above, switch the muffins out for biscuits, and find the amount of horseradish that's right for you.

Homemade Egg Muffin Sandwiches
A tasty and simple breakfast idea, sure to become a go-to meal in mornings, afternoons, and evenings!
Servings: 4
Cook Time: 15 minutes
Ingredients
4 sourdough English muffins, cut in half
4 eggs
4 thick slices of bacon
4 large slices of cheddar cheese
Mayonnaise and horseradish, for spreading
Non-stick cooking spray, for the egg rings
1 tablespoon of butter
Directions
  1. Heat butter in a large non-stick skillet. Spray insides of egg rings with non-stick cooking spray, and place in heated skillet. 
  2. Meanwhile, toast English muffins, either under a broiler or in a toaster oven. Toast until just browned on the edges. 
  3. Crack one egg directly into each egg ring. Puncture yoke before it has a chance to set. Allow eggs to cook in the egg rings until somewhat stable, with a minimal amount of liquid egg whites on top. Using tongs or an oven mitt, grasp and remove the egg rings from pan, leaving the eggs in place. If the rings stick to the eggs, run a knife around the inside edge of each ring. Flip the eggs once, allowing the top to fry for a moment. 
  4. Spread mayonnaise on the bottom half of each English muffin, and immediately place an egg on each half. Top with a slice of cheddar cheese, and then snap each piece of bacon in half, placing the two halves on top of the cheese. Spread horseradish on the top half of each English muffin, and place on top to finish the sandwich. Serve immediately, or keep warm in an oven at 170 degrees (briefly - they will dry out quickly). Serve with fresh fruit, hashbrowns, or any other breakfast side that appeals to you. 

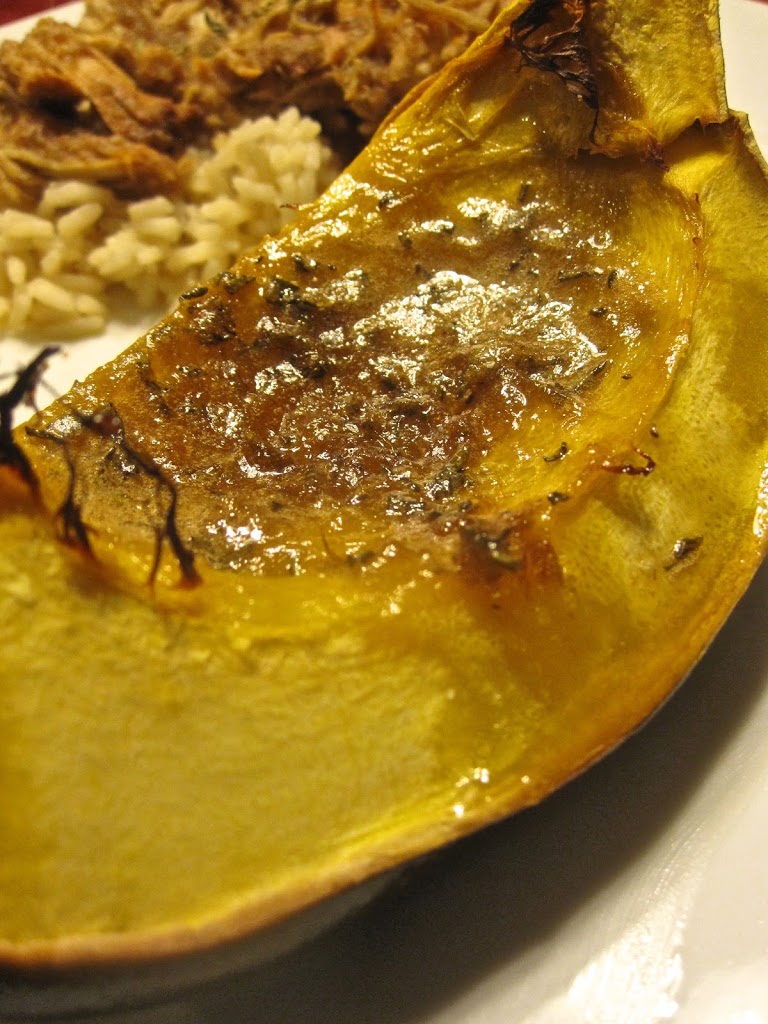
Sweet-Roasted Rosemary Acorn Squash Wedges

January 2, 2013 By Chelsia Rief Leave a Comment

With a newborn in the house, we are slowly adapting to our new "normal," whatever that is.  We're officially two weeks in and we are lucky enough to actually be getting 5-8 hours of sleep every night. Granted, that sleep is interrupted every 2-3 hours for feedings, diaper changes, and snuggles, it's still quite a bit of sleep for only have a 2 week old.

Josh is being very protective of me while I recover and heal from the labor and delivery and I've only gotten away with being in the kitchen and cooking once since we've been home. It felt good to assemble a meal and a few side dishes, but it was a little exhausting too. Currently, our church is bringing us some meals every other day, so there isn't a huge need to be in the kitchen whipping up delicious meals, because most of the meals we're being brought, we can use again as leftovers.

I did want to share with you this yummy side dish I made last week while Josh was at the dr.'s office with Christian. I had an acorn squash from before I went into labor, sitting in our pantry. I had plans of cooking it before I went into labor, but cooking those last few weeks while so pregnant almost became an impossible thing for me. So, the squash got forgotten about...and thank goodness it did, because the side dish I made with it was really yummy!

It's kind of a miracle that I had everything on hand that I needed to make this, considering we hadn't grocery shopped since being home. But I found some rosemary in my fridge that needed to be used up, just enough butter, and the rest of the staples I had on hand.

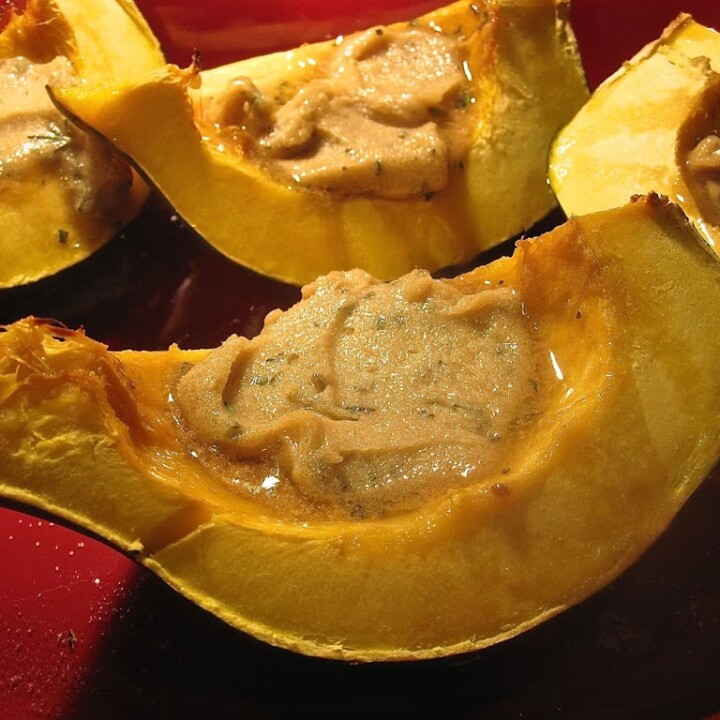
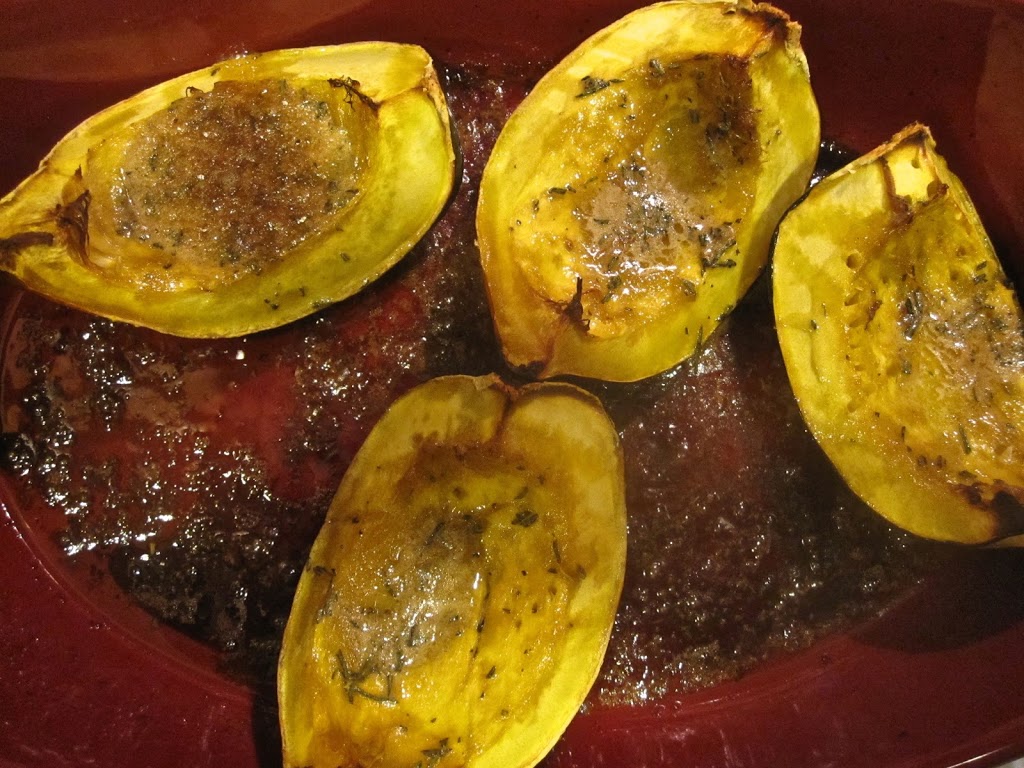
The squash is bathed in a delicious buttery herbed sugar mixture and roasted in the oven till the squash becomes soft and tender and full of flavor. This just might be one of my new favorite ways to cook an acorn squash!
Sweet-Roasted Rosemary Acorn Squash Wedges
(Adapted from: The Pioneer Woman)
 
1 acorn squash, cut into 4 wedges
drizzle of olive oil
salt to taste
½ stick butter, softened
¼ cup brown sugar, packed
1 TB rosemary, minced
Pre-heat oven to 350 degrees.
Place wedges on a baking dish and drizzle with olive oil and season lightly with salt. Roast for 20 minutes.
Combine, butter, brown sugar, rosemary, and salt in a bowl and mix into a paste.
After 20 minutes, remove the baking dish and raise the temperature to 400 degrees. Smear the paste over the wedges and return the baking dish to the oven for 30 minutes, until brown and caramelized.
Halfway through the 30 minutes, baste the wedges in the paste that has gathered at the bottom of the baking dish and continue cooking for the remainder of the time.
Drizzle the remaining bits of sauce over the squash right before serving and enjoy!

Top 5 Recipes of 2012

December 31, 2012 By Chelsia Rief Leave a Comment

Can you believe 2013 is tomorrow?! Where did the year go? In fact, where did the last two weeks go? I'm having a hard time knowing that Christmas has already come and gone. I think that when you're an adult, time just flies by faster than when you're a child.

We made a lot of yummy meals this past year and Josh and I thought it would be fun to highlight the Top 5 of the year. If you haven't checked them out, please make sure you do, because they are pretty tasty!

Hot Chocolate Cookies
Applesauce Cookies with Caramel Frosting
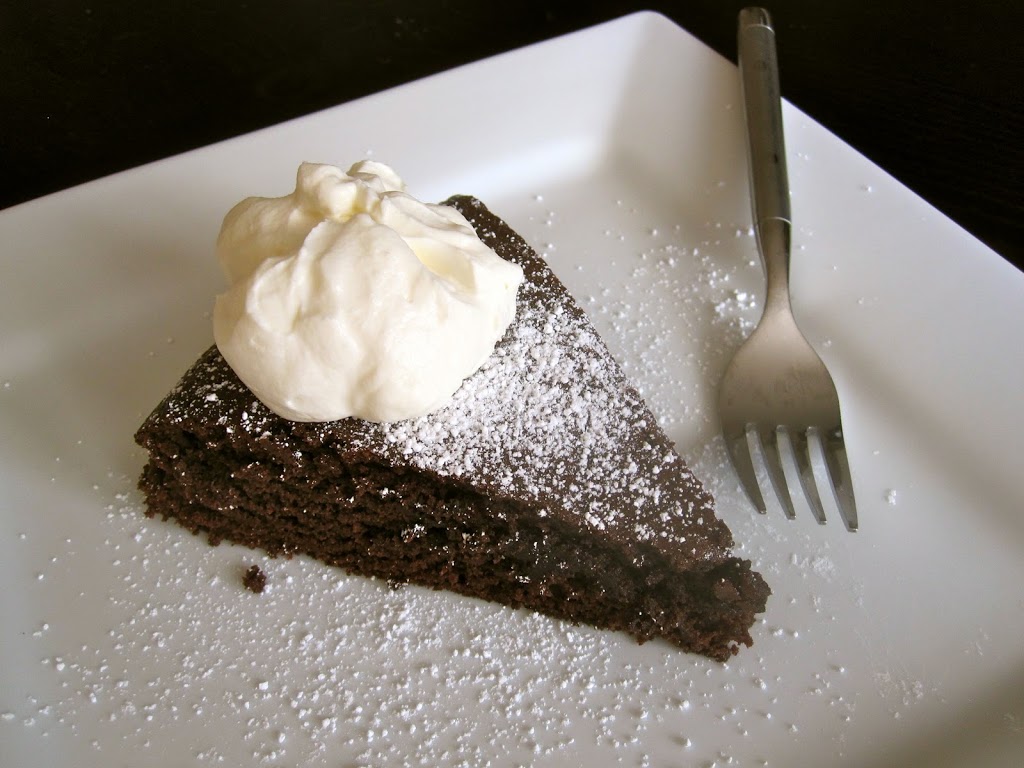
Red Wine Chocolate Cake
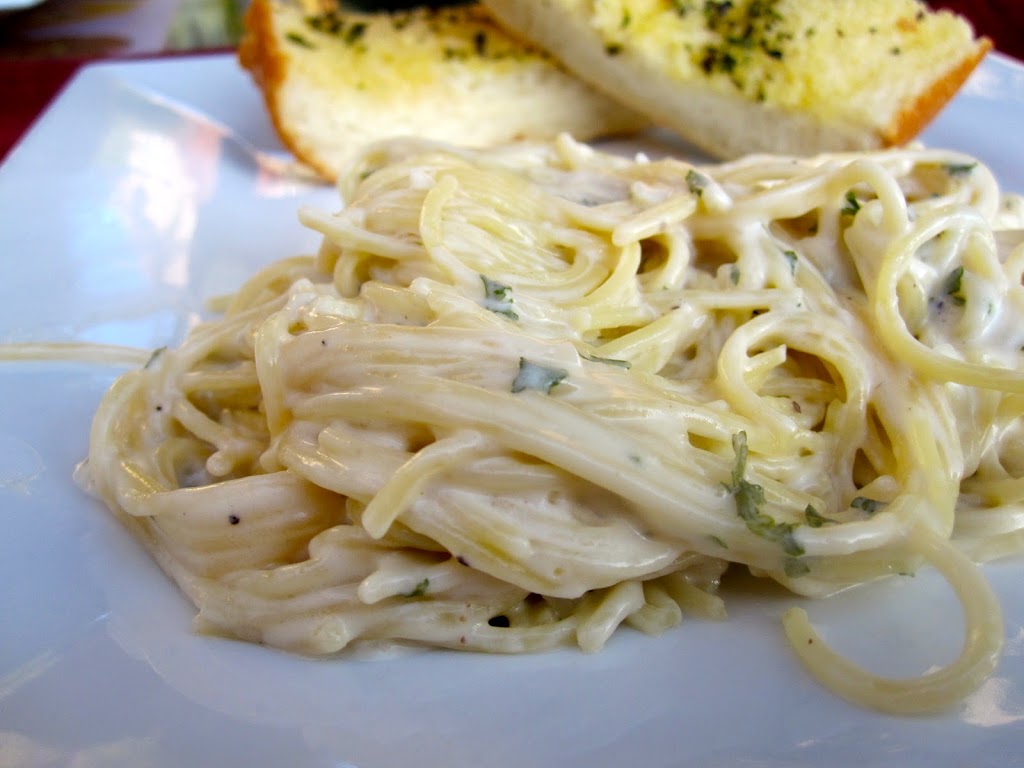
Creamy Garlic Pasta
Chicken and Dumplings
I hope something on this list makes you hungry and curious to try one of these dishes! And let me be one of the first to wish you a Happy New Year!

Weekly Menu and Tuesday's Tidings is Officially On a Break!

December 17, 2012 By Chelsia Rief Leave a Comment

Hi everyone!
I hope you are all getting settled into the final week before Christmas and are getting things done. We are going to be taking a break from the Weekly Menu and Tuesday's Tidings until further notice. I'm not sure for how long, but hopefully I'll resume it back in January. Since our son is set to arrive at any moment, please forgive any delays in our posts as we figure out our new normal and get settled in with a our newborn baby.

Thank you for all of your understanding and wonderful comments! We'll update you all when our son is born and give you a beautiful preview at that time as well. Have a great week everyone, and stay tuned for some delicious recipes on Wednesday and Friday.

Weekly Menu 12/10-12/16

December 10, 2012 By Chelsia Rief Leave a Comment

How was everyone's week and weekend? Ours was Buuuusy...with a Captial B! We finished all of our Christmas shopping for the majority of the families and tied up some of the loose ends. Our hospital bags are officially packed and we're kind of living out of our toiletry bags and such and I got my hair done which was of course extremely important for hospital pictures, lol! Girl's gotta look pretty ya know!

We actually strayed from the menu a lot more than we meant too. We just kind of did other things because our evenings didn't always plan out the way we thought they would, so we still have several meals that we're going to use for this week. So if you are wondering why there are repeats, that's why.

Monday
Baked Penne with Italian Sausage
Tuesday
Chicken Stew in the Crockpot
Wednesday
Pork Chops with Wine and Garlic, side salad, and rustic bread
Thursday
(Awana Night)
Leftover Baked Penne
Friday
Burgers out
Saturday
Garlic Rosemary Chicken and Potatoes in the Crockpot with sliced bread, 
and green beans
Sunday
Pizza Night

Egg Nog French Toast

December 5, 2012 By Joshua Rief 1 Comment

I seem to be on something of a holiday French Toast kick lately. You know what? I'm totally okay with that. French Toast is always wonderful, and always a bit reminiscent of the holidays, what with its hints of nutmeg, suggestions of cinnamon, and whispers of vanilla. It can be Christmas in July, Thanksgiving in February, or Winter Solstice in May. Needless to say, I'm a fan. However, as we participate in the actual holidays themselves, it's fun to take those hints and whispers and turn them into focal points. Pumpkin was something of a forgone conclusion, I suppose, but what about egg nog?

I find that egg nog can be something of a polarizing subject for many people. It seems as though you either can't get enough of the unique flavor profile, or you just can't stand it at all. Luckily, the majority of the people I engage in culinary conversation seem to be of the former opinion, and that conclusion is well-supported by the facts at hand. In much the same way that pumpkin-flavored everything surfaces as Thanksgiving draws near, so, too, do all things egg nog with the advent of Christmastime. Egg nog ice cream, Coffee-Mate, cookies, and fudge all vie for our tastebuds, and I, for one, don't mind a bit. In fact, our most popular recipe ever here at Catz was Chels's egg nog fudge from last year. My constant indulgence come the holiday season? Egg nog in my coffee, each and every morning. If you haven't tried it, you should.

A few weeks ago, Chels brought to my attention an egg nog French Toast recipe she found on Pinterest. I immediately loved the simplicity of the ingredients and preparation - I'm all for in-depth, complex recipes that leave me in the kitchen for hours on end, but, let's face it, you can only fix that sort of thing so often. This looked to be one of those things you could whip up anytime, with little or no advance notice, in a matter of minutes. And so it proved to be - I made a couple of ever-so-minor adjustments, tried it out, and loved it. I think the entire process took about fifteen minutes. So, why not whip this up for your family as the holidays draw near? It doesn't need to be a special occasion, and you won't need to add much to your grocery list. You'll love the simplicity, the flavor, and the gentle undertone of egg nog flavor. Give it a try!

Egg Nog French Toast

Egg Nog French Toast

Yield: 6
Prep Time: 10 minutes
Cook Time: 15 minutes
Total Time: 25 minutes

Ingredients

  • A small loaf of French or Italian bread, sliced roughly half an inch thick
  • 6 eggs
  • roughly one cup of egg nog (adjust to taste)
  • about a tablespoon of vanilla (again, adjust to taste)
  • pinch of salt
  • butter for frying in pan
  • ¼ teaspoon of nutmeg

Instructions

  1. Beat eggs, egg nog, vanilla, salt, and nutmeg together in a large boal until smooth.
  2. Heat skillet to medium heat, and melt some butter (about a tablespoon) in the pan.
  3. Dip slices of bread in the egg mixture, allowing them to coat thoroughly.
  4. Fry in pan until golen brown on both sides, turning once.
  5. May keep finished slices warm in 170 degree oven. Serve topped with butter and syrup.
Nutrition Information:
Yield: 6 Serving Size: 1
Amount Per Serving: Calories: 137Total Fat: 9gSaturated Fat: 4gTrans Fat: 0gUnsaturated Fat: 4gCholesterol: 216mgSodium: 140mgCarbohydrates: 5gFiber: 0gSugar: 4gProtein: 8g

Nutrition information isn't always accurate.

© Catz in the Kitchen
Category: Brunch

  • « Previous Page
  • 1
  • …
  • 132
  • 133
  • 134
  • 135
  • 136
  • …
  • 159
  • Next Page »

Welcome!

HI! We're Chels & Josh, and this is Catz in the Kitchen! Let's find love around the table, one recipe at a time!

More about us

Popular

  • If you've ever thought about turning your cement porch into a wood deck, it's surprisingly easy! Here are some thoughts, tips, & photos from our experience!
    DIY: Turning a Cement Porch Into a Wood Deck
  • Ever thought about turning your concrete slab into a covered deck? It's definitely doable! Here are some thoughts, tips, & photos from our experience!
    DIY: Turning a Concrete Slab Into a Covered Deck
  • DIY Window Box and Shutters
  • DIY Under the Stairs Closet Pantry Conversion
  • DIY Home Library Built-In
  • Grilling these simple chicken foil packets is an easy, tasty way to get a flavorful, healthy meal on the table, whether you're camping or at home!
    Loaded Chicken Foil Packets

Recent

  • One-Pot Turmeric Chicken & Rice
  • Chicken and Broccoli Stir-Fry
  • Catz on the Move: 5 Nights in Paris with 5 Kids
  • Simple Baked Oats
  • Almond Ricotta Cake
  • Molasses Cookies

Footer

↑ back to top

About

HI! We're Chels & Josh, and this is Catz in the Kitchen! Let's find love around the table, one recipe at a time! Read more

Socials

Contact

  • Contact
  • Privacy Policy

Catz in the Kitchen is a participant in the Amazon Services LLC Associates Program, an affiliate advertising program designed to provide a means for sites to earn advertising fees by advertising and linking to amazon.com.

Copyright © 2025 Catz in the Kitchen

19 shares