
Catz in the Kitchen

  • Home
  • About
  • Recipes
    • All Recipes
    • Healthy
    • Italian
    • Mexican / Latin
    • Gluten-Free
    • Vegetarian
    • Grilling
    • Desserts
  • DIY
  • Featured
  • Contact
menu icon
go to homepage
  • Home
  • About
  • Recipes
    • All Recipes
    • Healthy
    • Italian
    • Mexican / Latin
    • Gluten-Free
    • Vegetarian
    • Grilling
    • Desserts
  • DIY
  • Featured
  • Contact
search icon
Homepage link
  • Home
  • About
  • Recipes
    • All Recipes
    • Healthy
    • Italian
    • Mexican / Latin
    • Gluten-Free
    • Vegetarian
    • Grilling
    • Desserts
  • DIY
  • Featured
  • Contact
×
Home

Tuesday's Tidings for March 5, 2013

March 5, 2013 By Chelsia Rief 2 Comments

1. I was doing Eden's hair last week, when I noticed that some of her hairs were extremely short. Like, so short that when I put her hair in a ponytail, the hairs fly and stick straight up and won't relax. So I did what any normal mother would do, I questioned her on playing with scissors. She assured me that she didn't and that she knows not to touch scissors without me, Grace, or Josh around to help her. So I puzzled over her hair for a few days when it dawned on me. When she and Grace get Ashley out to run around (Ashley is Grace's pet bunny) Eden has the tendency to lay down on the ground and watch her. My guess is that Ashley thought Eden's hair was food...AGAIN! Yes, this has happened before, but not for some time. I guess I'll have to be more careful with Eden's hair when she is around Ashley.


2. On Saturday, I started Jillian Michael's 30 Day Shred. Since Josh goes back to work on Monday (Waaahhh), our evenings are going to be a little bit less predictable when it comes to getting dinner on the table and me making it to the gym. So I wanted to make sure that I would have something quick that I could squeeze in if I can't make it to the gym on one of my planned evenings. Plus, we all know Jillian is a hard core trainer, and I kind of wanted somebody to kick my butt. Today was day 3 of the shred and I'm literally so sore. But I gotta be honest, I am loving it!

3. So yeah, you read right. Josh goes back to work on Monday. I'm so nervous, lol! But the good thing is, Josh doesn't leave for work till close to 8am. He's home for lunch around noon (cuz he works like 2 miles from our house), and since he is so close to home, he doesn't fight traffic coming back home. I really do wish these 12 weeks would of gone by slower. Next Tuesday, I'll update you with how Monday went...that is if I survive ;)

4. When Josh writes posts for the blog, he always has me reread what he wrote out loud so we can make sure it sounds right, if I like it, etc. Apparently, when I read out loud, I add words to his posts that aren't written. I don't even realize I'm doing it, but he thinks it's the funniest thing ever!

5. Breaking Dawn Pt. 2 came out on Saturday. I never went to the theater to watch it because I was nearly 9 mths pregnant and I really just did not want to sit in a theater at all. So we watched it on Saturday night. Can I just say that there was a bunch of smack talking going down when I saw Carlisle get decapitated. There was so much smack, that Josh had to tell me to pipe down! Have you seen the movie? If you have, then you know EXACTLY what I'm talking about.

6. True story, since Christmas, I've had probably about 10 pieces of candy all together. I ate a few of my Lindor truffles Josh bought me, and then I snuck two cherry airheads from my daughter's Valentine Candy stash. I can honestly say that because I never eat candy or chocolatey delights...that the few bites I've had...kind of grossed me out, lol! WHAT IS WRONG WITH ME?

7. Christian has expensive taste. His body will not happily accept any other formula other than Enfamil. We've tried him on the Target brand stuff twice (which is what Grace and Eden used and our pediatrician recommended since I'm not nursing) and he just can't handle it. His cute little body only responds to Enfamil. You guys, do you know how expensive it is? I'm just gonna put it out there, if any of you have coupons for Enfamil...would you consider mailing them to me? Our wallets and our son's tummy would be so grateful.

8. Christian is officially sleeping in his crib all night long! Granted, he doesn't sleep all night long, but after he is done with a feeding, he falls right back asleep in his crib! This momma is happy!!!

9. We hear the rain is supposed to come in soon, so Josh took the girls on a bike ride. Perfect day for it. I stayed home with the little man who was sleeping. We're looking into our options for bike riding this spring and summer. We already have a bike trailer, that we're using for Eden right now, but we're not sure if we want to buy another trailer, so Christian can ride in one and she can ride in the other, or if we just want to get one of those seats that go behind the parent on the bike. I don't know what those things are called. So many things to consider. Do you people have opinions or thoughts on the subject?

10. Josh and I started working on our coffee car in our house. It's still a work in progress. We are thinking about going to Ikea for some more storage options, but when it's completely done, I will post a before and after pic for you guys.

Weekly Menu 3/4-3/10

March 4, 2013 By Chelsia Rief Leave a Comment


The weather has been unusually beautiful here the last few days. So beautiful and warm for Portland weather, in fact, that we actually grilled two times last week! And since the weather was so nice (high 50's-low 60's), Josh and I got outside and worked in the yard for a bit too. Josh mowed and replanted one of our little trees, while I raked and weeded one of our flower beds. However this morning, we woke up and there was frost everywhere. Our bird bath is completely frozen over. But it's still sunny with some blue skies peeking out from behind a few clouds.

You'll notice that some of my dinners from last week have made an appearance on this week's menu. That's because Josh and I had dinner at his parents house a couple of times last week because our sister was in town from Washington for a few days and then over the weekend, Josh picked up some Steelhead at the grocery store and we had that one night too. Obviously, all of those roll over dinners make my menu planning quite easy for this week.

Monday
Lemon Dill Chicken with Orzo and Green Beans
Tuesday
Sloppy Joe Enchiladas with corn on the side
Wednesday
Pork Chops with Dijon Mushrooms with Roasted Parmesan Potatoes and veggies
Thursday
(Awana Night)
Black Bean "Nacho" Burgers with a Mexican Salad
Friday
Pizza Night
Saturday
Southwestern Quiche with fresh fruit
Sunday
Corned Beef Sliders and Chips

130 Calorie Egg White Omelet with Spinach and Tomatoes

March 1, 2013 By Joshua Rief 1 Comment

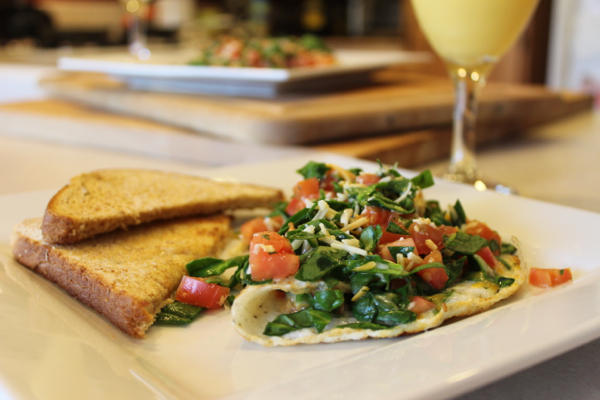
low calorie egg white omelet

I'm not normally the one who writes the "low calorie" posts. Chels does a fantastic job watching what she eats, which is why she looks so unbelievably fantastic two months after having a baby. I, on the other hand, am not as good. My favorite snack? A piece of multigrain bread slathered in chunky peanut butter and chocolate chips. Some protein there, to be sure, but each slice is close to 500 calories. Generally, though, we both avoid fast food, snacking between meals, and pop (except on special occasions!), and we exercise regularly, leading me to avoid spending too much time counting calories (or buying new jeans). Once in a while, though, I come across a meal that ticks all three boxes - low calorie, nutritious, and tasty. Normally, you have to sacrifice at least one of those boxes to enjoy a decent meal (often you're sacrificing both of the first two), but we try to check off as many as possible as often as possible. This is one of those "all three boxes" meals.

healthy omelet

Chels and I are both big omelet fans - my dad did most of the breakfast cooking at home when I was growing up, but omelets were always my mom's specialty. In fact, it's probably the only breakfast food she taught me to make - lots of dinner and lunch, though! I had never had an egg white omelet until Chels and I had been married for quite a few years - I guess I just never saw the point. I love eggs (especially the yolks), I was in my early 20's, and I weighed about 130 pounds. I needed all the egg yolks I could get. Now, though, as I'm closing in on 30, still slim but not skinny, I don't think there's any harm in reducing my fat and cholesterol intake a bit now and then. Chels is very appreciative, and I like our girls to get used to the idea that you can make something healthy that also tastes delicious. So, egg whites. Chels likes me to keep the yolks in a plastic bag in the freezer so she can use them for baking later (sometimes I forget), but otherwise it does seem wasteful just to throw them away. That's probably my biggest issue with just using the whites. Other than that, they're surprisingly tasty, and they cook up beautifully - I'd say an egg white omelet is done in about one third the time of a regular one, and is much easier to cook evenly.

low calorie omelet

All of that being said, the other morning it was just Chels, myself, and baby Christian here (no omelet for him), and I came downstairs to make breakfast. I had farm fresh eggs from my mother-in-law's chickens, raw spinach leaves that we keep in the fridge for Grace's rabbit, leftover Roma tomatoes from making The Pioneer Woman's chicken tacos, and a variety of low fat cheese blends. Omelets sounded good, but I knew Chels and I were both in the mood for something light, so I didn't reach for the sausage or ham in the freezer. Instead, I Googled my ingredients and found about ten different tasty-looking omelet recipes. Some involved feta cheese, which I had but was low on, and some involved dill weed (a story for another time). I ended up just deciding that the ingredients obviously went well together and plunging ahead. What I ended up with is similar to a variety of recipes out there, but probably most closely resembles this one at Reader's Digest Asia.

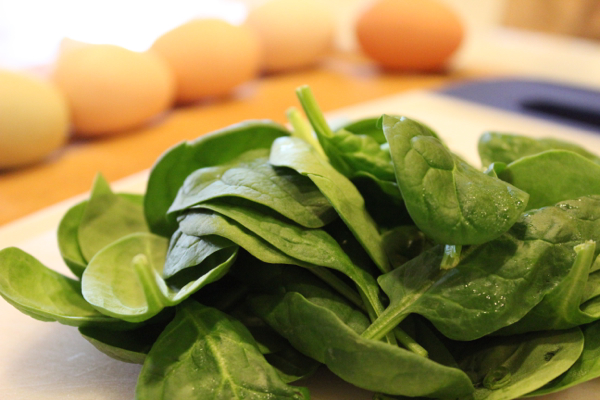
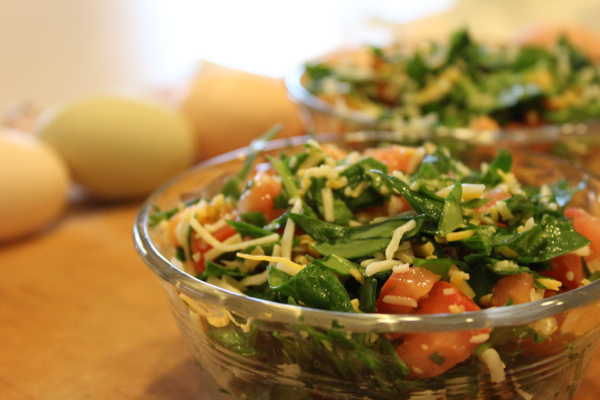
spinach omelet
Raw spinach leaves are the most awesome kind of green
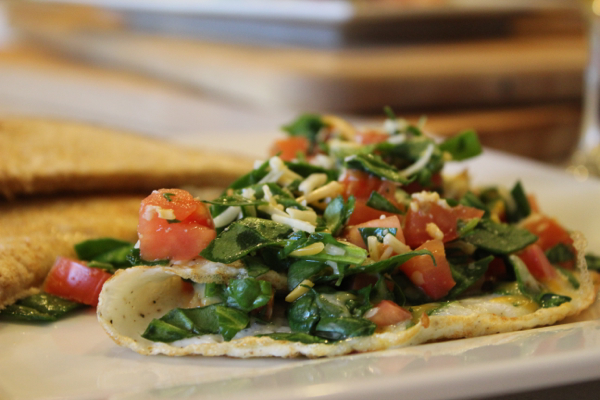
tomato omelet
Colorful food tastes better
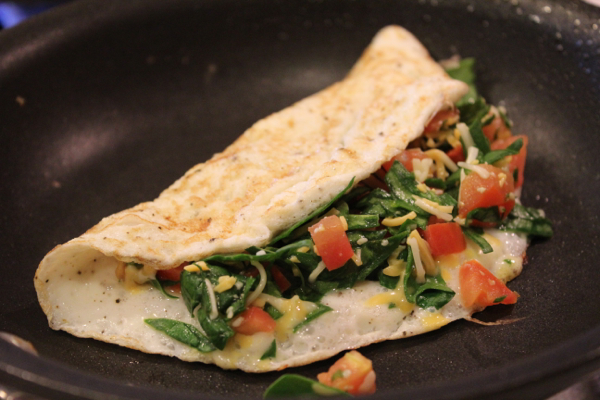
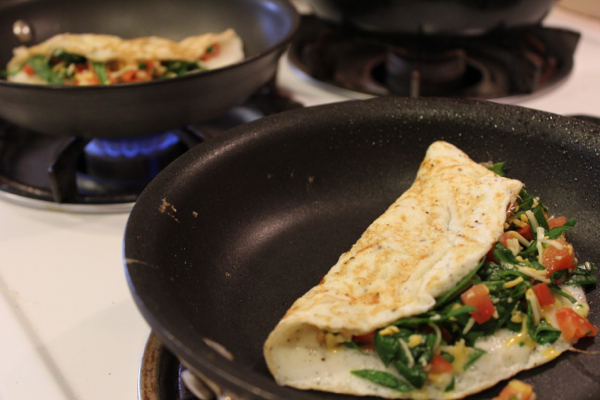
healthy spinach tomato omelet
I need to get those cast iron skillets you can eat out of...
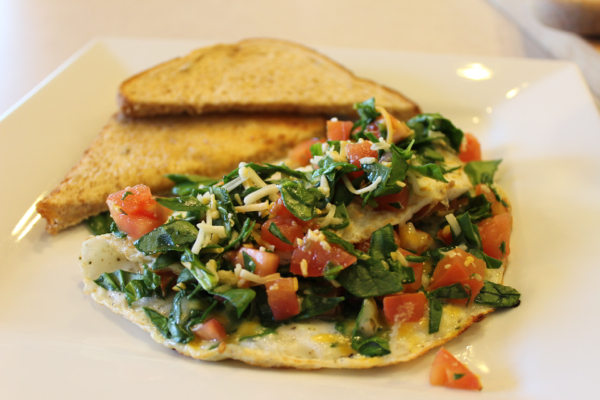
tasty low calorie omelet
Even the kids liked them - no kidding!

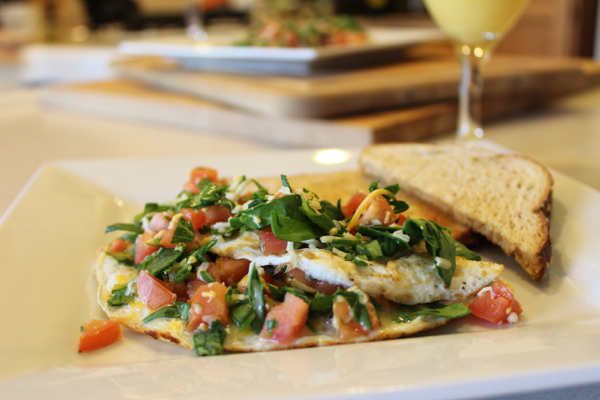
The beauty of this recipe is threefold: it looks incredibly appetizing, with it's beautiful color palate; it tastes delicious and won't weigh you down at only about 120 calories; and it's quick, cooking up in about ten minutes. As an aside, I would definitely recommend keeping spinach and Roma tomatoes around the house - they're versatile and healthy ingredients that are amazing to have nearby when you're trying to come up with something yummy on the fly. The acid test for these omelets, of course, was when I made them again on Monday morning with the girls at home. A four-year-old and an eight-year-old can put any healthy recipe to the test. The verdict? They loved it, both cleaning their plates! As a secondary aside, 120 calories isn't a lot if you're (a) a growing child or (b) planning some physical activity - such as going to the gym - later in the day. We supplemented with multigrain toast and orange juice. That doubles or even triples the calorie count, but those are pretty good calories. My estimate of the calorie count says 112, but I know this is approximate, so I rounded up to 130. Enjoy!

low calorie spinach tomato omelet

130 Calorie Egg White Omelet with Spinach and Tomatoes
This omelet is so delicious, you won't be able to believe it has fewer calories than the piece of toast at its side!

Servings: 2

Prep Time: 5 minutes
Cook Time: 5 minutes
Total Time: 10 minutes

Ingredients
6 egg whites
1 cup chopped spinach leaves
1 diced Roma tomato
ground pepper
4 tablespoon (¼ cup) low fat Mexican cheese blend

Directions

  1. Place three egg whites each in two small bowls. Pepper to taste. Beat until small stiff peaks form.
  2. Place ½ cup spinach, half Roma tomato, and 2 tablespoon cheese into one small prep bowl. Repeat for remaining ingredients in second small prep bowl.
  3. Coat two 8" skillets lightly with non-stick cooking spray. Heat to medium heat. Add one bowl of egg whites to each pan, and lift and swirl pan to ensure even distribution across the bottom of the skillet.
  4. Cook for about one minute, using a spatula to lift cooked edges slightly and move uncooked egg white in center of pan to the outside.
  5. Split one prep bowl's vegetable and cheese mixture to between the pans, placing the mixture on one side of each omelet. Fold the uncovered side of the omelet over about ¾ of the way, leaving a portion of the vegetable mixture exposed.
  6. Cook for another one to two minutes, and then slide directly from pan onto plate. Split the remaining bowl of vegetable and cheese mixture between the omelets, sprinkling over the top and serving immediately.
Nutrition Information
Approximate (per omelet)
48 calories - 3 egg whites
3 calories - ½ cup raw spinach
11 calories - half Roma tomato
50 calories - 2 tablespoon cheese blend
112 calories - total

Simple Baked Flan

February 28, 2013 By Joshua Rief Leave a Comment

easy flan recipe

Okay, of all the Latin-themed dishes we make here at Catz, this is easily one of my favorites. For one thing, it's a Latin dessert. We don't make many of those (I'm not brave enough to deep fry ice cream yet!). Secondly, it feels adventurous when you're making it, but it's actually really easy and quite difficult to mess up - it came out basically perfect the very first time I tried it. How one comes up with a recipe this foolproof and tasty for something that can be as tricky as flan is beyond me, but we have someone named "Beth" at Allrecipes.com to thank for it. I've made some modifications each time I've made it, but they are relatively minor. All in all, I'd be hesitant to mess with this formula too much - it's basic, but it is so good!

Let's talk flan for a moment. In some ways, flan is the best of many worlds when it comes to desserts. It incorporates a satisfying amount of sweetness, but not to the point of being overwhelming. It's beautiful to look at, but in a simple, elegant way, not an ornate one. It certainly carries the characteristics of custard, but it literally "stands" on its own, setting it apart from mere pudding. Believe it or not, flan's origins are not Latin American, but Roman. The ancients prepared flan as a savory course, focusing primarily on finding an elegant and versatile way to serve eggs. With the conquest of Spain (the Iberian peninsula at the time), flan spread throughout the European continent, and was eventually carried to Central and South America (and Mexico!) by the conquistadors and those that followed them. It is believed that the Spaniards oversaw the evolution of flan into a sweet dessert, with the Mexican culinary culture perfecting the version we know and love - a custard-like structure with a caramelized sugar topping.
My understanding is that many different varieties and flavors of flans exist - almond, cinnamon, pistachio, chocolate, and pumpkin are a few of the examples I have heard of. Personally, I've only ever prepared and partaken of the traditional Mexican flavor - vanilla. This recipe is for a vanilla flan, of course, but I see no reason you couldn't get creative and substitute some quality almond extract in place of the vanilla extract, for starters. I'm planning on giving it a shot myself soon! In the meantime, though, this is the perfect compliment to finish off any Latin-themed meal. Next time you serve tacos, enchiladas, burritos, chimichangas, tortas, or flautas, try this as your dessert! Here's a disclaimer: if you've grown up making traditional Mexican or Spanish flan, or you've perfected your authentic flan-making skills over the years, this recipe is probably not for you. However, if flan is something you've only ever ordered at Chevy's or salivated over at your local Mexican restaurant, this is a great way to get comfortable serving up a special Latin treat.
The flavor you're looking for in this recipe is predominantly vanilla. I've increased the vanilla extract in this recipe 50% from the original as I've experimented with it, and I think this is the sweet spot between hints of vanilla and overwhelming vanilla. If you decide to try another flavor, you'll probably have to start from ground zero as far as figuring out how much to use. The ingredients are so simple and inexpensive (other than the vanilla), you can certainly try it out multiple times.
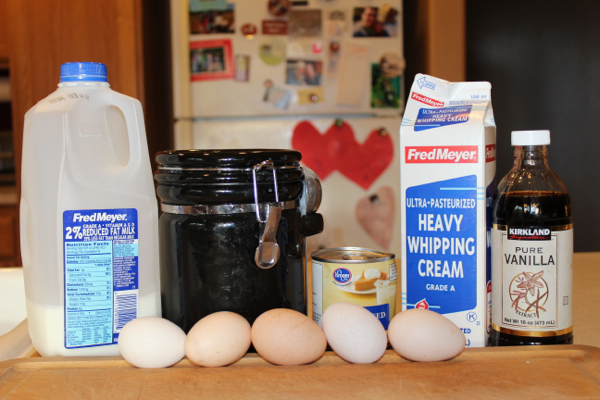
flan ingredients
Yes, those hearts on the fridge in the background are from my daughters. They made them for each other during craft time at the library! The mystery black canister? That would be sugar.
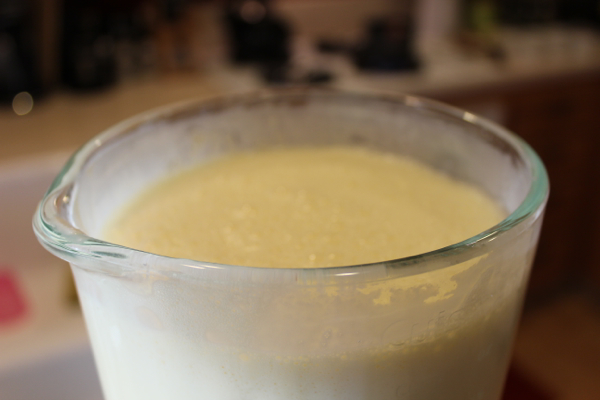
flan recipe ingredients
Foamy and frothy flan mixture!
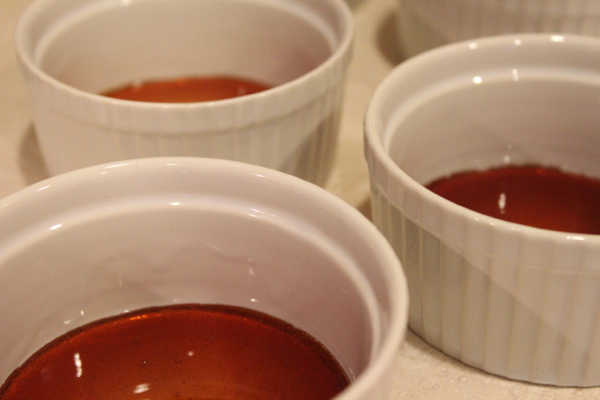
flan topping
We make our flan upside down!
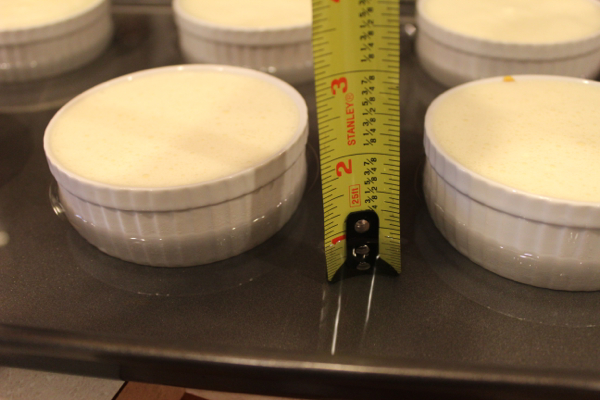
how to make flan
Why the measuring tape? Read on to the recipe to find out!
easy way to make flan
The flan turns this beautiful color when it's ready to take out of the oven
I always prepare and serve my flan in ramekins as individual portions. There a couple of benefits to this. First, it's really cute (hey, what can I say?). Secondly, it cooks faster and is easier to transfer to a plate without destroying. Lastly, it makes it really easy to determine exactly how many you're goingto be able to feed. All of that being said, one large flan makes for a very impressive presentation, so if you feel ambitious, make the appropriate modifications and go for it. Keep in mind that ramekins are all slightly different sizes, so you may have a bit of the flan mixture left over. ⅔ cup of sugar makes enough caramel sauce for about six ramekins that are three inches in diameter, but the flan mixture would probably fill about eight that size. I only have six, so I didn't worry about it, but if you have more, I would use a full cup of sugar for your sauce.


One last note before we get into the recipe. When you're making the caramel sauce, resist the temptation to stir. Swirl, shake a bit, lift from the fire as needed, but don't stir. It only makes the sugar start tocrystalize, and you'll have toremelt it. You're really going to feel like you should stir (unless you've done this before), so maybe have a second person stand with you in the kitchen during that part for the sole purpose of keeping spoons out of your reach. Just a thought!

flan recipe


Simple Baked Flan
Adapted from Allrecipes.com
This is a fun, easy way to add authentic-tasting and looking flan as a dessert to any Latin-themed meal!
Servings: 6-8 (depending on ramekin size)
Prep Time: 15 minutes
Cooking Time: 45 minutes
Total Time: 90 minutes
Ingredients
5 eggs
1 cup milk
2 cups heavy cream
⅔ - 1 cup sugar
1 can sweetened condensed milk (14 oz)
1 tablespoon pure vanilla extract
Directions
  1. Begin by adding eggs, milk, heavy cream, condensed milk, and vanilla to blender. Blend on high for one minute. Set aside.
  2. Preheat oven to 350 degrees.
  3. Add sugar to 1.5 qt (1.4L) non-stick saucepan. Heat saucepan over medium heat, swirling and sifting the sugar about to keep it from sticking to the bottom or burning. As the sugar begins to dissolve and turn brown, it may be necessary to hold the saucepan a couple of inches above the flame to keep the sugar dissolving without burning.
  4. When sugar is completely caramelized, liquid, and a deep golden brown with no crystalized solids, immediately pour into ramekins, swirling the ramekins about as you pour to ensure that the caramel sauce coats the bottom of each dish evenly. It is important to work quickly, as the caramel sauce will harden almost instantly upon contact with the ramekins.
  5. Place ramekins in a deep cookie sheet (min 1.5 in) or glass baking dish, spaced evenly. Pour flan mixture from blender into ramekins. The mixture should fill the ramekins almost to the point of overflowing.
  6. Add one inch of hot water to the cookie sheet or baking dish, allowing it to fill in the spaces surrounding the ramekins. Carefully (both the ramekins and the baking dish will overflow easily) place the baking dish in the oven. Bake for 40-45 minutes, or until flan is set and the mixture visible in the top of each ramekin is a bubbly golden brown.
  7. Carefully remove baking dish from oven (water is very hot, and still prone to overflowing) and allow water and ramekins to cool. Depending on environment and time to serve, it may be necessary to refrigerate the flan temporarily to allow it to completely set. If time is limited, ramekins may be placed in the freezer briefly.
  8. Run a small knife around the inside edge of each ramekin to loosen the flan. Turn ramekin upside down on a plate, hold base of ramekin firmly, and shake once or twice to free flan from ramekin. Carefully lift ramekin away from flan. Some caramel sauce may remain in ramekin. Service immediately.

{Skinny} Grilled Chicken and Roasted Broccoli Fettuccine Alfredo

February 27, 2013 By Chelsia Rief 1 Comment

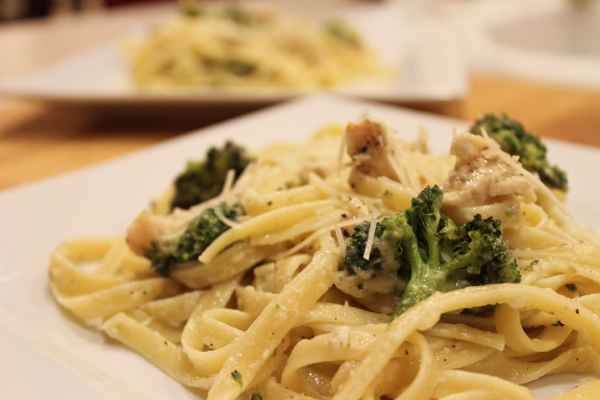
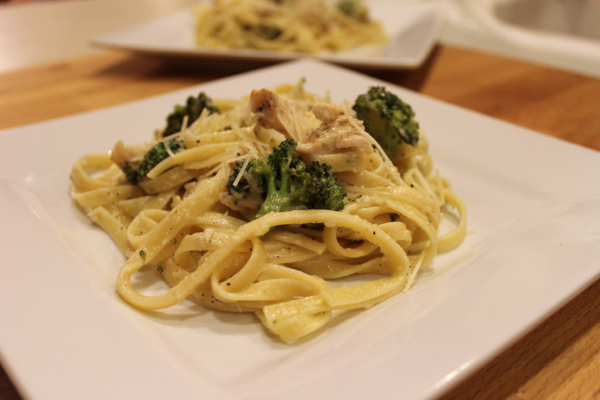
skinny fettuccini alfredo

This whole getting body back after baby thing is pretty slow going. I'm one of those girls that expects results over night, and when I don't get them, I get frustrated. It sure would be nice to be able to bounce back like Gisele has ten weeks after having a baby. I mean, c'mon...what is that all about?! As my husband would remind me in my moments of crying frustration, "Chels, you don't have a personal trainer, a personal chef, and a nanny to watch your kid 24/7." That's very true. I don't. What I do have, though, is a supportive husband who motivates, pushes, and yes, even guilts me into going to the gym (on the days I don't want too).

Josh also has been very supportive in my quest to start initiating even more low-calorie meals into our weekly menus than we had before. I've begun having at least one or two meatless meals a week, and finding lower-calorie dinners that imitate some of our higher-calorie favorites. So far, every dinner has been a hit - so much so, that some of the dinners may be replacing the less-healthy versions.

skinny chicken fettuccini alfredo

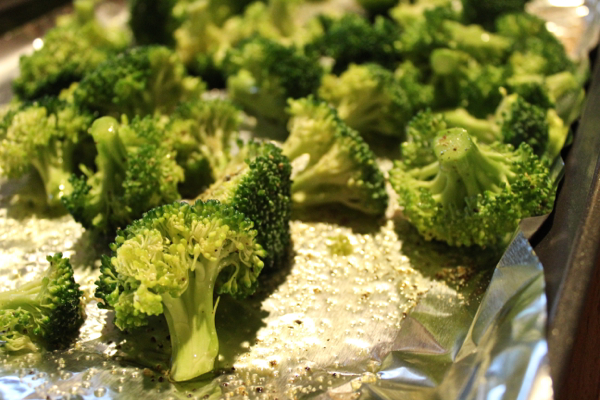
I wouldn't have believed this chicken and broccoli fettuccini alfredo was a low-calorie dinner if I hadn't made it myself. There is absolutely zero butter in the sauce! Yes, you heard me...NO BUTTER! Instead, you are rewarded with delicious grilled chicken (not fried or seared), and roasted broccoli, which maintains its color and nutrients, and an even better flavor.

skinny broccoli fettuccini alfredo
healthy chicken fettuccini alfredo

With dinners like this, I don't feel like I'm missing out on anything. I feel good about what I'm putting into my body and more importantly, my family's body - and guess what? You can feel good about it, too.  You don't even have to be a celebrity with a personal chef to have a yummy and healthy dinner like this. You can just make it yourself!

healthy fettuccini alfredo

{Skinny} Grilled Chicken and Roasted Broccoli Fettuccine Alfredo
Sourced from KitchenJoy
Are you craving the indulgence of Fettuccine Alfredo without the guilt? Then try this lighter version that will make your figure happy.

Servings: 4

Prep Time: 10-15 minutes
Cook Time: 20-25 minutes
Total Time: 40 minutes

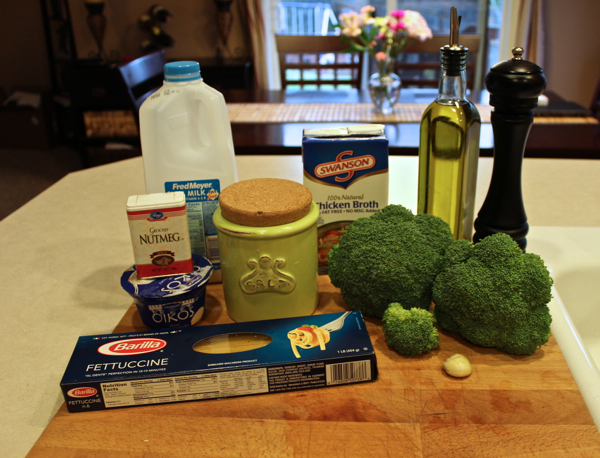
Ingredients
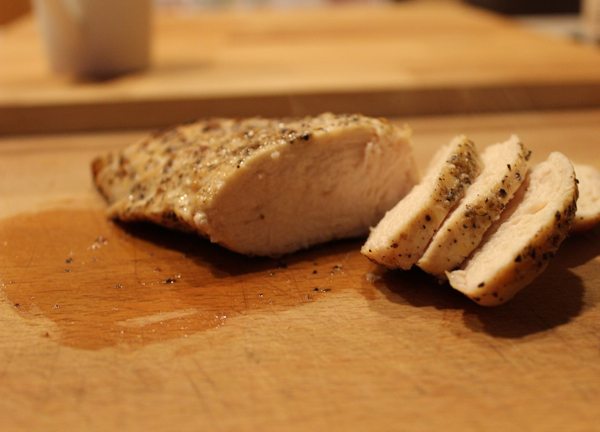
1 boneless, skinless chicken breast, grilled and sliced
2-3 cups chopped broccoli florets
1 lb fettuccine noodles
2 TB extra-virgin olive oil
1 clove garlic, minced
2 TB all-purpose flour
1 cup, low sodium chicken broth or homemade
¼ cup skim milk
¼ cup non-fat plain greek yogurt
¼ teaspoon pepper
⅛ teaspoon nutmeg
¾ cup, fresh parmesan cheese, shredded

Directions

  1. Pre-heat oven to 425 degrees. Start a large pot of water and cook pasta according to package directions.
  2. While water begins to boil, line a cookie sheet with aluminum foil and lay broccoli florets so that they aren't over-lapping each other. Toss with extra-virgin olive oil and salt and pepper to taste. Roast for 20-25 minutes. Set aside.
  3. While the broccoli is roasting, grill the chicken till the juices run clear.
  4. To make the sauce, heat extra-virgin olive oil in a saucepan over medium-low heat. Add garlic, stirring frequently until golden brown, about 2 minutes. Whisk in flour until smooth. Gradually, whisk in broth, milk, yogurt, pepper, and nutmeg. Bring to a low boil, stirring consistently. Lower the heat and simmer for 3-5 minutes, or until sauce has thickened, stirring carefully. Stir in cheese until melted.
  5. Toss broccoli, chicken, pasta, and sauce to combine and evenly coat.

Note: A serving of this pasta dish roughly comes out to around 580 calories. You can lower the calories even more by using whole wheat pasta and more veggies. 

Tuesday's Tidings for February 26, 2013

February 26, 2013 By Chelsia Rief Leave a Comment

Image credit: The Telegraph

1. Sooo, what did you think of the Oscars? I for one, thought the host was annoying. I didn't care for the inappropriate song (The Oscars are supposed to be a family show) and or any of his jokes, nor do I even know who the guy is! I could have gone without the stupid bear from Ted, too. I have two little girls who were watching it and I had to mute the show and explain why I was muting it. It's just stupid.


2. I am so happy Argo won. Josh and I watched it on Saturday and I bit all of my nails off while watching it. A well-deserved win. Ben Afleck's speech totally made me cry!

3. I have not seen The Silver Lining's Playbook. From the majority of the people who I do know that saw it, said the acting was great, but the movie, was long, boring, and slow. Well, I could see that much from the trailer of the movie. But, I do know that Jennifer Lawrence is an excellent actress and probably deserved her Oscar, as did Anne Hathaway for Les Mis...something else I have yet to see. Daniel-Day Lewis's speech was really well done as well. Josh saw the movie and loved it and was happy he won, but super upset the once again, the Academy snubbed Spielberg.

4. Anyone see Life of Pi? Anyone even know what it's about? Yeah, I have no clue either. Why did it win? I don't know, except that I've heard it's visually stimulating.

5.

True Story...Josh put Christian on my head and I said," watch, he's going to spit up in my hair." Sure enough, Josh turned his back to me to get his phone and when he went to take the pic, Christian was spitting up on top of my head. Yes, it was gross! However, we cleaned my roots up and took a pic anyways. If you look closely, my roots look a little damp from washing the upchucked milk out of it. I am a mother and yes, I was not phased by this one bit, lol!

6.

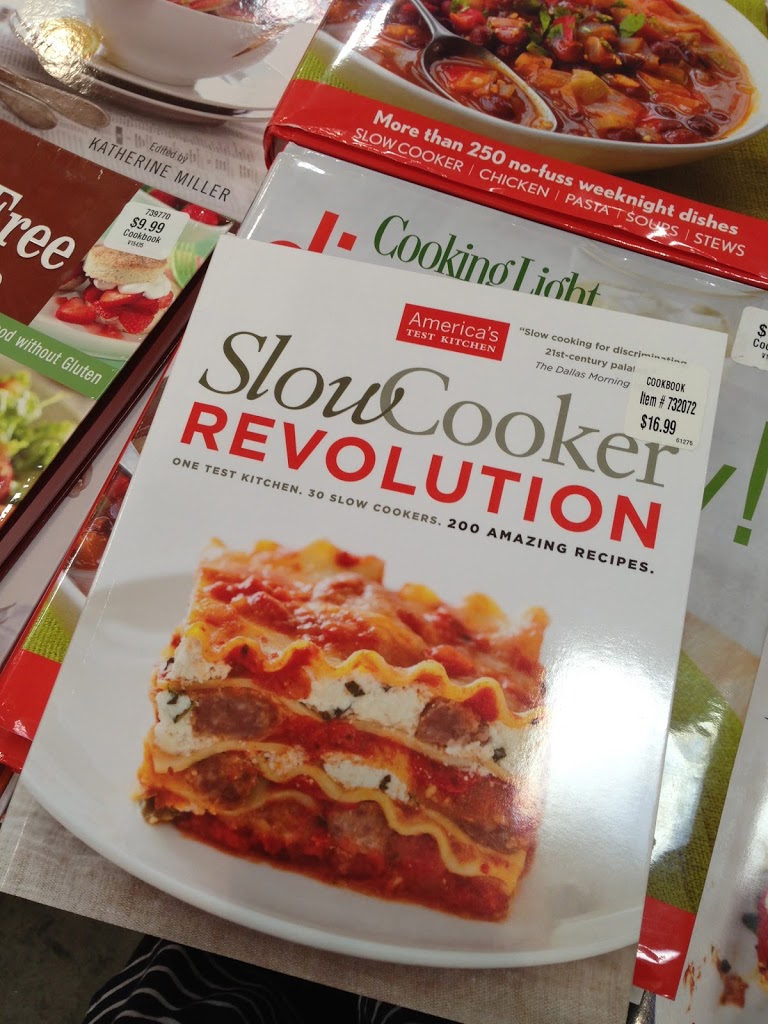
I saw this cookbook at Cosco a few days ago. I really want it! Anyone own it or know if it's good?

7. Over the weekend, we attempted to switch over to WordPress. Obviously, the site still looks the same. WordPress is confusing. No joke! Josh worked on moving things over for 4 hours until I made him stop. Maybe someday, but someday, is not today.

8. Josh and I finally took the plunge and bought a DSLR. We got a Canon, because it's what I wanted and after doing a bunch of research, it turned out that it was the right brand for us. Owning this camera is just as confusing as trying to switch to WordPress. Thank goodness, I have Josh. He has been sifting through the manual reading everything and trying things out so then he can teach it to me. He's also found that Amanda from Kevin & Amanda's site has some really good information and we've been using her posts to educate ourselves.

9.

Check out our crazy birds! They must really LOVE the suet I bought them, because this is just nutty!

10. One last thing about the Academy Awards...I am so stinkin happy Adele won for Skyfall!!! She has so much talent and that song was a well-deserved win! Don't ya think?

Weekly Menu 2/25-3/3

February 25, 2013 By Chelsia Rief Leave a Comment

I can't believe this is the last week of February. Wasn't it just Groundhog's Day? Is St. Patrick's Day really just a few more weeks away? I'm not really ready to say goodbye to February. Call me sappy, but saying goodbye to February means that I've got only a few weeks left with Josh here at home with me. Don't get me wrong, I feel so grateful and blessed to of had so much time with Josh, when other families don't get opportunities like this...by the way, I think every business should offer 12 weeks off (paid) as well. Think of the bonding time there could be for the families. Or how much less stressed new parents would be going back to work. It really just doesn't seem fair to me.


Okay, is it the Oscars or the Academy Awards. What is the official name? I've heard it be referred by both names and I'm confused. I know the little statue is called The Oscar, but why do people say," I'm going to watch the Oscars tonight." Or, "Did you watch the Academy Awards the other night?" I'm so confused...please help unconfuse me.

Monday
Lighten Up Shepards Pie with a side salad
Tuesday
Skinny Chicken Marsala with mashed potatoes and green beans
Wednesday
Southwest Style Quiche
Thursday
(Awana Night)
Crockpot Minestrone Soup and Rolls
Friday
Homemade Pizza
Saturday
Lemon and Dill Chicken with Orzo and Salad
Sunday
Sloppy Joe Enchiladas
Image credit: Vanity Fair

Simple Lemon Pepper Grilled Chicken

February 22, 2013 By Joshua Rief Leave a Comment

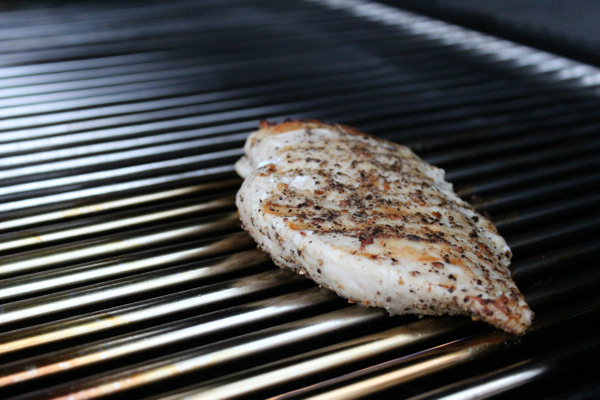
Grilled lemon pepper chicken

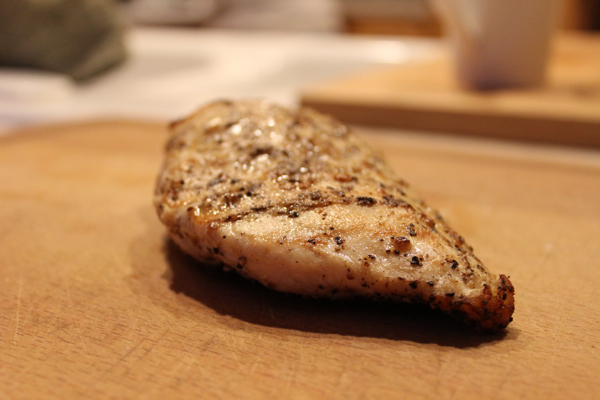
Okay, this is technically more of a continuation of the "grilling basics" theme from yesterday. This lemon pepper chicken isn't something I would recommend making as a main course all on its own - it's my go-to grilling recipe for any meal that needs sliced chicken breast when I feel like grilling it. Making a caesar salad and want to add grilled chicken? This is an easy way to do that. Fettuccine Alfredo with a tender, flavorful bit of protein? Look no further. Point being, when I want to add grilled chicken to my entree without making things complicated, I do it this way. And, hey, it's pretty dang tasty to boot.

You'll need completely thawed chicken breast for this method, so try to plan ahead if you can. Of course, you can use the microwave to thaw the chicken in a pinch, but it's hard to get the center thawed through, and you run the risk of drying out the ends.

Grab a shallow glass baking dish, and lay the chicken breast out in it completely flat. Drizzle the chicken in olive oil, allowing the excess to gather in the bottom of the dish. Use a pepper mill to grind fresh black peppercorns over the chicken, and then sprinkle with salt. Use a spice grinder to sprinkle the chicken with a basic lemon pepper mixture. Use tongs to turn the chicken breast over and repeat the process for the other side.

Grilled lemon pepper chicken

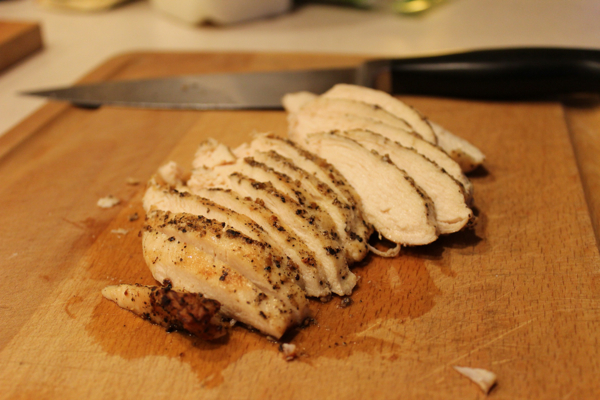
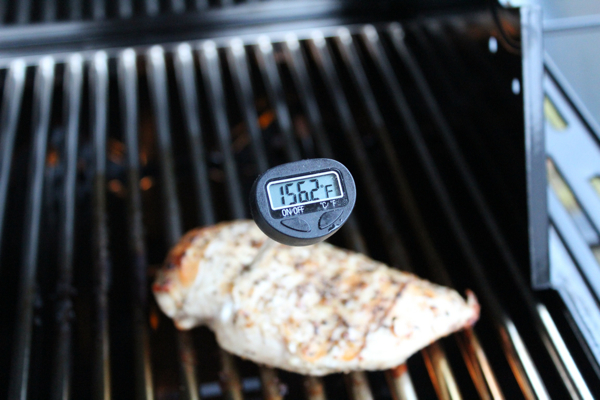
Let the chicken sit in the olive oil while you preheat the grill - about ten minutes. Grill the chicken breast on an oiled grill grate on high heat for about six minutes per side, or until the the center reaches an internal temperature of 165 degrees. Try to time the grilling with the completion of whatever dish you're adding it to, so that you can slice and serve the meat hot. Unlike beef or pork, there's no need to let the chicken rest before slicing it - when the temperature's right, use tongs to transfer it to the cutting board and make nice, clean slices with a chef's knife across the chicken breast (if you're planning to serve the chicken breast sliced in a highly visible way - on top of rice, for example - a slight diagonal angle to the slice improves the visual appearance). As always, the juices from the chicken should be running clear, or there may be something wrong with your meat thermometer!

And that's it! Slice it, dice it, serve it in hot pastas and cold salads - it's a simple, universal recipe that takes no time at all to prepare and goes with a wide variety of meals. Of course, feel free to change up the spice mixture to suit the dish you're making - enjoy!

Grilled lemon pepper chicken recipe

Simple Lemon Pepper Grilled Chicken
A highly versatile basic grilled chicken recipe that can be paired with a wide variety of entrees. 

Servings: Depends on dish

Prep Time: 5 minutes
Idle Time: 10 minutes
Cook Time: 10-15 minutes
Total Time: 25-30 minutes

Ingredients
1 boneless skinless chicken breast
2 tablespoons olive oil (approx)
½ teaspoon freshly ground black peppercorns (approx)
¼ teaspoon salt (approx)
½ teaspoon freshly ground lemon pepper (approx)

Directions

  1. Place chicken breast flat in the bottom of a shallow glass baking dish and drizzle with olive oil. 
  2. Sprinkle both sides of chicken breast with ground peppercorns, salt, and lemon pepper, and allow to stand for 10 minutes. While chicken breast is standing, preheat grill to high heat.
  3. Grill approximately six minutes per side, or until chicken breast reaches an internal temperature of 165 degrees and juices run clear.
  4. Transfer to cutting board to slice and serve immediately. 

Grilling Basics: The Meat Thermometer

February 21, 2013 By Joshua Rief Leave a Comment

How to use a meat thermometer

Believe it or not, we're closing in on the beginning of grilling season. Yes, at least here in the evergreen north Willamette Valley, spring seems to be setting in a bit early this year. No, we're not breaking out shorts and shades (that comes in about August), but the constant drizzle is giving way to persistent showers, and the ever-temperate level of mercury in the thermometer is rising ever so slightly, from its normal low 30's into the mid 40's. Thus, I declare grilling season (the only season that truly matters) to be right around the proverbial corner.

In celebration of its advent, I'm planning a few posts on the basics of grilling. Let's be clear: there are a wide variety of grilling basics I have yet to master, or even attempt! However, I have a few things I'm pretty comfortable with, and I like to think I generally know my way around a grill (or at least know what I'm not good enough to mess with), so I'll share some tidbits as they return to me after the long winter hibernation.

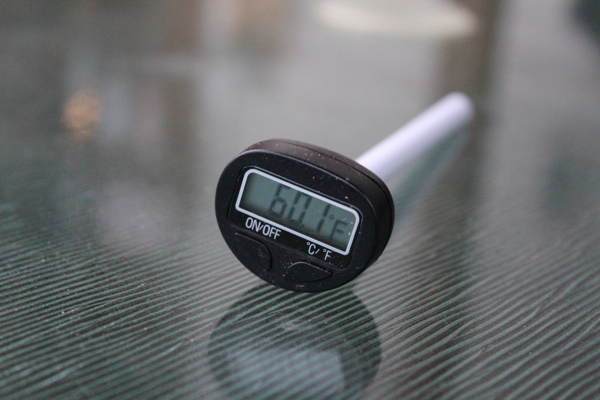
Believe it or not, last year was the first year I purchased a "real" grilling meat thermometer. I had a simple beef thermometer that I used during my massive burger phase, but I never took the time to purchase a decent, digital meat temperature taker! After visiting my grandpa in Southern California last May and using his to grill a lime-chicken-cilantro-quinoa-avocado feast for thirteen people, I knew I had to have my own. Luckily, it's one of the least expensive purchases you'll ever make for your grilling ensemble - a nice one is about $15-20, while inexpensive ones (which will work just fine) go for about $6-10 at places like Harbor Freight Tools.

Using a meat thermometer couldn't get a lot easier. Figure out what temperature you're supposed to get the interior of the meat to, grill for a while, and then stick the thermometer in and see how close you are (you don't want to puncture meats like steak and chicken too often, or they'll start to lose their juiciness, so follow the recommended timeframes before you check). Here's what you're shooting for (at a minimum), according to the FDA:

  • Beef, veal, lamb, & steak (pork is the same, with a 3 min rest time): 145° F (63° C)
  • Ground meats, including the above and pork, but not poultry (see below): 160° F (71° C)
  • Poultry, including ground: 165° F (74° C)
If you want something to print out and keep with your grilling equipment, here's a nifty PDF that the government put together just for you (actually, they put it together for expectant moms, but I don't think they'll mind). I would add a couple of caveats to the FDA's temperature recommendations. First, remember that protein will continue to cook internally for a few minutes after you take it off the grill. So, for example, if you're shooting for 145 degrees on your steak, you probably want to take it off the heat at about 135 and let it rest. Also, these are recommended "safe" temperatures - meaning, you may prefer the taste at a slightly lower temperature, which is probably fine, but you experiment at your own risk.
The most important point I can make when it comes to the meat thermometer is this: use it with chicken. It's important to get beef to it's minimum temperature, but eating a rare steak probably isn't going to kill you. Raw chicken? That's another story. Get a thermometer, even a cheap one, and use it. Chicken breast, especially, can be tricky. Every breast is a different thickness, and the fact that it looks tasty on the outside is exactly no indicator of how done it is inside. Even if you lay aside the safety concerns (don't), the impact to your meal can be just as severe. If you don't get it right, cut it open to see if it's done, put it back on the grill, you're not only wasting time, you're going to have one dry chicken breast.
Get grilling!
How to use a meat thermometer

Tuesday's Tidings for February 19, 2013

February 19, 2013 By Chelsia Rief 1 Comment

1. It's Tuesday and I'm still reeling from Sunday night's finale...if you want to call it that. Finales in my opinion are supposed to have that firework mentality. This was just a tear-jerker. But in fairness, I knew it was coming. When my sister in law bought season 3 and watched the last episode last week and fb'd her thoughts, I knew right away that someone else was going to bite the dust. In fact, my first guess, was that it was Matthew. That was even before I heard the rumors of his contract ending. I texted Jenn (my sister) and said," Matthew dies doesn't he?" She wouldn't confirm and that was when I knew I was right. So when I watched the show last night, I already knew in my gut it was him being killed off. If you haven't read this post yet on The Pioneer Woman's blog, you should. It's pretty funny.

2. Yesterday, Christian had his 2 month well checkup. My little chap is 12 lbs!!! Apparently though, that is still considered small and normal for him. He had 3 shots and did not care for them at all. I made Josh take him since Grace and I are fighting off a cold and I feel lucky that for once, I didn't have to be the parent to silently watch my kid suffer at the needle in the nurses hand and be helpless to stop it. I've been the parent who's had to stare into my child's eye with that look of betrayal. I did it with both of the girls...and since Josh still has a few weeks left of his paternity leave, it was his turn!

3. Josh bought a new grill this week. Don't even get him started on how excited he is to play with it!

4. So yeah. I'm sick. AGAIN! WHY IS THIS HAPPENING TO ME??? Honestly, it's not a bad cold. Just awfully inconvenient and really really stupid. So tired of the head congestion!

5. I was pretty proud of myself Sunday night while watching Downton Abbey. I really wanted a cookie. I don't keep these kinds of sweets in the house, unless it's something I've baked and I haven't baked since I made the heart shaped cheesecakes for Valentine's Day. I wanted cookies or something and Josh offered to drive out and get me something (bless his heart) but I declined and instead we snacked on multigrain crackers and brie. Dare I say it was better than the cookies and ding dongs I wanted.

6. St. Patrick's Day is coming up and this year I really really want to try corned beef. I've never had and I'm not exactly sure what it even is. But I'm looking for a good recipe to try it out. If you have a recipe, would you post it in the comments for me?

7. A strange thing happened to me a few weeks ago. My US Weekly app on my phone was acting up and being really strange so I deleted it with the intent of downloading it again. I have yet to do it and it's weird...I don't really miss the celebrity drama. Isn't it all about Kim Kardashian's pregnancy and divorce anyways?

8. BTW- I'm kind of obsessed with The Walking Dead. I've only seen like 2 episodes, but I love zombie movies a lot!

9.  I bought Josh Skyfall for V-day. I have to admit, it was pretty good! I was kind of thrilled that this movie killed off the Bond girl early on, lol!

10. I'm kind of curious about the new Masterpiece Classic show with Jeremy Piven starting in March...Mr. Selfridge. Piven is a great actor and it looks like it could be really good. Who else is interested in it?

  • « Previous Page
  • 1
  • …
  • 130
  • 131
  • 132
  • 133
  • 134
  • …
  • 159
  • Next Page »

Welcome!

HI! We're Chels & Josh, and this is Catz in the Kitchen! Let's find love around the table, one recipe at a time!

More about us

Popular

  • If you've ever thought about turning your cement porch into a wood deck, it's surprisingly easy! Here are some thoughts, tips, & photos from our experience!
    DIY: Turning a Cement Porch Into a Wood Deck
  • Ever thought about turning your concrete slab into a covered deck? It's definitely doable! Here are some thoughts, tips, & photos from our experience!
    DIY: Turning a Concrete Slab Into a Covered Deck
  • DIY Window Box and Shutters
  • DIY Under the Stairs Closet Pantry Conversion
  • DIY Home Library Built-In
  • Grilling these simple chicken foil packets is an easy, tasty way to get a flavorful, healthy meal on the table, whether you're camping or at home!
    Loaded Chicken Foil Packets

Recent

  • One-Pot Turmeric Chicken & Rice
  • Chicken and Broccoli Stir-Fry
  • Catz on the Move: 5 Nights in Paris with 5 Kids
  • Simple Baked Oats
  • Almond Ricotta Cake
  • Molasses Cookies

Footer

↑ back to top

About

HI! We're Chels & Josh, and this is Catz in the Kitchen! Let's find love around the table, one recipe at a time! Read more

Socials

Contact

  • Contact
  • Privacy Policy

Catz in the Kitchen is a participant in the Amazon Services LLC Associates Program, an affiliate advertising program designed to provide a means for sites to earn advertising fees by advertising and linking to amazon.com.

Copyright © 2025 Catz in the Kitchen

19 shares