
Catz in the Kitchen

  • Home
  • About
  • Recipes
    • All Recipes
    • Healthy
    • Italian
    • Mexican / Latin
    • Gluten-Free
    • Vegetarian
    • Grilling
    • Desserts
  • DIY
  • Featured
  • Contact
menu icon
go to homepage
  • Home
  • About
  • Recipes
    • All Recipes
    • Healthy
    • Italian
    • Mexican / Latin
    • Gluten-Free
    • Vegetarian
    • Grilling
    • Desserts
  • DIY
  • Featured
  • Contact
search icon
Homepage link
  • Home
  • About
  • Recipes
    • All Recipes
    • Healthy
    • Italian
    • Mexican / Latin
    • Gluten-Free
    • Vegetarian
    • Grilling
    • Desserts
  • DIY
  • Featured
  • Contact
×
Home

Huevos Rancheros Fried Bagel Sandwich

June 14, 2013 By Joshua Rief Leave a Comment

Huevos Rancheros Fried Egg Bagels | Catz in the Kitchen | catzinthekitchen.com | #bagels #huevosrancheros

It's Friday, and that means it's time for our third and final offering for Catz' fried egg sandwich week! We've gone completely off the deep end with this one, and can personally testify that the deep end is a wonderful place to be. As has oft been stated, Chels and I both have a distinct weakness for Latin and Latin-inspired cuisine, and this certainly falls into the latter category. After all, is there anything Latin about bagels? Yeah, not so much. Well, not yet...


To those of you familiar with huevos rancheros, and I imagine that's most of you, the phrase probably makes your mouth water. The phrase literally translates to something along the lines of "ranch-style eggs," meaning there are a thousand different interpretations of what constitutes "ranch-style." In it's most basic iteration, huevos rancheros is generally some sort of dish involving fried eggs served over tortillas, topped with a salsa mixture. Beyond that, the creative license is basically endless. I've probably experimented with huevos rancheros five or six times, and my only regret is that I don't do it more often.Huevos Rancheros Fried Egg Bagels | Catz in the Kitchen | catzinthekitchen.com | #bagels #huevosrancheros


When we got to our third Sunday of the new "fried eggs and smoothies" tradition we mentioned earlier this week, I told Chels I had a crazy idea I wanted to try. Wonderful wife that she is, she indulged me, and we added a jar of black bean and corn salsa and freshly baked plain bagels to the grocery list that weekend. We always have eggs, some random mexican blend of shredded cheese, and Latin seasonings in the house, so I didn't need to grab any of that. Oh, remember Aruguzilla? Yeah, well, the humble cilantro plant we placed right next door isn't so humble anymore. The thing is literally three feet high. How in the heck am I ever supposed to use that much cilantro? I guess I can start by adding it to everything, this dish included (okay, maybe not everything - cilantro smoothies aren't sounding particularly appetizing).


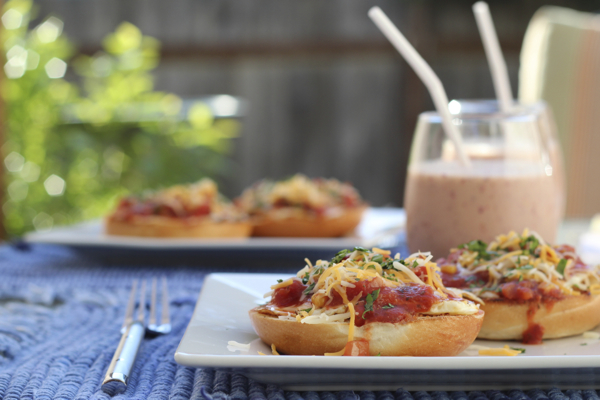
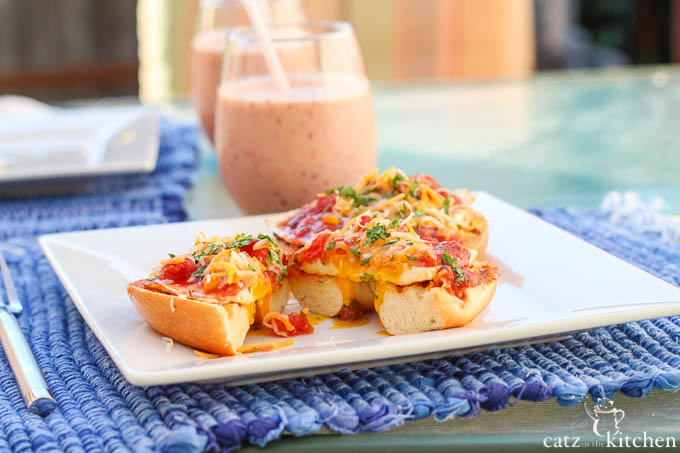
Huevos Rancheros Fried Egg Bagels | Catz in the Kitchen | catzinthekitchen.com | #bagels #huevosrancherosAt any rate, my experiment turned out better than I expected - a lot better. In fact, I want to get up, go to the kitchen, and make more of these right now. Seriously tasty. And really simple, actually. The flavors are complex, but the preparation is incredibly quick. This is definitely a meal you could throw together on the fly, as long as you keep some of the basic ingredients around. So, in the end, is a grilled bagel topped with a fried egg, salsa, cheese, and cilantro stretching the definition of a fried egg sandwich too far? Maybe. I'll make you a deal - you can call it whatever you want, as long as you try it. Oh, and at only 265 calories each, you can probably afford to try a couple.

Huevos Rancheros Fried Egg Bagels | Catz in the Kitchen | catzinthekitchen.com | #bagels #huevosrancheros

Huevos Rancheros Fried Egg Bagel Sandwich

Yield: 4
Prep Time: 5 minutes
Cook Time: 10 minutes
Total Time: 15 minutes

If you're wanting to add some hearty Latin flavor to your fried egg, this is a great place to start.

Ingredients

  • 2 large deli-style plain bagels, sliced in half
  • 4 eggs
  • ¼ cup Mexican blend shredded cheese
  • 1 cup salsa
  • 1 tablespoon chopped fresh cilantro
  • ancho chile powder
  • 1 tablespoon canola oil
  • butter for pan

Instructions

  1. Heat grill pan to medium heat. Heat large skillet to medium heat.
  2. Add salsa to small saucepan and heat slowly over low heat.
  3. Brush canola oil lightly on cut side of bagels. Place in grill pan and grill lightly.
  4. Melt a small amount of butter in skillet, and crack eggs into it delicately, avoiding disturbing the yolk. Sprinkle the eggs with ancho chile powder. When eggs are slightly brown on the bottom and well set, turn gently and cook for ten seconds on yolk side. Remove from heat and place on top of bagels.
  5. Pour warm salsa over the top of each egg, and top with 1 tablespoon of shredded cheese. Sprinkle cilantro on top and serve immediately.
Nutrition Information:
Yield: 4 Serving Size: 1
Amount Per Serving: Calories: 353Total Fat: 15gSaturated Fat: 5gTrans Fat: 0gUnsaturated Fat: 8gCholesterol: 201mgSodium: 879mgCarbohydrates: 40gFiber: 2gSugar: 9gProtein: 16g

Nutrition information isn't always accurate.
© Catz in the Kitchen
Cuisine: Mexican / Category: Entree


Gourmet Open Face Fried Egg Sandwich

June 13, 2013 By Joshua Rief Leave a Comment

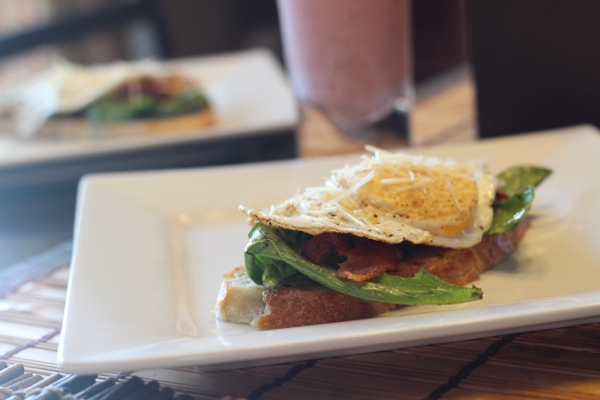
Okay, time for day two of fried egg sandwich week here at Catz! Though tomorrow's sandwich is a bit of a radical departure, today's is a simple extrapolation of the ideas that we built into yesterday's. Call it a process of refinement, if you will. What were the key ingredients of yesterday's sandwich? Arugula tossed in olive oil and balsamic vinegar, bacon, and cheese. So, what happens if we change the type of bread, remove the top piece, and change out the cheese? Believe it or not, we get a dramatically different "fried egg" experience...

On our second Sunday of adopting my sister and brother-in-law's traditional of fried egg sandwiches and smoothies, I was craving some freshly baked "artisan" bread. That happens to me a lot, actually. Luckily, most of the supermarkets here in town have bakeries in them, and most of those bakeries actually do bake fresh, high quality product on a daily basis. Our local Fred Meyer produces a fantastic artisan Italian loaf, and that's what I picked up. This particular batch had a really strong, crumbly crust around the outside and a beautiful, oblong shape to the loaf itself. As I looked at the loaves in the baskets outside the bakery, I wondered how the flavors we had developed in last Sunday's fried egg sandwiches would fare in an open-faced "salad" style application. There was only one way to find out, so I grabbed the loaf and headed home to give it a try.

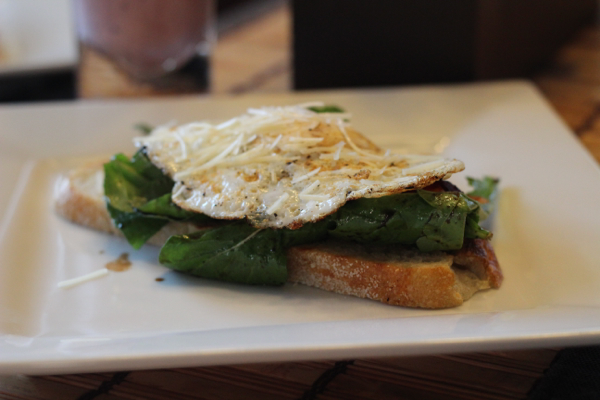
I love the taste and texture of grilled bread, so I started out by getting some light grill marks on the sliced Italian loaf, using olive oil this time instead of butter. On top of the grilled bread, I piled on a more generous, salad-like helping of the same arugula mixture, bacon, the fried egg, and sprinkled parmesan cheese over the top. The result? Exactly as I had hoped! Whether we chose to eat them by picking them up with our hands or by cutting into them with a fork (we did a little of both), the punctured egg yolk ran down over the bread, negating the need for condiments like mayonnaise or horseradish. If you're looking for a more refined take on a fried egg sandwich, or one that's just a bit lower in calories, this is right up your alley.

Gourmet Open Face Fried Egg Sandwich
Ready for a slightly more "Italian" fried egg sandwich? Try this salad-like entree!

Serves: 4

Prep Time: 5 minutes
Cook Time: 10 minutes
Total Time: 15 minutes

Ingredients
4 slices crusty bread, preferably Italian
4 eggs
8 slices bacon
4 tablespoon shredded parmesan cheese
2 cups arugula
2 tablespoon extra virgin olive oil
1 tablespoon balsamic vinegar
lemon juice
sea salt
black pepper

Directions

  1. Add arugula to a medium bowl. Add 1 tablespoon olive oil, balsamic vinegar, a splash of lemon juice, and a sprinkling of sea salt. Toss by hand.
  2. Pan fry bacon to desired doneness.
  3. Brush remaining olive oil on one side of each slice of bread.
  4. Heat grill pan to medium heat and lightly grill bread on oiled side. Keep warm in 200 degree oven.
  5. Melt a small amount of butter in a large frying pan. When heated to medium heat, crack eggs into pan carefully, avoiding disturbing the yolk. Grind black pepper lightly over eggs while frying.
  6. When eggs are well set, and underside is lightly browned, flip eggs gently. Fry for an additional ten seconds on the yolk side, and then remove from heat.
  7. Lay one slice of bread grilled side up. Top with ½ cup of arugula, two slices of bacon, one egg, yolk side up, and a tablespoon of parmesan cheese. Serve immediately.
Nutrition Info
Approximate, per sandwich
Calories: 339
Carbs: 29 g
Fat: 17 g
Protein: 18 g
Sodium: 669 mg
Sugar: 1 g

Tuesday's Tidings for June 11, 2013

June 11, 2013 By Chelsia Rief Leave a Comment

1. Josh got his Father's Day gift early this year. He's had his eye on this lens for our Cannon DSLR since we bought the camera at the beginning of the year...and finally it dropped in price. I told him I would either chip in money for the lens or for some of his Weber wishlist items. He chose the lens and I'm so glad he did because it is amazing! On one of our family walks last week, we got this picture of a bullfrog that lives in the pond across from our neighborhood. We wouldn't of been able to get this shot with our other two lens's, so I'm thrilled with this one!

2. I'm currently obsessing over ice cream. I want to make THIS, THIS, and THIS!


3. Father's Day is Sunday and we all the ladies in the church make or bring pies for the dads. This year, Josh has requested a berry pie, so I'm making a Huckleberry Pie and I'm going to make my dad something special too...but in case he reads today's post, I can't  mention it, lol!

4. I started my new Jillian Michaels DVD yesterday. I'm doing the 6 week 6 pack one and I woke up SOOORE! OMG- You guys! Burpees are going to be the death of me!

5. My daughter (referring to the one in hot pink, not the little one)...She likes to photobomb!

6. Sunday morning Josh wakes me up out of a sound sleep to tell me to start getting ready for church. I do so, ever so slowly, because A) Duh, I'm still waking up and B) I'm still plagued with stuffy nose allergies. Josh said he didn't know what was taking me so long to get out of bed, and then he heard me "HONKING" in the bedroom. (Dude, I was blowing my nose and he sounds like a foghorn when he does it).  But then he said," Even Swans honk!" LOL! So...I'm a honking Swan. I guess I could be called something worse, lol!

7. My girls are leaving for a week long camping trip next Monday. I'm already getting sad about it. It is way to quiet when they aren't here.

8. Portland is having a Food Cart Tour and I want to go so badly next Saturday!! Wouldn't that just be so much fun???

9. In our attempts to do more exercise in the great outdoors, Josh spotted a Kayaking groupon deal. At first, I was like, "Heck No! I don't want to get wet!" And then I was like," Bring it on!" So I'm trying to get Josh to buy it. It sounds like so much fun!

10. I just wanted to remind you all that tomorrow starts our Fried Egg Sandwich week! So check it out, we've got 3 yummy (original) recipes coming your way!

Weekly Menu 6/10-6/16

June 10, 2013 By Chelsia Rief Leave a Comment

How was everyone's weekend? Ours was really good! We had Grace and Eden's best friends come over for the day and spend the night. We spent most of the day at the Oregon Zoo and we had a blast!!! We watched Wreck It Ralph after dinner and what a cute movie! Have you seen it? I really want to buy it now!


This week, you guys, we are bringing you three days of off the hook fried egg sandwiches recipes! We've been playing around with different ideas of them and they have turned out super yummy, so we just have to share with all of you! So make sure you come back here- Wednesday, Thursday, and Friday for some awesome fried egg sandwich recipes!

Monday
Oriental Chicken Salad with rolls
Tuesday
Lasagna Casserole with a Garden Salad, and Garlic Bread
Wednesday
Balsamic and Brown Sugar Pork Chops with a Baked Potato 
and Green Beans
Thursday
Crockpot Honey Sesame Chicken with Rice and Corn
Friday
Hot Dogs and Fresh Fruit
Saturday
Taco Pizza with a Salad
Sunday
(Father's Day)
Dinner is up in the air....not sure what we're doing! 

Chicken Piccata with Rosemary Ciabatta

June 5, 2013 By Joshua Rief Leave a Comment

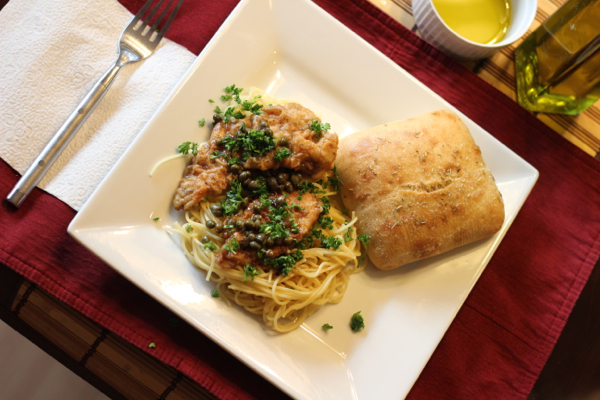
For me, at least, chicken piccata always seemed intimidating. It's really a very simple Italian staple, but I think the complexity of the flavors in the sauce coupled with the attractiveness of the finished product always made me feel that it was something far beyond my skill level. Nevertheless, one night shortly after Christian was born, the girls were over at their grandparents, the baby was sleeping, and I wanted to make a special meal for Chels and I to enjoy during our few minutes of alone time. She is wild about chicken piccata, so I thought I'd give it a whirl, with no promises for a pleasing result! As I alluded to at the beginning of this paragraph, it's much easier than it appears, but every bit as enjoyable as I'd hoped.

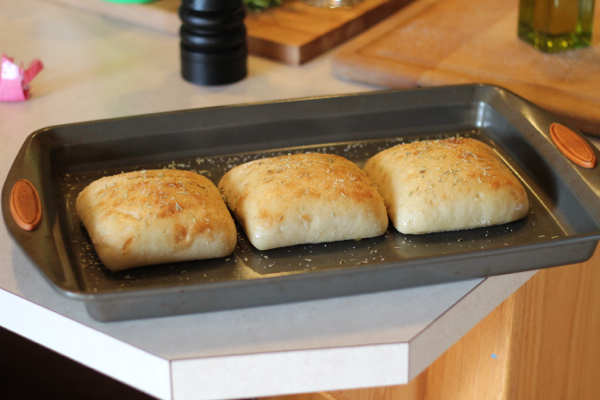
For a perfect side, Chels and I prepare rosemary and sea salt ciabatta rolls, which we then tear chunks from and dip in olive oil mixed with freshly ground black pepper. Unless you have a particular aversion to ciabatta (and in that case, what?!), I strongly recommend pairing these two together during your first go around with the piccata - they're a wonderful combination, both simple and, to my American palate anyway, strikingly Italian. We got the idea for preparing ciabatta this way a few years ago when we went to Macaroni Grill. It's very similar in taste and texture to the bread they serve while you wait for your food - or at least, I think it is. They closed up all of the Macaroni Grills in Oregon awhile back! Very sad!
Searching "chicken piccata recipes" on Google yields about seven and a half million results. I'm not at all surprised that there are so many recipes out there - like I said, it's a staple. For my first time out, however, I decided to go with one I was sure would be good, and reasonably authentic - Giada De Laurentiis' version. It's a popular Food Network recipe, with an average of five stars from almost 1200 reviews! While I've certainly seen instances where 1200 people can be wrong, this isn't one of them. The recipe is fantastic. I've made it twice now, and we've been "wowed" both times.
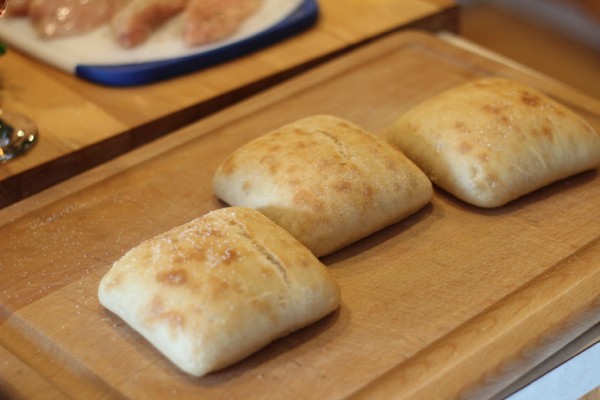
Let's start with the ciabatta. Dang do they look yummy. This is pretty simple stuff, too. Brush them with extra virgin olive oil, and then sprinkle them with sea salt and rosemary. Give them a good dose of the rosemary, and hit them pretty heavily with the sea salt as well. Remember, a decent amount will fall off while you're eating them, so you'll probably only end up tasting about half of what you put on. These little guys will take about ten minutes to heat up at 350 degrees. Pour some extra virgin olive oil into a ramekin or small bowl, grind some pepper in, and you're in business.
What's next? Butterflying your chicken breast, of course. Giada's got a great video showing how to butterfly chicken breast, but I will add that the process varies based on the type and size of breasts you're working with. You may need to modify the procedure. Start with Giada's basic process in the video, and then work them down to what you want. I wanted something a little closer to chicken tenders in size, so that's what I cut down to.
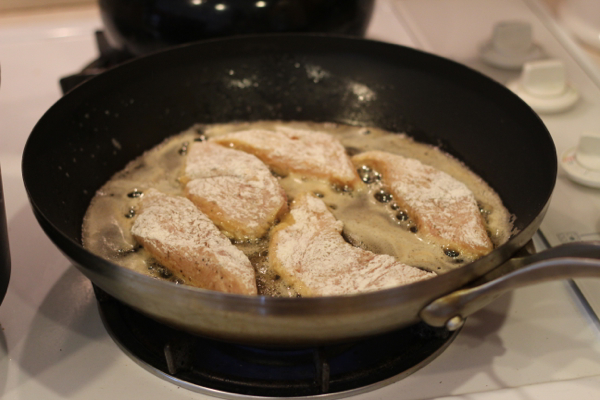
You'll salt and pepper them, dredge them in flour, and get them in a tasty mix of butter and olive oil in the frying pan - and even though raw chicken is far from appetizing, at this point the aroma alone will have you desperately wanting dinner to be done. The torture (or aromatherapy, if you prefer) is far from over, however. We haven't even gotten to the capers yet!
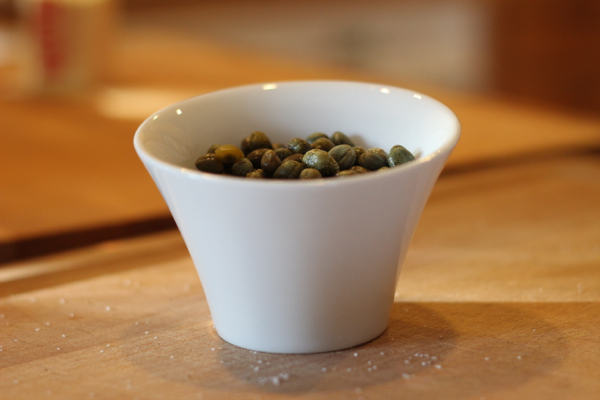
Mmm. Capers. Mental note: find more recipes that call for capers! These little guys are so ridiculously tasty and full of flavor, it doesn't even make sense. When the chicken is done, as in browned on both sides, you'll remove it and add lemon juice, capers, and chicken stock. At this point, the aroma is a blissful blend of citrus, sweet, sour, and savory smells, and only the heat of the frying pan will keep you from sticking a straw into the mixture. That, and the fact that raw chicken stock is odd. Moving on.
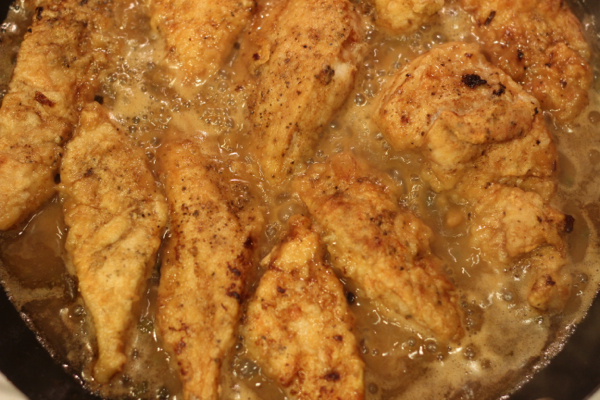
When the olive oil/butter/chicken stock/lemon juice/caper mixture is back to boiling, you'll add all of your chicken back to the pan and cook it for about five minutes, just letting it simmer in the mixture, soaking up ridiculous amounts of flavor. When you're done cooking the chicken this second time, you'll remove it for good, and add a couple tablespoons of butter to the remaining sauce, whisking it in.
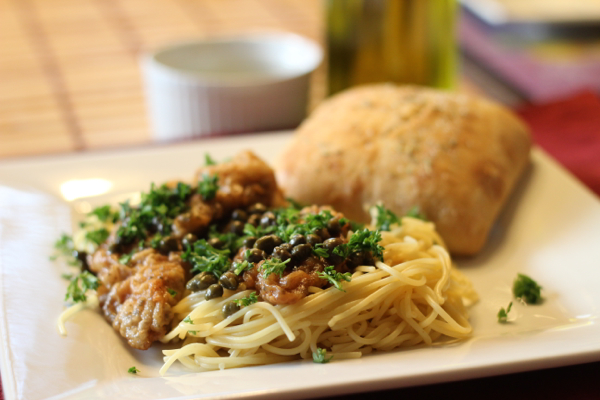
At this point, you're basically done. It's really up to you how you serve it - Giada says just to put the chicken on a plate and pour the sauce over it, topped with fresh parsley, but Chels and I really prefer it over some thin spaghetti noodles.
Personally, I spoon the sauce mixture over the chicken after it's been laid across a bed of pasta, and then top with parsley. I'm sure there are some other ways to serve piccata than the way we're doing it, or even the way Giada does it, but we've had it served this way at our local Italian restaurant as well, and it makes this simple dish more of a complete meal. See the recipe below for all of the precise times and measurements, grab some fresh ciabatta, and get cooking!

Chicken Piccata with Rosemary Ciabatta

Chicken Piccata with Rosemary Ciabatta

Yield: 4
Prep Time: 20 minutes
Cook Time: 30 minutes
Total Time: 50 minutes

Craving a light, citrusy Italian dish that doesn't require Tuscan culinary school beforehand? Here's your answer!

Ingredients

  • 4 small loaves of ciabatta
  • 5 tablespoon extra virgin olive oil, plus extra for dipping and brushing
  • Flour, for dredging
  • Sea salt, black pepper, and dried rosemary for sprinkling on the chicken, the ciabatta, and the oil
  • 2 skinless, boneless chicken breast
  • ⅓ cup lemon juice
  • ½ cup low-sodium chicken stock
  • ⅓ cup fresh, chopped parsley
  • ¼ cup non-pareil brined capers, rinsed
  • 6 tablespoon unsalted butter
  • ½ pound thin spaghetti

Instructions

  1. Butterfly the chicken breast, and then cut it in half or to desired portion size. Season the chicken with the sea salt and black pepper, and then dredge it in flour.
  2. Brush the ciabatta loaves with olive oil, and then sprinkle them heavily with sea salt dried rosemary. Preheat the oven to 350 degrees.
  3. Prepare spaghetti according to box directions.
  4. In a large, high-sided skillet, melt three tablespoons of olive oil and two tablespoons of butter together over medium heat. When sizzling, add chicken breast. Depending on the size of the chicken breast and the size of your pan, your may need to cook the chicken in stages. If so, cook each set of breast pieces for approximately three minutes per side, or until browned. For each additional stage, add two more tablespoons or butter and two more tablespoons of olive oil. When all chicken is browned, remove to a plate.
  5. Place ciabatta in oven and cook for about ten minutes.
  6. Add lemon juice, capers, and chicken stock to the pan, and bring to a boil while scraping up brown bits left over from cooking the chicken (for extra flavor). Once boiling, return all of the chicken breast pieces to the pan, and simmer for approximately five minutes. Remove chicken and return to plate.
  7. Add two tablespoons of butter to the pan and whisk (vigorously). Add pasta to plate, top with chicken, and then spoon sauce mixture over the top. Finish by sprinkling with fresh parsley. Serve immediately.
  8. Serve ciabatta alongside small bowls or ramekins containing olive oil and ground black pepper for dipping.

Notes

Giada De Laurentiis for The Food Network

Nutrition Information:
Yield: 4 Serving Size: 1
Amount Per Serving: Calories: 741Total Fat: 44gSaturated Fat: 15gTrans Fat: 0gUnsaturated Fat: 27gCholesterol: 117mgSodium: 1170mgCarbohydrates: 53gFiber: 4gSugar: 2gProtein: 33g

Nutrition information isn't always accurate.

© Catz in the Kitchen
Cuisine: Italian / Category: Entree

Tuesday's Tidings for June 4, 2013

June 4, 2013 By Chelsia Rief Leave a Comment

1. This happened on Saturday. Christian made the leap from riding in the car seat in the stroller to just riding in the stroller. He was pretty happy about it too. Me, on the other hand...not so much!

2. This also happened this weekend. We bought a blueberry plant. We're going to buy another one because everyone is saying,"Get two! Get three!" So we heard, we're going to buy another one.

3. Today, I opened my washing machine and found that my new favorite white t-shirt from The Loft had turned pink. Thanks to me absent-mindly throwing in Josh's red car detailing towels that I thought had been washed at some point. I almost cried. But thanks to one of my friends ( Hi, Karen) I'm going to try this dye remover and see if it will make it all better.

4. I'm getting over a stupid cold. The cold itself wasn't bad. It knocked me on my butt for at least one day and I thought the whole time that it was allergies, lol! But, now it's gone into this stupid cough. I hate coughs, especially raspy ones that leave me croaking like a frog.

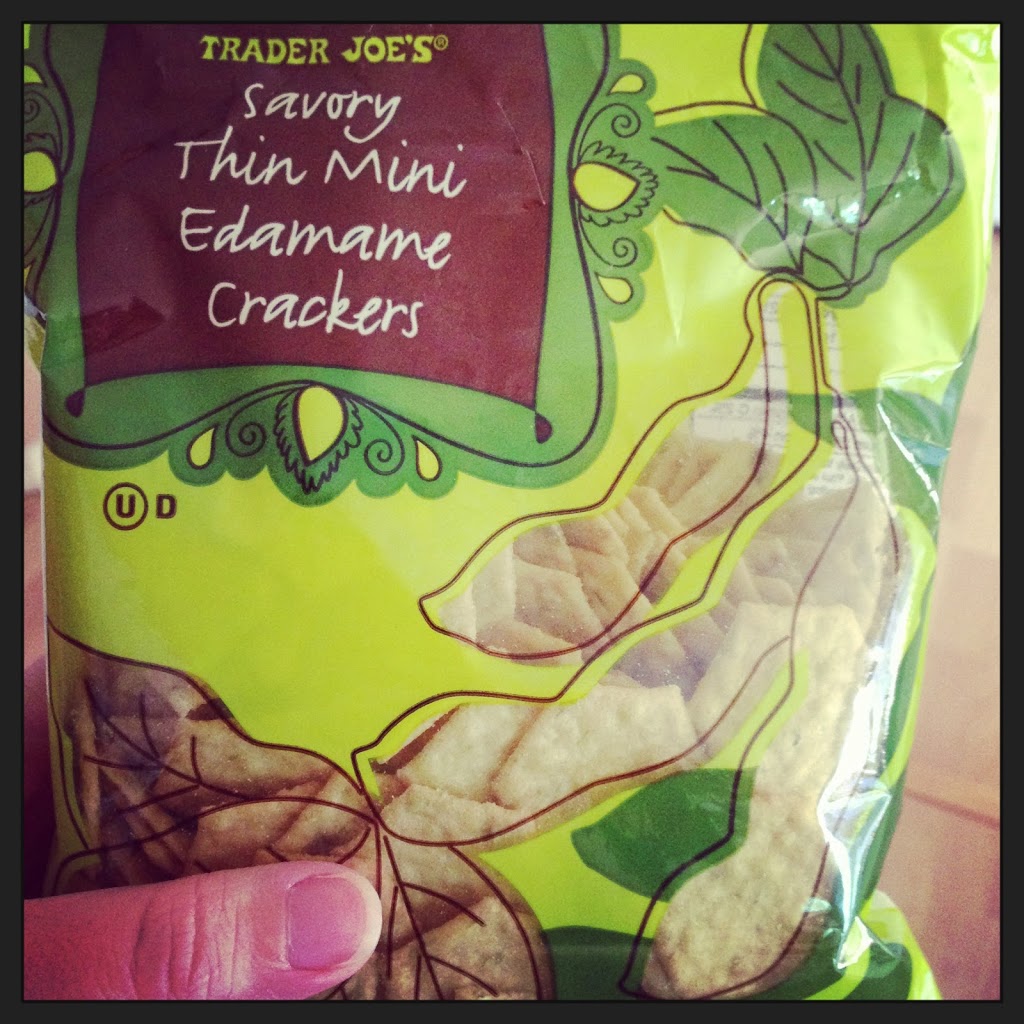
5. We went to Trader Joe's on Saturday and this lady was letting everyone sample these crackers. I am now obsessed and kicking myself for not grabbing like five more bags!

6. I'm obsessed with my mom's new dog, Juniper! She is a little fox! And I'm obsessed with my parents hammock. Every spring and summer when they hang it up, I always go lay in it. I'm now hounding Josh to buy me one. (BTW-that shirt I'm wearing in this pic is the same one that turned pink.)

7. I finished the 30 Day Shred on Saturday. I've got six week 6 pack on it ways :) YAY!

8. I've decided that on the days we go to Cosco, the samples are calorie-less and I refuse to count them. Who's with me!

9. I really wish allergy season was over.

10. I'm just gonna leave you with this picture...because seriously? Those cheeks!

Weekly Menu 6/3-6/9

June 3, 2013 By Chelsia Rief Leave a Comment

Happy Monday!!! I'm super excited about going into this week. The weather is going to be great and Josh and I are going to try out a new recipe, plus, Grace and Eden are having their best friends over for a sleepover on Saturday. Wish me luck. This will be our first sleepover since having Christian and I'm a little nervous. But these girls are so amazing...I really don't have much to be nervous about. I think we're going to take them to the zoo on Saturday. The weather will be nice and though it will probably be crowded, I'm sure we'll have a great time.


Since visiting my sister and brother-in-love in Cusick, WA a few weeks ago, we've taken up their Sunday night tradition of fried egg sandwiches and smoothies for dinner. The kids love it and Josh and I love it! We're playing around with different fried egg sandwich ideas, and maybe in the near future, we will bring you a fried egg sandwich week! :)

Monday
Grilling BBQ Chicken Drumsticks, Baked Potatoes, Fruit Salad, 
and leftover BBQ Lentils
Tuesday
Grilled Pork Chops with Blackberry-Ginger Sauce, Garden Salad, 
and Rice Pilaf
Wednesday
Mexican Pizza and a Salad
Thursday
Chicken Flautas, Slow-Cooker Spanish Rice, and Beans
Friday
Cheeseburgers, Fries, and Fruit
Saturday
(Girls Sleepover)
Buttermilk Pancakes with Fruit
Sunday
Fried Egg Sandwiches and Smoothies

Kitchen Tip: Decalcify Your Coffee Maker with Vinegar

May 31, 2013 By Joshua Rief 10 Comments

The more I mention it to people, the more I realize how few people follow this simple routine for cleaning out and decalcifying your coffee maker! It's really simple, prolongs the life of your machine, and keeps the flavor of your coffee top notch. So, while some of you are undoubtedly aware, this post is for the rest of you, blissfully ignorant of the decalcification your coffee pot so badly needs! If you're somebody that loves their coffee but doesn't have a machine of their own, then it may be time to pull your finger out and have a look at some coffee machine hire options that could change the way you enjoy your mornings.


First off, what are we talking about here? This is a quote from Cuisinart, maker of many fine kitchen products, including coffee makers:

Decalcification refers to removing the calcium deposits which form over time on the metal parts of the coffeemaker. For best performance from your coffeemaker, decalcify the base unit from time to time. The frequency depends upon the hardness of your tap water and how often you use the coffeemaker.

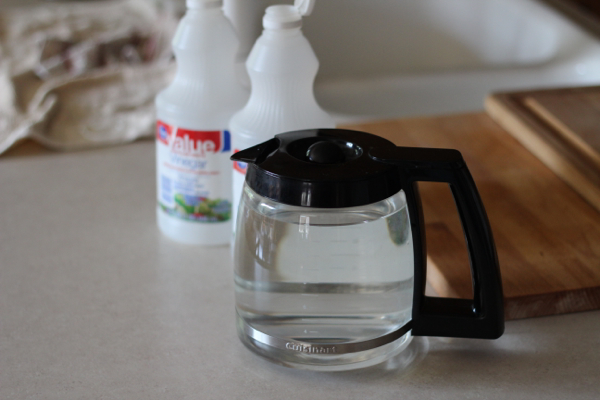
Every coffee maker I've ever owned, bonavita vs technivorm, Mr. Coffee, Krups, Cuisinart, etc, has recommended a similar frequency for decalcification, normally about every 30 uses. If you're a daily coffee drinker, like myself, that means you should just plan on doing this once a month, even if your coffee maker has a built in water filtration system, like mine does. I know some people who completely forgo cleaning their coffee makers and just go out and buy a new one from somewhere like Identifyr because they don't clean their coffee and it ultimately is used so much that it breaks. Or they believe that there is no way to actually clean a coffee machine. Luckily, the procedure requires nothing fancier than household white distilled vinegar. If you're worried about cost - don't! No need to use up your good cooking vinegar for decalcification. The one-quart bottles of vinegar I use on my coffee machines are the absolute bottom of the barrel (Kroger's "Value" brand), and cost a measly $0.98 a piece. Depending on the size of your coffee maker, one bottle will just about get you two cleanings. Remember, you're cleaning with it, not eating it!

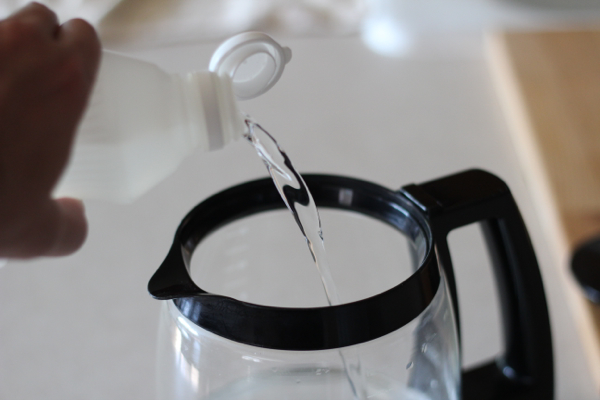
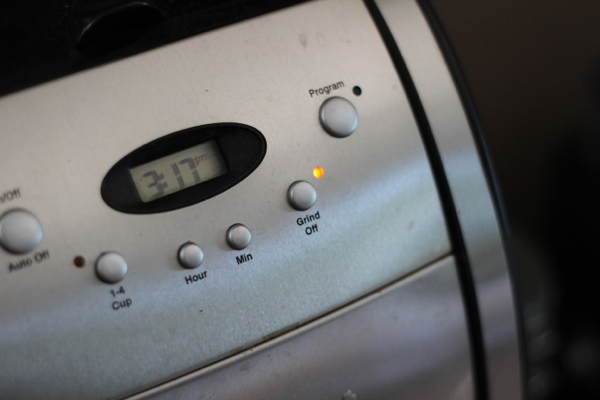
So, here's the very simple process you should go through each month. Fill your water reservoir with one-third vinegar and two-thirds water. For my 12-cup Cuisinart, that's means I fill it to the 4-cup mark with vinegar, and then to the top with water. For my latte maker, which only holds eight ounces of water, it's a little under three ounces of vinegar and the rest water. When the reservoir is full, go ahead and run the coffee maker through a normal brewing cycle (minus the coffee grounds, of course). If you have a built in grinder, be sure to deactivate it for this cycle. When it's complete, refill the reservoir with water and run it through again. Depending on the coffee maker, you may need to repeat this procedure one additional time to eliminate the flavor and smell of the vinegar (I only need to run it once on my drip coffee maker, but the latte maker needs two additional cycles of water only after the vinegar).

And that's it! Set a reminder for yourself to do the same thing next month, and you'll get a longer-living, better performing coffee maker out of the deal.

Tuesday's Tidings for May 28, 2013

May 28, 2013 By Chelsia Rief Leave a Comment

1. This last week while were visiting my sister and brother in love, I got a real quick crash course in knitting. It's HARD!!! My sister said, I'm a pretty tight knitter...which probably made it even harder for me and which is why my hands began to ache. I attempted to make a potholder, but my lack of patience won out and I ended up making a blanket for one of Grace's My Little Pony's instead.


2. It's allergy season and I want to die! I can't stop sneezing, rubbing my eyes, blowing my nose, and I have constant drainage which is causing my throat to hurt a little. It sucks and I can't wait for this month to be over so I can live a normal life again.

3. I did Zumba for the first time last week with my sister. It was harder than I thought it would be and I ached for a few days. But I really enjoyed it. Not sure what I liked more though, the exercise itself or the amount of calories you burn while doing it, lol!

4. I fed a lioness last Thursday! It rocked my world and I fell in love!

5. This morning, I allowed my husband to wake me up at 7am. I'm going to try getting up with him in the mornings so we can be together, do our Bible study together, and eat together before he leaves for work. I'm reallly sleepy, so I hope I can keep this up.

6. I cannot believe it! This little guy has been working on his balancing the last week and now he's actually sitting on his own for a moments before toppling over! He's only 5 ½ months, WHY WHY WHY????

7. For a few years now, I've been trying to find a similar version of Fresh and Easy's Honey Greek Yogurt in our area. We don't have a Fresh and Easy in Oregon, so I can only get this yogurt when I go and visit Josh's grandparents in So Cal. But, last week, when I was at the store trying to figure out which Greek Yogurt I wanted to use in our smoothies, I decided to go with the Greek Gods brand and I tried out their honey version. OMG, it tastes almost like the Fresh and Easy one!!!! I'm super excited!

8. I haven't had time to snap a picture yet, but our garden grew a ton while we were gone last week. There is so much green(ness) or greenery out there it's blowing my mind :)

9. I bought a pair of American Eagle jeans yesterday (my first pair) and they were all of the regular in my size, so one of the guys brought me my size in a short. I kind of laughed at him, because I've never been able to wear a short in my life! Well, believe it or not, in the Artist style of jeans, this 5'3 mama, can wear a short!

10. We watched Les Mis the other night. So it was a really good movie. The singing was beautiful, the acting was superb, but holy moley, it felt like the movie was 4 hours long. 45 minutes into it, felt like 2 hours! Great movie, but I don't think I can sit through it again. Which is odd, because I adore musicals. I guess this one was just to heavy for me.

Weekly Menu 5/27-6/2

May 27, 2013 By Chelsia Rief Leave a Comment

The weekly menu is BACK! We are back from our trip up to Cusick, WA and we had a blast. The picture above is from the Pend Oreille River where little town is nestled up against. It is absolutely gorgeous up there! To be quite honest, I wasn't ready to come home. I could of stayed longer, but our little 5mth old needed to get home and sleep in his own bed once again. But you will hear a bit more about our trip tomorrow on Tuesday's Tidings.


Today is Memorial Day which is kind of like the official kickoff of the grilling season. Unfortunately, Oregon didn't get the message and it's supposed to rain, so we won't be doing any grilling tomorrow. However, the end of the week and the weekend is supposed to be nice, so hopefully we can make up for it then. Do you have plans, traditions, or anything special that you do on Memorial Day?

Monday
Pork Chops with Wine and Garlic, Mashed Potatoes, and Roasted Asparagus
Tuesday
Lasagna Casserole, Salad, and Garlic Bread
Wednesday
(Crockpot) Lime Chicken Tacos with Mexican Roasted Potatoes
Thursday
Spinach Artichoke Pesto Pizza with a Salad
Friday
Maple Cheddar Turkey Burgers with BBQ Lentils and Fruit
Saturday
Hawaiian Grilled Chicken and Pineapple with Rice
Sunday
Fried Egg Sandwiches and Smoothies
  • « Previous Page
  • 1
  • …
  • 125
  • 126
  • 127
  • 128
  • 129
  • …
  • 159
  • Next Page »

Welcome!

HI! We're Chels & Josh, and this is Catz in the Kitchen! Let's find love around the table, one recipe at a time!

More about us

Popular

  • If you've ever thought about turning your cement porch into a wood deck, it's surprisingly easy! Here are some thoughts, tips, & photos from our experience!
    DIY: Turning a Cement Porch Into a Wood Deck
  • Ever thought about turning your concrete slab into a covered deck? It's definitely doable! Here are some thoughts, tips, & photos from our experience!
    DIY: Turning a Concrete Slab Into a Covered Deck
  • DIY Window Box and Shutters
  • DIY Under the Stairs Closet Pantry Conversion
  • DIY Home Library Built-In
  • Grilling these simple chicken foil packets is an easy, tasty way to get a flavorful, healthy meal on the table, whether you're camping or at home!
    Loaded Chicken Foil Packets

Recent

  • One-Pot Turmeric Chicken & Rice
  • Chicken and Broccoli Stir-Fry
  • Catz on the Move: 5 Nights in Paris with 5 Kids
  • Simple Baked Oats
  • Almond Ricotta Cake
  • Molasses Cookies

Footer

↑ back to top

About

HI! We're Chels & Josh, and this is Catz in the Kitchen! Let's find love around the table, one recipe at a time! Read more

Socials

Contact

  • Contact
  • Privacy Policy

Catz in the Kitchen is a participant in the Amazon Services LLC Associates Program, an affiliate advertising program designed to provide a means for sites to earn advertising fees by advertising and linking to amazon.com.

Copyright © 2025 Catz in the Kitchen

19 shares