Catz in the Kitchen

  • Home
  • About
  • Recipes
    • All Recipes
    • Healthy
    • Italian
    • Mexican / Latin
    • Gluten-Free
    • Vegetarian
    • Grilling
    • Desserts
  • DIY
  • Featured
  • Contact
menu icon
go to homepage
  • Home
  • About
  • Recipes
    • All Recipes
    • Healthy
    • Italian
    • Mexican / Latin
    • Gluten-Free
    • Vegetarian
    • Grilling
    • Desserts
  • DIY
  • Featured
  • Contact
search icon
Homepage link
  • Home
  • About
  • Recipes
    • All Recipes
    • Healthy
    • Italian
    • Mexican / Latin
    • Gluten-Free
    • Vegetarian
    • Grilling
    • Desserts
  • DIY
  • Featured
  • Contact
×
Home

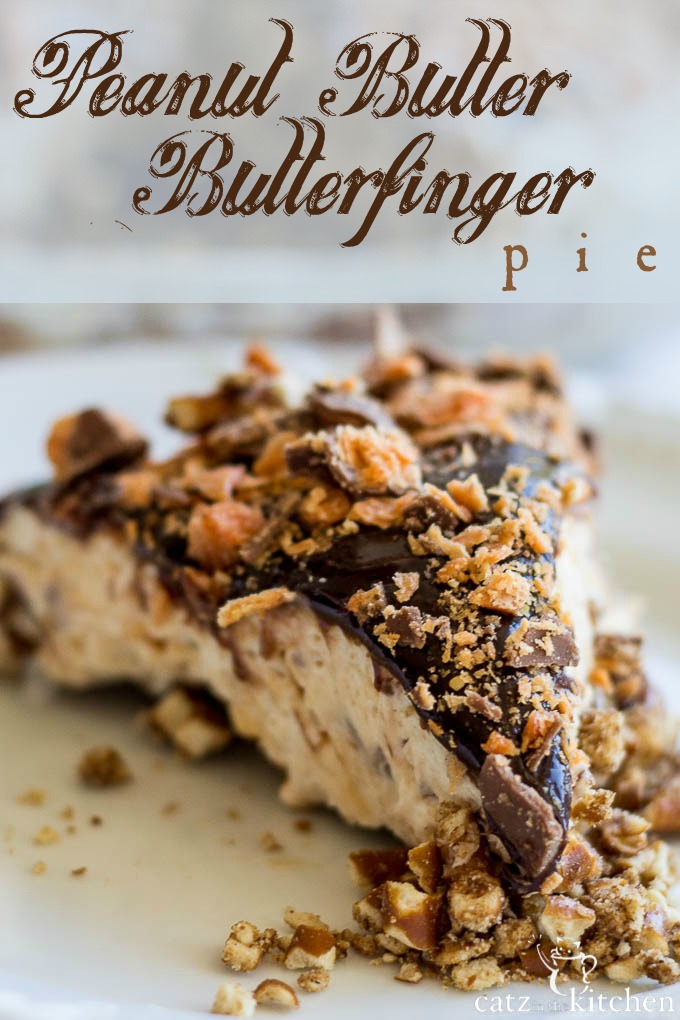
Peanut Butter Butterfinger Pie with a Pretzel Crust

July 18, 2014 By Chelsia Rief 5 Comments

Peanut Butter Butterfinger Pie | Catz in the Kitchen | catzinthekitchen.com #Butterfinger
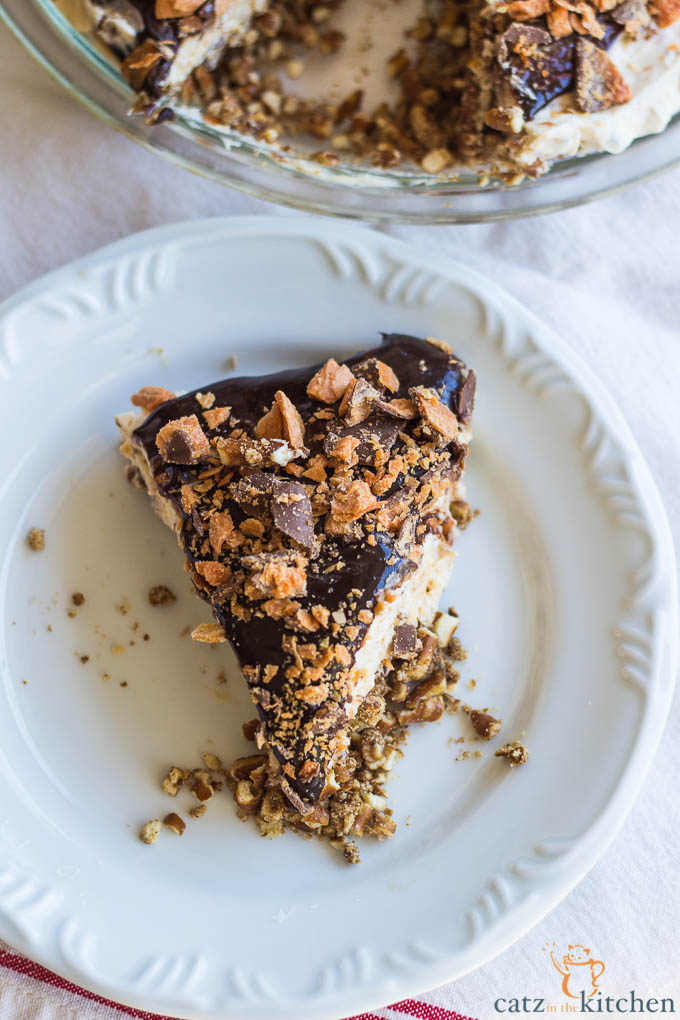
Sweet and Salty is the theme of this creamy peanut butter Butterfinger pie. With chunks of Butterfinger and a salty pretzel crust, it's the perfect dessert to serve this summer. 

Peanut Butter Butterfinger Pie | Catz in the Kitchen | catzinthekitchen.com #ButterfingerIn China, it's customary or tradition to bring candy over to someone's house for the little kids if you are visiting. When my dad and step-mom visited us back in June, that's exactly what they did. They brought a 2 pound bag of fun size Butterfingers and Butterfinger Crisps into my home. I've been eating my way through the bag trying to use them up ever since.
Peanut Butter Butterfinger Pie | Catz in the Kitchen | catzinthekitchen.com #ButterfingerI've never been a fan of Butterfingers. I discovered that they are much better tasting when frozen (but what candy bar isn't better frozen?) and I've discovered that I'm slightly obsessed with the Butterfinger Crisps! You can't stop with just one fun sized candy bar. It takes an amount of self-control that I do not possess.

In an attempt to get rid of the candy that is yes, still sitting in my freezer (it barely looks like I made a dent in it), I bring you this pie. The idea of the pie filling and topping came first, the crust later.

The pretzel crust is a great salty addition to all of the sweet flavors and textures going on. It's crumbly, it's creamy, it's sweet, it's rich, it's decadent, it's probably one of the best pies I've ever made.  Even Christian thought so, because he helped taste test with me in the kitchen. He kept coming back for more from the spatula with his little finger sticking out so he could swipe and go and say," Mmmm." on his way out of the kitchen. I had all of my brothers and sister have a go at the pie the other night and there was only a little blob left after they were all done with it. I think I like my brother Jeffrey's reaction best," WOW! That's Amazing!"

This pie was toddler tested and family approved. The crust is a little crumbly, as in it still held it's shape, but was ya know. Crumbly. I would add more butter to it next time so it didn't crumble so much, but everyone said they liked that it kind of crumbled. They got a piece pretzel in every bite. So if you don't want your crust to be crumbly go ahead and add one whole stick of melted butter to the pretzel crumbs. Otherwise, leave it as is.
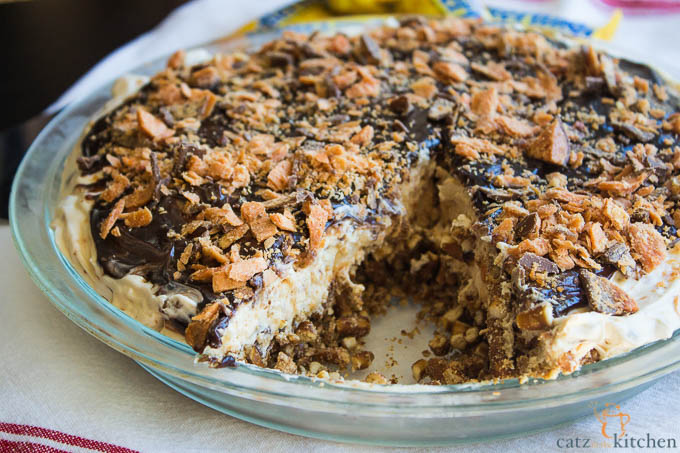
Peanut Butter Butterfinger Pie | Catz in the Kitchen | catzinthekitchen.com #Butterfinger

Peanut Butter Butterfinger Pie | Catz in the Kitchen | catzinthekitchen.com #Butterfinger

Peanut Butter Butterfinger Pie with a Pretzel Crust

Yield: 10
Prep Time: 6 hours 30 minutes
Cook Time: 10 minutes
Total Time: 6 hours 40 minutes

Sweet and Salty is the theme of this creamy peanut butter Butterfinger pie. With chunks of Butterfinger and a salty pretzel crust, it's the perfect dessert to serve this summer.

Ingredients

  • 1 pkg (8 oz) cream cheese, softened
  • ½ cup sugar
  • ¼ cup creamy peanut butter
  • 2 cups Cool Whip, thawed
  • 12 (fun sized) Butterfinger candy bars, finely chopped
  • ½ cup hot fudge topping, melted
  • 2 cups crushed pretzel crumbs
  • 6-8 tablespoon butter, melted

Instructions

  1. Pre-heat oven to 250 degrees. In a food processor, process pretzels until they are fine little pieces. (You do not want a true crumb. You want the pretzel to still have some of it's former shape.) In a saucepan or microwave safe bowl, heat butter until melted. Use 6 tablespoons of butter if you want your crust to be crumbly. Or 8 tablespoons if you want a slightly firmer crust. Combine pretzel crumbs and butter until completely incorporate and pour into a 9-inch pie plate, make sure the bottom is evenly covered and the crumbs go up the sides.
  2. Bake the pie crust for 10-12 minutes. Remove and place on wire rack and allow to cool.
  3. Finely chop 9 of the fun-sized candy bars, reserving 3 for topping the pie.
  4. In a large bowl of your stand mixer using the paddle attachment, combine cream cheese, sugar, and peanut butter and beat until blended. Add whipped cream and the chopped Butterfingers and beat gently on a low speed until evenly distributed. Pour the peanut butter batter on top of the baked pretzel crust and gently, using a spatula, spread the mixture until it is evenly spread over the crust.
  5. Add the hot fudge topping to a microwave-safe bowl and heat for 30 seconds. Stir. It may not be completely melted after 30 seconds, so heat for an additional 10 secs, stirring after each interval. Gently pour and spread the hot fudge topping over the top of the pie, gently spreading the chocolate around, but leaving about a ½-inch space around the edge of the pie.
  6. Chop the remaining 3 Butterfinger bars and scatter the Butterfinger crumbs over the chocolate. Refrigerate for 6-8 hours before serving.
Nutrition Information:
Yield: 10 Serving Size: 1
Amount Per Serving: Calories: 744Total Fat: 66gSaturated Fat: 41gTrans Fat: 2gUnsaturated Fat: 21gCholesterol: 150mgSodium: 681mgCarbohydrates: 36gFiber: 1gSugar: 22gProtein: 5g

Nutrition information isn't always accurate.
© Catz in the Kitchen
Category: Dessert

No-Churn Apricot and Toasted Almond Ice Cream

July 17, 2014 By Chelsia Rief Leave a Comment

Have we talked about mosquitos yet? I saw this funny little blurb on Facebook yesterday and laughter so hard. This is exactly how I feel right now. I don't think I ever showed all of you my foot the day after the 4th of July, but I had like 9 mosquito bites on it. Last night, we were playing spike ball and roasting s'mores with family and you guessed it, I discovered more mosquito bites while I was settling into bed. Between my sneezing fits and bug bites, it's not hard to see why I'm not much of a summer person.

One of the things I do love about summer, is ice cream. I could eat any form of ice cream every night of the week during the summer and never get tired of it.

Now, I have an ice cream maker that I love. But I decided to jump on the no-churn ice cream band wagon when I saw that I possessed several ingredients that could make some awesome ice cream flavors.

I've had this can of apricot pie filling sitting in my pantry for several months now. I played around with making a cheesecake with it or a pie...but then I thought about making ice cream out of it and voila! This delightful little number was made. I was really unsure about it though after I made it. I got heckled by Josh for not using our ice cream maker, but that didn't stop him from helping himself to a few spoonfuls and my little brother was over yesterday and he gobbled down a bowl of it so fast I thought he was going nutty. #punintended

The ice cream was a winner! I've got a few more flavor ideas up my sleeve, but for now, I leave you with this one.

No-Churn Apricot and Toasted Almond Ice Cream


A Catz Original Recipe by Joshua & Chelsia Rief

A creamy fruit and nutty ice cream that is guaranteed to cool you down.

Prep time: 15 minutes

Cook time: 8 hours or overnight

Total time: 8 hours and 15 minutes

Yield: 6-10 servings

Ingredients

  • 1 (12 oz) can apricot pie filling
  • 1 (14 oz) cansweetened condensed milk
  • 2 cupsheavy cream
  • ½ cupwhole almonds, toasted and finely chopped

Cooking Directions

  1. Pre-heat oven to 350 degrees. On a baking sheet spread out almonds and toast for 10 minutes . Remove from oven and allow to cool. Once cooled, chop almonds finely.
  2. In your stand mixer fitted with the whisk attachment or with an electric mixer, beat condensed milk and heavy cream until soft peaks form. Fold apricot filling and almonds with a spatula until combined.
  3. Pour into a loaf pan and freeze for 8 hours or overnight and cover with plastic wrap.

Tuesday's Tidings for July 15, 2014

July 15, 2014 By Chelsia Rief Leave a Comment

1. On Friday the kids and I went to Goodwill. I was looking for an ice cream scoop and came across this box set of gorgeous dishes. Instantly fell in love. I've been keeping my eye out for some dishes that are white that I like to replace an old set of ours. It's a good thing I opened up the box to check on the condition of these gorgeous plates because someone obviously bought this set and repacked their old set up in this. Major disappointment. But at least I can still purchase the set from Target in the future.

2. Josh sent me this link about brand slogans. It is so funny-I almost died laughing!

3. Josh and I are finally catching up on old episodes of Grimm. I feel a little lost though. It has been so long since we watched it.


4. These Steak and Potato Kabobs have been calling my name since I read the post. I'm making them on Saturday and CANNOT WAIT!

5. I've been in love with this baking dish for several months. I finally used a coupon this weekend to get it and I cannot wait to use it!

6. We went to Trader Joe's on Sunday and Christian was so tired from all of our weekend activities that he had fallen asleep in the car on the way to the store and managed to stay asleep while Josh removed him from the car seat and proceeded to sleep the whole time we shopped in the store. It was so cute and we got so many compliments on his adorable-ness.

7. I want to buy a maxi skirt but I haven't had any luck yet. What are some stores (not online) that has some cute ones?

8. This hat would be perfect for when I'm running outside this summer or kayaking with my hubby on our anniversary!

9. My friend informed me of something I'm calling a rumor at the moment...Target will no longer be selling their overstock to Goodwill! I really hope this isn't true because I have loved taking advantage of their low prices.

10. What summer movies are you excited about? I wish I cared more about the ones that are coming out.

Weekly Menu 7/14-7/20

July 14, 2014 By Chelsia Rief Leave a Comment

Welcome back to our weekly menu! I've missed my menus quite a bit. The freedom to cook whatever my soul craves, the freedom to play in the kitchen, and the pleasure of my routine and schedule. What can I say? I'm a creature of habit.

Grace and Eden will be gone for a few days. They were going to be camping with their grand-parents, but the heat will be kind of extreme, so they are having a few day stay-cation instead.

Did you all get to check out the 1st of the 3 Super Moon's on Saturday? Josh and I stayed up till around 11pm so he could get this shot. Quite beautiful if I do say so myself.

Monday
Trader Joe's Tempura Chicken with rice and salad
Tuesday
(Mexican Night)
We're going out for Tacos
Wednesday
(Salad Night)
Oriental Chicken Salad with homemade rolls
Thursday
Pulled Pork Sliders with Coleslaw
Friday
(Pizza Night)
Sweet Potato and Kale Pizza with Salad
Saturday
Steak and Potato Kabobs
Sunday
Fried Egg Sandwiches and Smoothies

Cooking with Gracie: Herb & Cheese Burgers

July 12, 2014 By Chelsia Rief 6 Comments

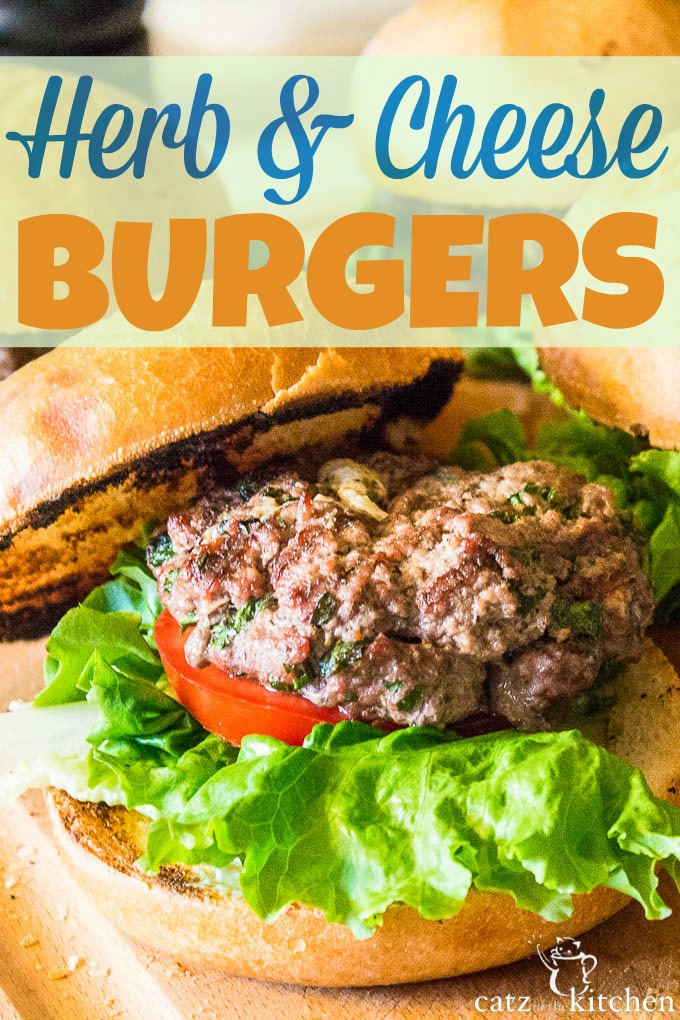
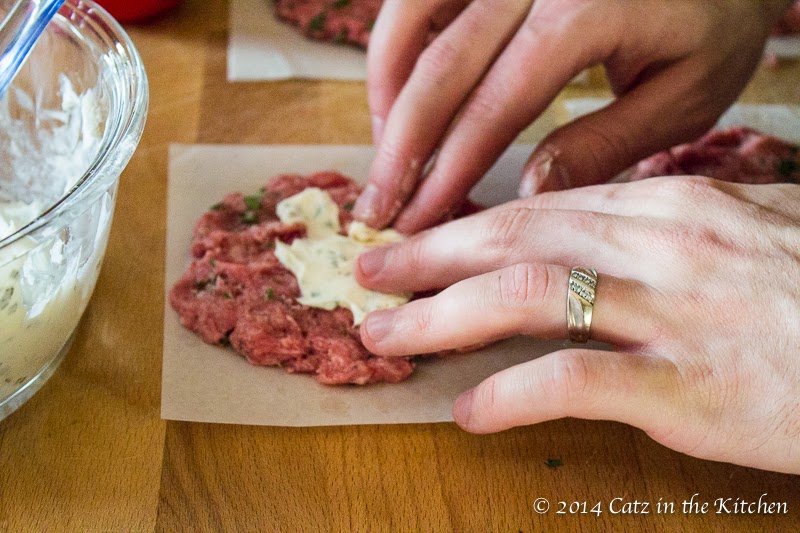
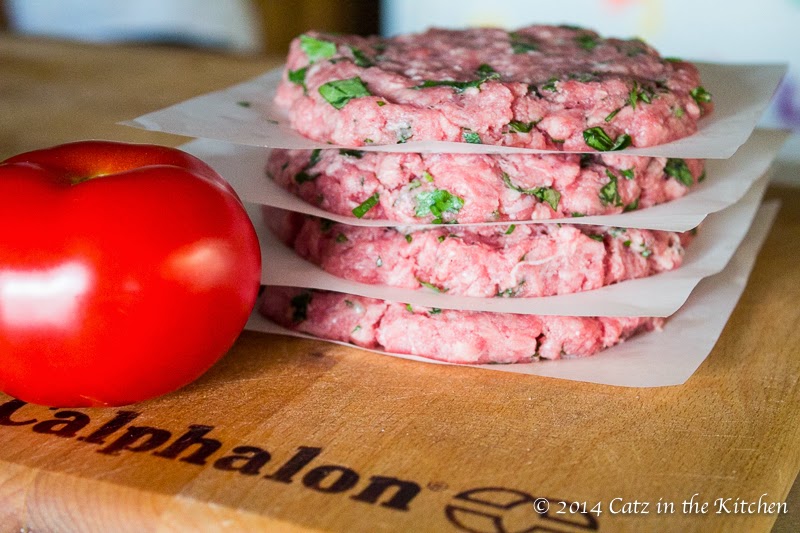
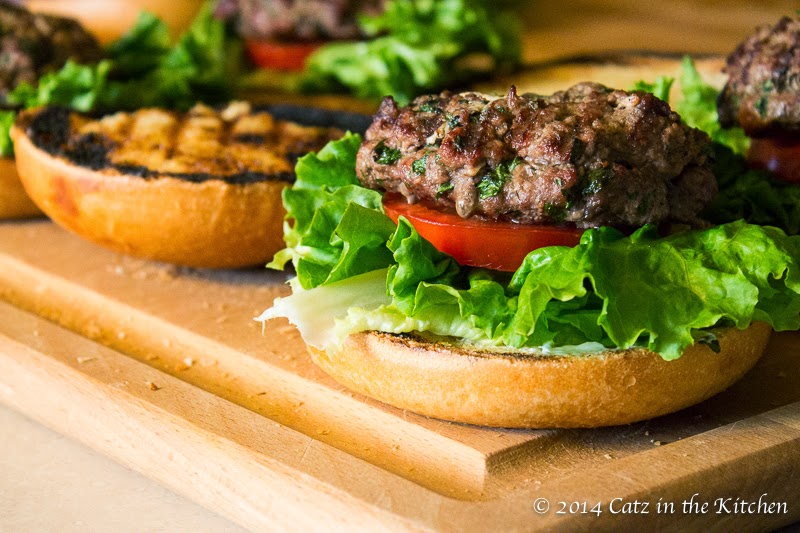
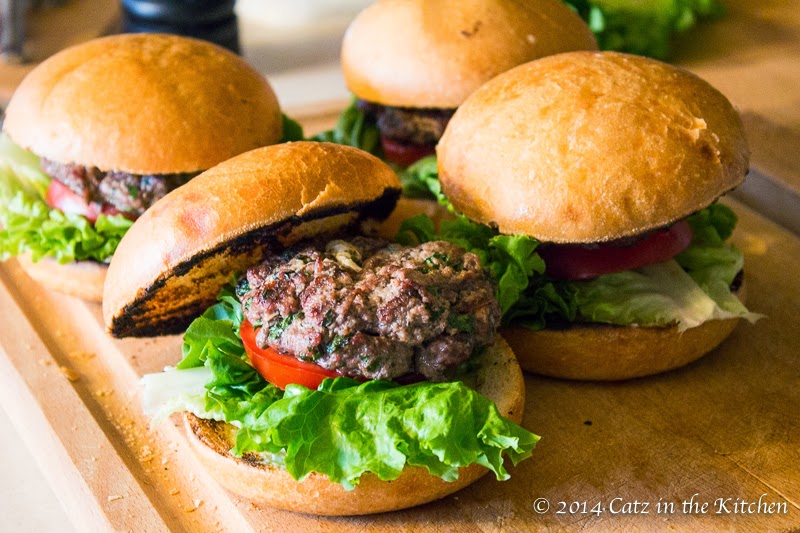
These beef patties are stuffed with a cream cheese, herb, and garlic filling and served on a freshly baked Kaiser roll for a juicy herb and cheese burger!

Herb & Cheese Burgers | Catz in the Kitchen | catzinthekitchen.com #burgersOh, have we been sitting on these pictures for awhile now. Why is it that I get this idea in my head that when summer rolls around, the days are going to be slower and more relaxing.

People...it is a MYTH that during the summer time goes by slower. Let me tell you, I have a hard time with summer for a few reasons. Here is reason #1- My days are just as busy without the homeschooling as when I was homeschooling and I have no idea why!


Reason #2: I have a hard time relaxing when everywhere I look there are back to school sales. I mean really, didn't the kids all just get out of school last month?? Whatever!


Originally, Josh was going to write this post because he and Grace are the ones that cooked and prepared this meal. What did I do? I took pictures, watched Christian and Eden, and baked frozen sweet potato fries in the oven. HA! Seriously though, Josh and Grace are cute to watch in the kitchen and Josh did a great job of assisting Grace.

These burgers are perfect for year round cooking. They are simple to assemble and don't take long to cook. My kind of dinner!

I love the flavor the cream cheese and herbs give the burger. We kept things real simple and didn't even use condiments except for a tiny bit of mayo on the bottom of the bun. But you could certainly leave that out if you aren't a mayo person.

If you are looking for a new burger recipe to try this summer, I highly recommend this one. Let us know what you think. Grace would be tickled to know that you tried out a recipe from one of her cookbooks. :)


Herb & Cheese Burgers

Herb & Cheese Burgers

Yield: 4
Prep Time: 45 minutes
Cook Time: 15 minutes
Total Time: 1 hour

These beef patties are stuffed with a cream cheese, herb, and garlic filling and served on a freshly baked Kaiser roll for a juicy herb and cheese burger!

Ingredients

  • 1 ⅕ lbs lean ground beef
  • 1 small onion, finely chopped or grated
  • 4 tablespoon fresh parsley, chopped
  • 3 oz cream cheese, softened
  • 1 clove garlic, grated
  • 2 tbps fresh chives, chopped
  • extra-virgin olive oil for brushing
  • 4 Kaiser rolls
  • Salt and pepper
  • Green leaf lettuce leaves
  • Tomato slices

Instructions

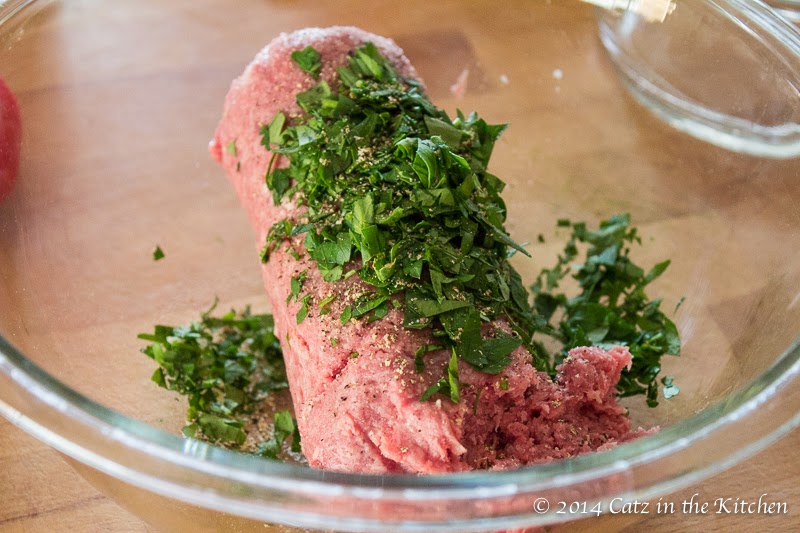
  1. In a large bowl, mix together the beef, onion, and parsley and a little bit of salt and pepper for the burgers.
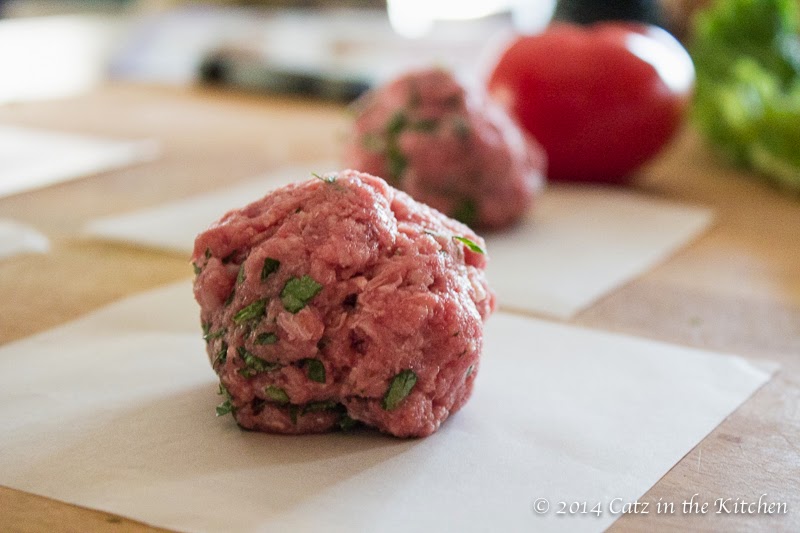
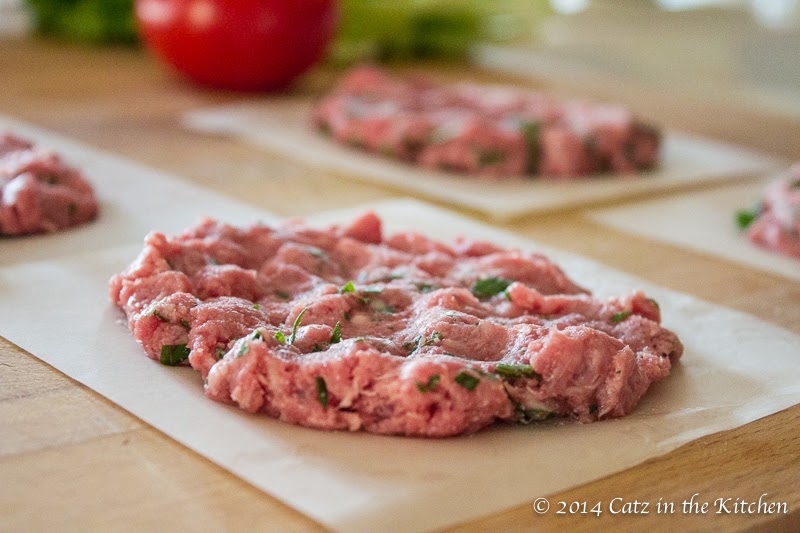
  2. Divide the meat into 8 equal portions and flatten into rounds. (A great chance to use that burger press if you've got one.)
  3. In a small bowl, mix together the cream cheese, garlic, and chives. Place a quarter of the mixture onto 4 of the burger rounds.
  4. Place the other 4 burger rounds on top and pinch together the edges. Mold into 4 burger patties. Chill for 30 minutes.
  5. Brush the burgers with a little bit of extra-virgin olive oil and broil for 8-9 minutes on each side (or if grilling outside, grill for about 6 minutes per side) or until thoroughly cooked through.
  6. Serve with Kaiser rolls and french fries.

Notes

Recipe from DK Cookbook for Girls

Nutrition Information:
Yield: 4 Serving Size: 1
Amount Per Serving: Calories: 505Total Fat: 29gSaturated Fat: 12gTrans Fat: 0gUnsaturated Fat: 14gCholesterol: 143mgSodium: 410mgCarbohydrates: 16gFiber: 2gSugar: 2gProtein: 43g

Nutrition information isn’t always accurate.

© Catz in the Kitchen
Cuisine: American / Category: Entree

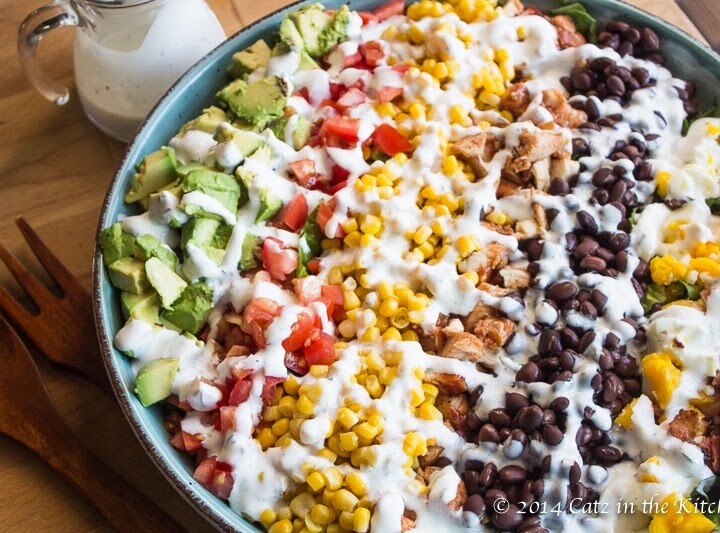
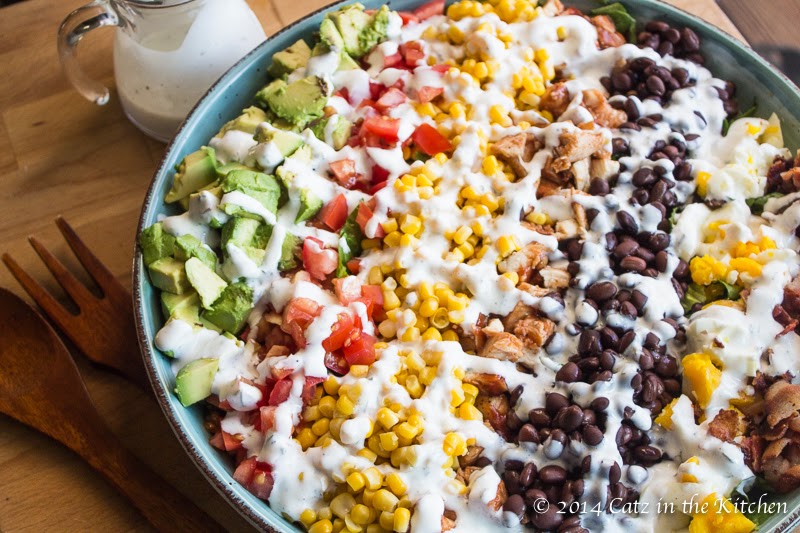
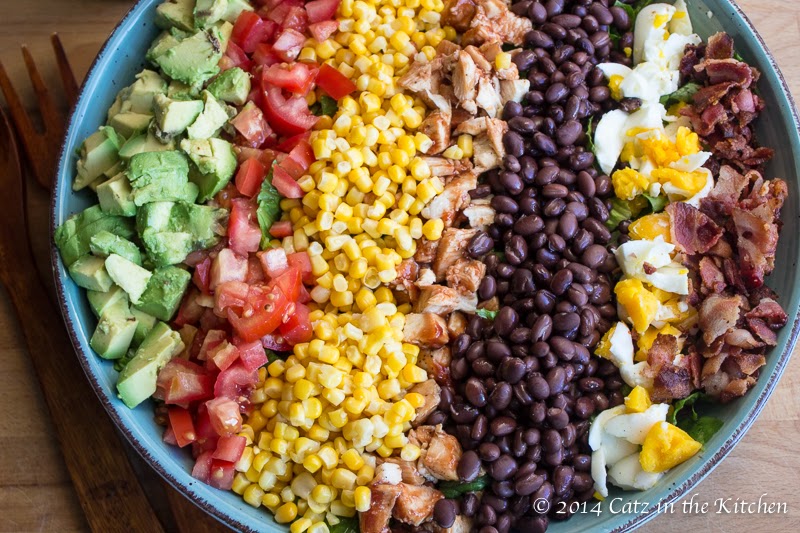
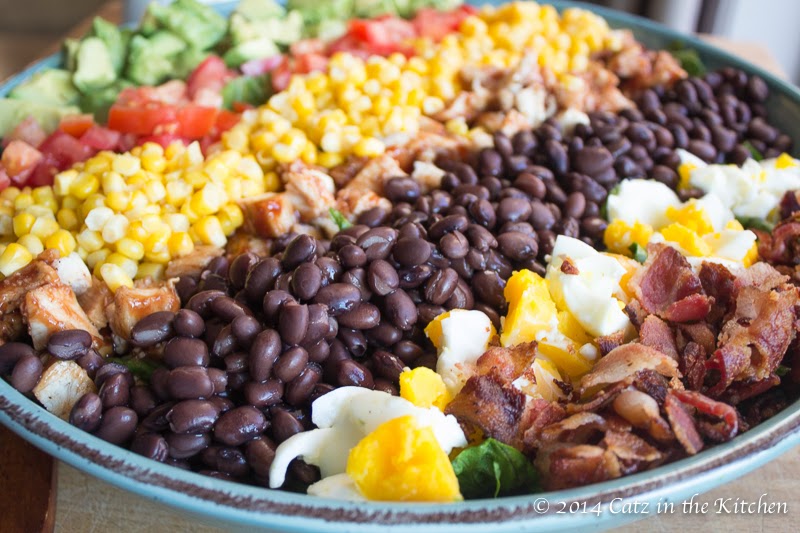
BBQ Chicken Cobb Salad

July 9, 2014 By Chelsia Rief Leave a Comment

So salad. So summer. Let me say that for the record, I am not the world's biggest fan of summer. I enjoy the sunshine, the seasonal fruit & berries, and all the flowers. I do not enjoy the heat, sunburns, or mosquito bites or the fact that my husband adores automobiles with leather seats and I do not. Hello, thighs that stick to leather not only makes an icky sound when removing oneself from the car, but also it's just kind of uncomfortable. Or am I the only one dealing with this dilemma? Did I mention, that we only have rear a/c in my beloved suv? Summer is real fun with kids and no a/c.

With all of that said, I come to this salad. Salad is one of the best ways to beat the heat. It usually involves little to no cooking, always is kind of gorgeous looking, and of course is a great way to get a few servings of fruits and veggies into your diet. We could all use more of that. Am I right or am I right?

I've never had a cobb salad before. Josh loves them. But when I go to a restaurant, honestly the last thing I feel like ordering is a salad. Give me the good stuff. The stuff I won't necessarily make at home. This cobb salad is perfect for the home cook though. It embraces everything about summer, like bbq sauce, avocados, and tomatoes and fills you up in a nice comforting way that still makes you feel healthy cause you ate a bowl full of color. I paired our cobb salad with some homemade rolls and it was the perfect meal. Even my kids gobbled it up and asked for more.

If you are all about summer, one way to do it is by fixing salads and this salad is what's up!

BBQ Chicken Cobb Salad

Recipe by Damn Delicious

Fun to look at, fun to eat, and filling to boot!

Prep time: 15 minutes

Cook time: 25 minutes

Total time: 40 minutes

Yield: 6-8 servings

Ingredients

  • 4 slices bacon, diced
  • 2 boneless, skinless chicken breasts
  • kosher salt and black pepper, to taste
  • 3 TB Sweet Baby Rays bbq sauce
  • 2 large eggs
  • 5 cups romaine lettuce, chopped
  • 2 roma tomatoes, diced
  • 1 avocado, halved, seeded, peeled and diced
  • 1 cup canned corn kernals, drained
  • 1 cup canned black beans, drained and rinsed
  • ½ cup buttermilk
  • ¼ cup plain greek yogurt
  • ¼ cup sour cream
  • ½ teaspoon dried dill
  • ½ teaspoon dried parsley
  • ¼ teaspoon garlic powder
  • salt and pepper to taste

Cooking Directions

  1. To make the dressing: whisk buttermilk, yogurt, sour cream, dill, parsley, garlic powder, and salt & pepper together in a small bowl. Set aside.
  2. In a large skillet, add bacon and cook on medium-high heat until cooked, about 6-8 minutes. Transfer to a paper-towel lined plate and set aside to cool.
  3. Season chicken breasts with salt and pepper to taste and place in the pan you cooked the bacon in and cook for 3-4 minutes on each side or until cooked through. Allow to cool before chopping into pieces.
  4. In a medium-sized bowl, combine chicken and bbq sauce. Set aside.
  5. Place eggs in a large saucepan and cover with cold water. Bring to a boil and cook for one minute. Cover pan with lid, remove from heat and allow to sit for 8-10 minutes. Drain and cool before peeling and chopping.
  6. Place romaine lettuce in the bottom of a large bowl. Top with rows of bacon, corn, beans, tomatoes, chicken, avocado, and eggs.
  7. Serve with buttermilk-ranch dressing

Tuesday's Tidings for July 8, 2014

July 8, 2014 By Chelsia Rief Leave a Comment

1. As many of you know, last week we went out of town. We drove all the way up to the northwestern tip of Washington to a town called Clallum Bay. Fifty years ago, Josh's grandparents (whom we call Grammy and Grampy) went into the mission field and built their very first church. About 60 of us traveled from near and far and swarmed upon the little fishing town of Sekiu where we stayed in a motel that overlooked the strait of Juan de Fuca. It was gorgeous and we not only celebrated our grandparents but we also celebrated Grampy who turned 90 years old! I'll be sharing more about our time spent in Washington later on.

2. I know 24 started awhile ago, but Josh just shared this article with me by Dave Barry and it's pretty funny. If you haven't read it yet, then you should.


3. I know we're in full on Summer here, but these Salted Caramel Apple Pie Bars by Sally's Baking Addiction are singing Fall to me and I kind of can't wait already!!

4. Josh is notorious for finding new apps he must have. He is currently selling us all on Duolingo. Basically, it's a game that teaches you how to speak a foreign language, but you can also play against your friends and make a little competition of it.

5. We've had the power go out twice in 3 days at our house. Good thing I wasn't baking anything or I would of been in trouble.

6. On our way home from the family celebration, we stopped in Seattle so we could show the girls around a bit. I wish we had only had more time though. (And no, I'm not pregnant. I just look pregnant in this picture, haha!)

7. I have the toughest time finding shorts that fit me. But, I've found a style that does. I'm obsessed with these midi shorts from American Eagle. They are so comfortable! Now I need to find some jean shorts I'm just as in love with.

8. On 4th of July, I got eaten alive by mosquitos and I now have 9-count em' NINE bites on one foot!

9. I actually sat down and watched a little bit of the World Cup on Friday. I surprisingly enjoyed myself for the 20 minutes I watched.

10. I did this treadmill workout last night at the gym and it kicked my butt! It was awesome! After several days of not working out, I definitely needed a workout like this to get me back in the game again.

That time we spent all day making Chinese dumplings back in June

July 3, 2014 By Chelsia Rief 4 Comments

My dad and step-mom came to visit us in June, we were all excited. Of course it was great to see them again. It had been two years since they had been here and I was pregnant with Christian at the time. Obviously, they had never met Christian before. But, my step-mom Jen is from China and we were all stoked about her chinese dumplings...or as some people prefer to call them potstickers.

For the record, this is not a recipe post-however I did find a dumpling recipe through one of my sister's pinterest boards yesterday that looks very similar to these dumplings. And easier for you, because you buy the potsticker sheets from the store. I'll post the link for the recipe at the end of the post. It's next to impossible for me to even get a recipe down for this stuff because when she visits, she makes hundreds. I think she made over 300 dumplings when she made them and it literally took all day.

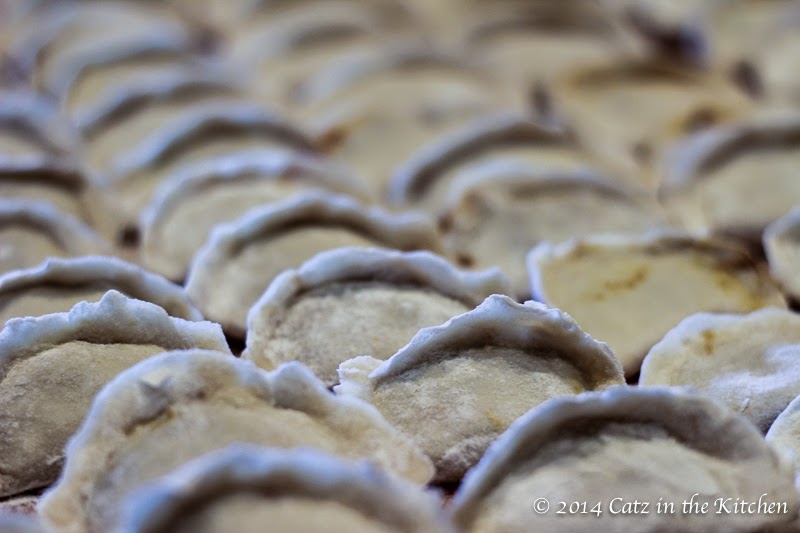
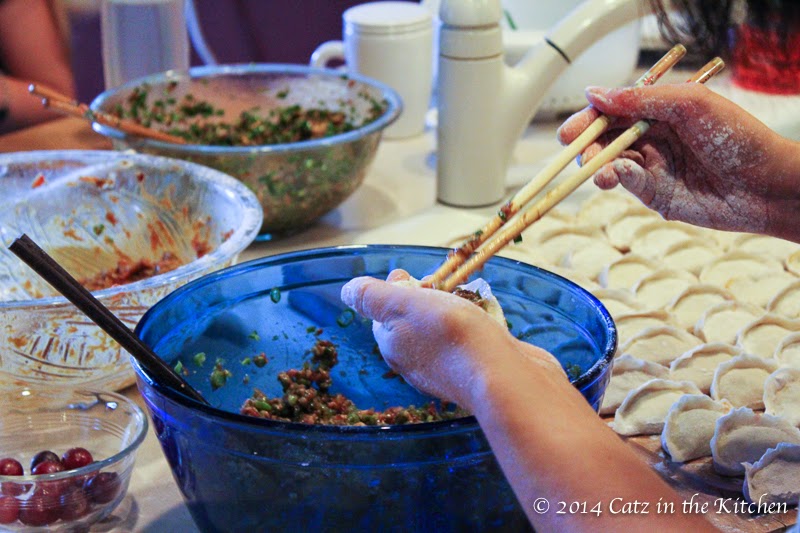
As in, as soon we were done eating breakfast, she got in the kitchen and started working on the dough for the dumplings, which is just flour and water mixed together to create the type of dough used for different methods of cooking. If memory serves me correct, a thicker dough is for boiling and the thinner is for frying or baking. (But don't quote me.) As you can see in the above pictures, there were 3 bowls full of mixture going: Beef and carrot, pork and green beans, and pork and green onion. And let me tell you...so much flavor was packed into each dumpling and each filling tastes different. It is seriously the best tasting Chinese food I've ever had.

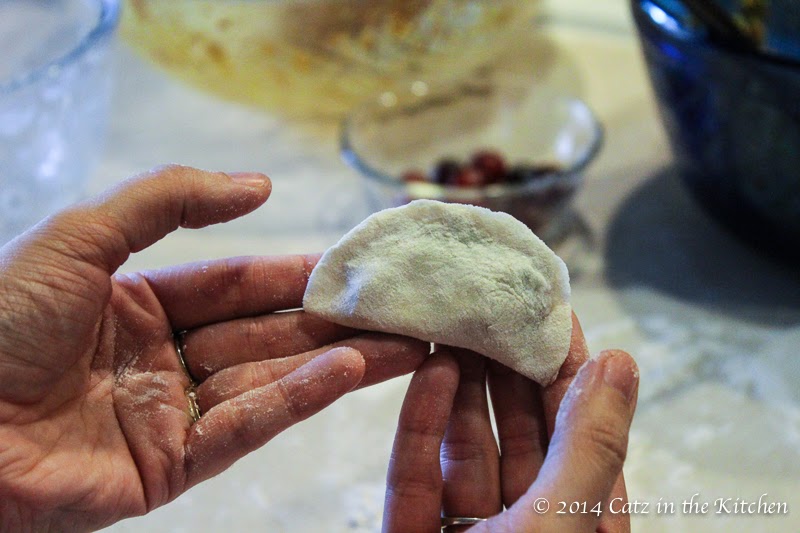
Grace worked steadily beside Jen all day, helping fill the dumplings and then gently folding them over. Let me tell you, it is harder than it looks to get it perfect.

With the help of Josh, our freezer was full of dumplings that he helped flash freeze so we could put them in our outside freezer in gallon sized freezer bags. I think I've got like 3-4 bags of dumplings with different fillings in my freezer now for easy, quick meals.

My dumplings never looked quite right. They always kind of ended up looking like a soft taco that got squeezed together. And I tried a bunch of times. Jen said she has been making dumplings with her family since she was 10 years old. She's had a lot more practice! She was very encouraging about mine though. Haha!

You can kind of tell which ones Grace and I did and which ones Jen made. LOL! See that last one on the end? That's one of Grace's dumplings.

What did Eden do you might ask? She helped roll the dumplings out with a special rolling pin from China and helped make a flour mess on my kitchen floor. But she had so much fun getting her hands involved too.

When dinner was almost ready, the girls set the table and yes, we all attempted to eat with Chopsticks. We were all kind of terrible at it. Except for Jen. Ya know, because she's Chinese.

Aside from some white rice which we had on the side with the dumplings-which was made in the RICE COOKER my dad and Jen got Josh and I as an early anniversary gift. Finally-I can stop killing the rice! Jen also made this delicious chicken, mushroom, broccoli dish that she made the last time she was here. This was the dish that made Eden fall in love with mushrooms!

And here was the final spread (chicken & mushroom dish and rice not pictured) of dumplings. Needless to say, they did not all get eaten. We experimented with baking some and grilling the dumplings to and they were all really delicious. We enjoyed these dumplings as other meals throughout the week.

A couple of things I learned while Jen was here. We have a huge asian market about 20 minutes from our house. The produce is cheaper and better looking than in our grocery stores. Asian sauces like chili sauce, soy sauce, etc also are much cheaper there.

So...if you like dumplings, aka pot stickers then here is a recipe that looks very similar to the ones Jen made for us and easier too. This recipe should not take all day :)

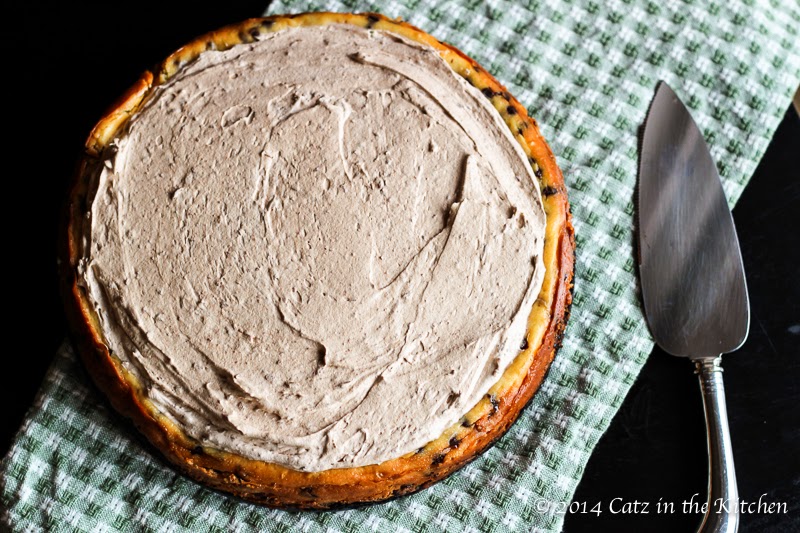
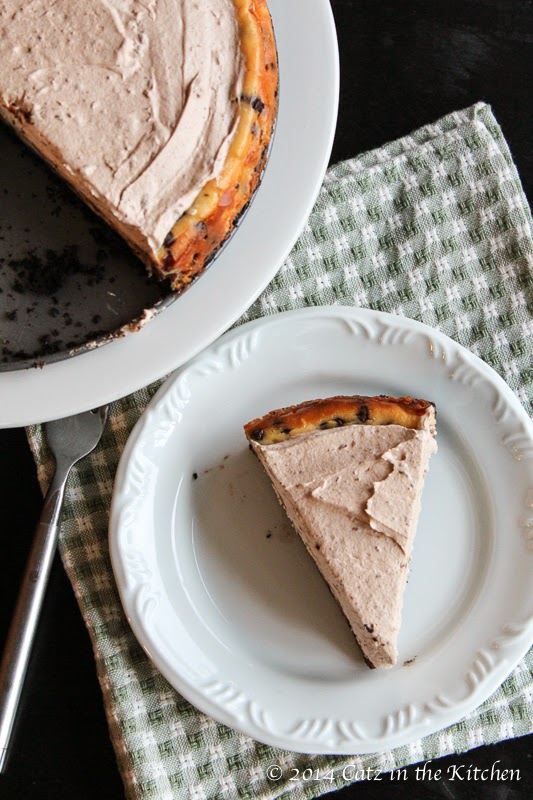
Frosted Chocolate Chip Cheesecake

June 25, 2014 By Chelsia Rief 2 Comments

My dad and step-mom were recently here from Las Vegas. Whenever he comes into town he requests a cheesecake from me. The only requirement? Chocolate. There has to be chocolate! I had no idea my dad was so into chocolate until I started making him cheesecakes several years ago.

I looked for weeks at different recipes I thought I would like to try out, but nothing came to my mind.  I finally narrowed it down to two choices for my dad to choose from and this one, won!

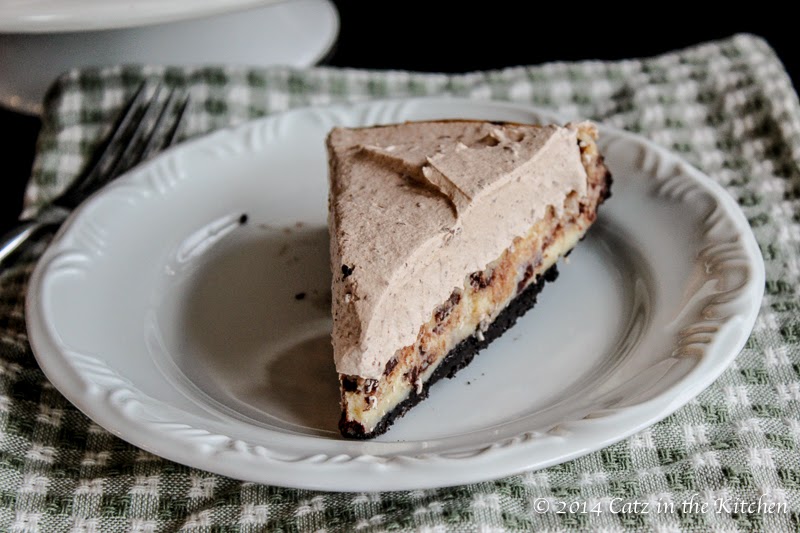
Good choice too, because this cheesecake is AWESOME! I don't know which part my dad liked best, the frosting or the actual cake itself. My favorite part is always the cake part. But he really went nuts over the frosting and couldn't believe how simple it was!

Since I only get to see my dad about once a year, I'm really glad I have a tradition of making him a cheesecake, something I know he really looks forward too. Of course it helps to have good taste in cheesecake too! LOL :)

Frosted Chocolate Chip Cheesecake

Recipe from Taste of Home

Semi-sweet mini chocolate chips mixed into a creamy cheesecake batter with a velvety chocolate whipped topping on top of a rich chocolate cookie crust.

Prep time: 35 minutes

Cook time: 55-60 minutes

Total time: 2 hours +

Yield: 12 servings

Ingredients

  • 2 cups cream-filled chocolate cookie crumbs
  • 6 TB butter, melted
  • 3 pkg ( 8 ounces each) cream cheese, softened
  • 1 cup sugar
  • 1 tsp vanilla extract
  • 3 eggs, lightly beaten
  • 1 cup mini semi-sweet chocolate chips
  • 1 ( 4 ounces) milk chocolate candy bar, chopped
  • 2 cups whipped topping, thawed

Cooking Directions

  1. In a small bowl, combine the cookie crumbs and butter. Press onto the bottom and 1-1-½ in. up the sides of a greased 9-inch springform pan. Chill for 15 minutes or until set.
  2. In a large bowl, beat the cream cheese, sugar, vanilla until smooth. Add eggs; beat on low speed just until combined. Stir in chocolate chips. Pour into crust.
  3. Place pan on a baking sheet. Bake at 325 degrees for 55-60 minutes or until center is almost set. Cool on a wire rack for 10 minutes. Carefully run a knife around the edge of the pan to loosen; cool 1 hour longer. Cover and refrigerate overnight.
  4. For frosting, in a microwave-safe bowl, melt candy bar; stir until smooth. Cool to room temperature. Gradually stir in whipped topping. Frost top of cheesecake. Refrigerate leftovers.

Tuesday's Tidings for June 24, 2014

June 24, 2014 By Chelsia Rief Leave a Comment

1. Christian had his 18 month well checkup last week. The little man is still growing...slow and steady, weighing in at only 21 lbs! My goodness that is tiny. Wouldn't you know though, he got sick over the weekend and now has an ear infection and a cough. He's doing better today, but yesterday, he was miserable.

2. I feel so accomplished, I read TWO chapters in one of my books last night before bed and didn't fall asleep! It's a miracle because I almost always fall asleep when I crawl in bed.

3. I got all of my grocery shopping done by noon today! Right on!

4. Despite actually sleeping last night. I could fall asleep right now.

5. We took the kids to see Maleficent last week. Excellent movie. It's really fun and great acting!

6. My sister got me on the stair master last week and I nearly DIED! I was only on the thing for 8 minutes people (granted I had just hopped off the treadmill after running 2 miles straight) but still...I didn't realize how challenging it was until I got on it. See that sweat on my shirt-from the stair master...not the treadmill.

7. I came across this Christian athletics website a few weeks ago and I'm loving all of their workout shirts. And I love this tank!

8. Josh and I went to the homeschooling conference over the weekend. I had probably more fun than you should at one of those things, lol!

9. After re-watching the movie Taken last week, I've decided that every man who is going to become a father to a daughter should go through Taken training to prevent or prepare for such a scenario.

10. Favorite Summer Dessert!- GO!

  • « Previous Page
  • 1
  • …
  • 106
  • 107
  • 108
  • 109
  • 110
  • …
  • 159
  • Next Page »

Welcome!

HI! We're Chels & Josh, and this is Catz in the Kitchen! Let's find love around the table, one recipe at a time!

More about us

Popular

  • If you've ever thought about turning your cement porch into a wood deck, it's surprisingly easy! Here are some thoughts, tips, & photos from our experience!
    DIY: Turning a Cement Porch Into a Wood Deck
  • Ever thought about turning your concrete slab into a covered deck? It's definitely doable! Here are some thoughts, tips, & photos from our experience!
    DIY: Turning a Concrete Slab Into a Covered Deck
  • DIY Window Box and Shutters
  • DIY Under the Stairs Closet Pantry Conversion
  • DIY Home Library Built-In
  • Grilling these simple chicken foil packets is an easy, tasty way to get a flavorful, healthy meal on the table, whether you're camping or at home!
    Loaded Chicken Foil Packets

Recent

  • One-Pot Turmeric Chicken & Rice
  • Chicken and Broccoli Stir-Fry
  • Catz on the Move: 5 Nights in Paris with 5 Kids
  • Simple Baked Oats
  • Almond Ricotta Cake
  • Molasses Cookies

Footer

↑ back to top

About

HI! We're Chels & Josh, and this is Catz in the Kitchen! Let's find love around the table, one recipe at a time! Read more

Socials

Contact

  • Contact
  • Privacy Policy

Catz in the Kitchen is a participant in the Amazon Services LLC Associates Program, an affiliate advertising program designed to provide a means for sites to earn advertising fees by advertising and linking to amazon.com.

Copyright © 2025 Catz in the Kitchen

19 shares