Catz in the Kitchen

  • Home
  • About
  • Recipes
    • All Recipes
    • Healthy
    • Italian
    • Mexican / Latin
    • Gluten-Free
    • Vegetarian
    • Grilling
    • Desserts
  • DIY
  • Featured
  • Contact
menu icon
go to homepage
  • Home
  • About
  • Recipes
    • All Recipes
    • Healthy
    • Italian
    • Mexican / Latin
    • Gluten-Free
    • Vegetarian
    • Grilling
    • Desserts
  • DIY
  • Featured
  • Contact
search icon
Homepage link
  • Home
  • About
  • Recipes
    • All Recipes
    • Healthy
    • Italian
    • Mexican / Latin
    • Gluten-Free
    • Vegetarian
    • Grilling
    • Desserts
  • DIY
  • Featured
  • Contact
×
Home

Grilled Pizza - Eat It & Weep

August 2, 2011 By Joshua Rief 7 Comments

Well, I've been gone from this blog for a couple of weeks - still an avid reader, of course, and, more than anything else, an avid eater! You see, I have the great fortune of actually getting to test-taste the vast majority of the foodstuffs that show up in this blog, and that, thank goodness, is not something I give up between posts of my own. The reality is, in addition to all of the marvelous wonderfulness that Chels has been posting here day after day, she and I have been working on some new collaborative favorites as well, and they are coming off nicely! We tried an incredible fish taco recipe we'll share with you very soon, as well as a peanut-chipotle barbecue burger experiment from Bobby Flay that is absolutely unreal. Tonight, however, I have something special for you. Tonight, we have Grilled Pizza.
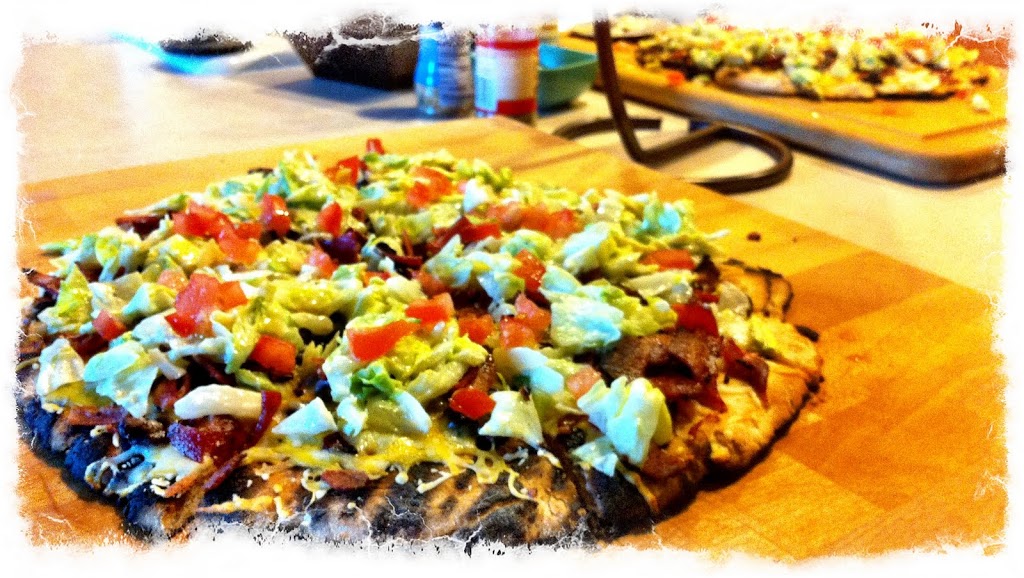
Yes, the Grilled Pizza must be capitalized. It is such a revelation unto itself, that it falls under the same capitalization rules as, say, "North America" or "The Middle Ages." It's true! If you've read my previous posts, you know I have no inclination towards exaggeration...
Now, this particular meal is sourced from a variety of places. The dough came from a blog that Chels follows, although we modified the recipe somewhat. The grilling methodology came Mr. Bobby Flay, of Iron Chef, Food Network, and Mesa Grill fame. And the topping we just made up as we went along. So, though there isn't a single source I can send you to and say, "This is what we did," I'll do my best to spell it out clearly. The great thing about Grilled Pizza, though, is that it's all about experimentation. Although I must admit I won't be avoiding the amazing local pizzerias for too long.
Obviously, you start with the dough. And, that's where I stop. See, shorter blog than you were expecting, right? Okay, okay, that being said, the reality is, Chels handles the dough preparation, and I merely assist. I'll have her post the recipe in here before this goes live, but I can tell you that we added cinnamon last time - wow, that was a revelation. Definitely something we will do again. 
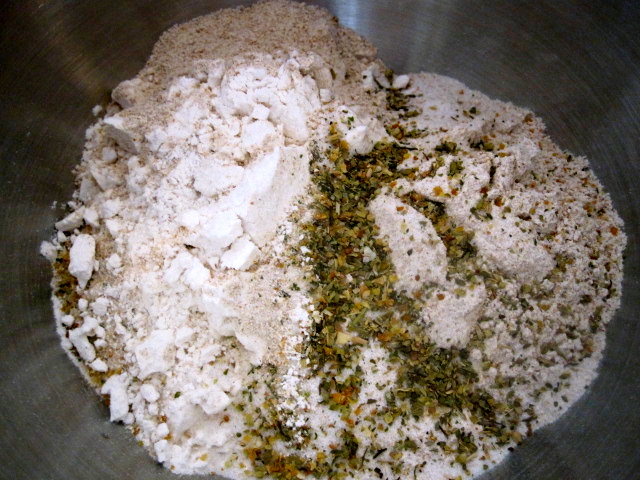
I'm assuming the dough starts with ingredients of some sort...

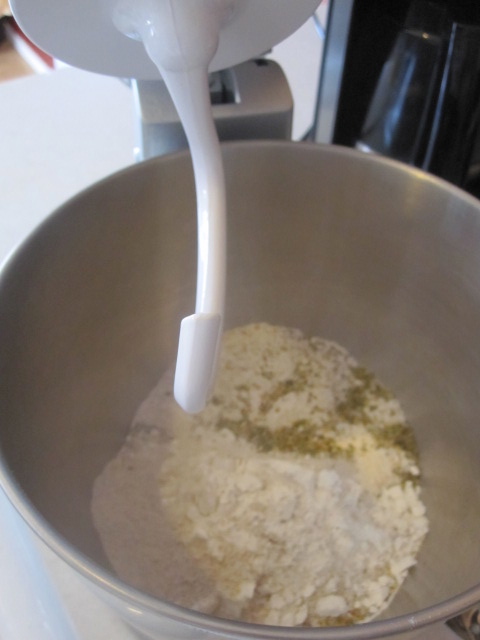
Some of those ingredients are combined in some way...

An evil hook descends from the sky...
Note the ominous shadow of the evil hook

I discovered a strange orange substance in this bowl

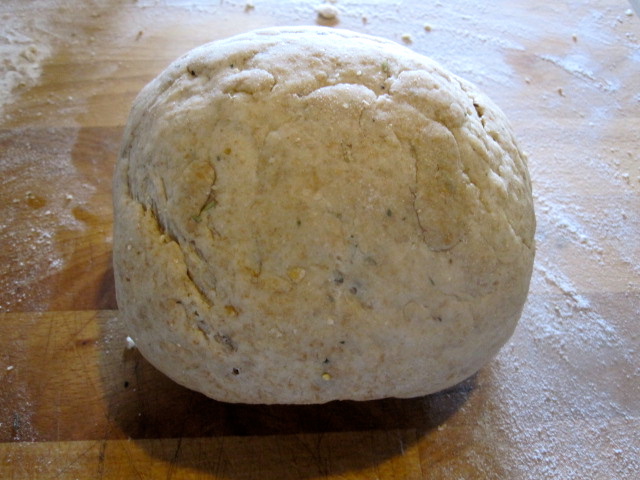
At this point, even I can begin to see some results from the process.
But, wait, it's so small...

How am I going to make two pizzas out of this?

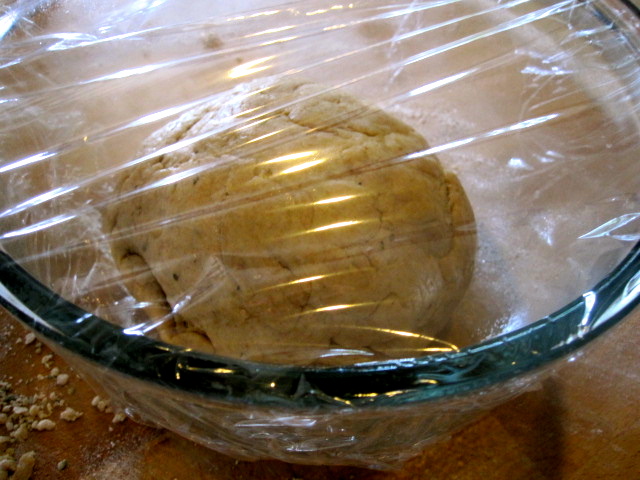
Chels assures me that placing the dwarf dough into a bowl and covering
it with plastic wrap will help it grow. I am skeptical.

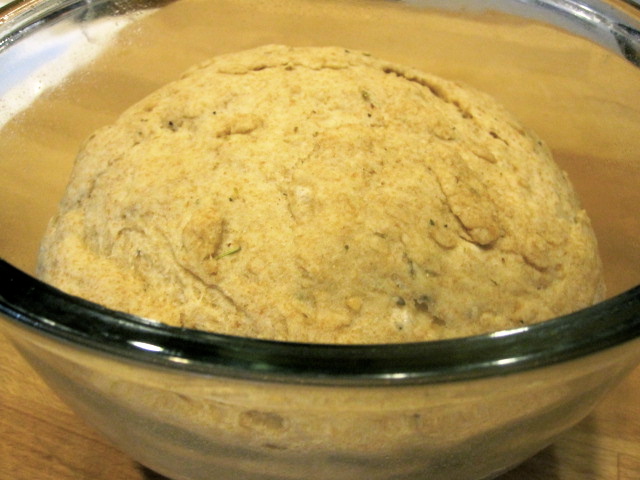
Magic! (like an Apple product!)

Okay, so, obviously, you won't be able to make the pizza dough simply based on the above tutorial alone (or, if you do, it'll end up being pizza dough with an inferiority complex about being too small and multiple phobias involving hooks and shadows and...), but I will make sure that we get you that information. Please enclose 12 UPC codes and send them in a self-addressed stamped envelope, and allow 8-12 weeks for delivery. 
Now, once the dough is out and big and all of the other wonderful, magical things that dough does when it rises, I get back into the picture. The first step, obviously, is to punch and knead the dough. If you haven't punched dough before, I highly recommend it. For those of you that are full of pent-up anger and frustration, it's a great way to let that out. For those of you without pent-up anger and frustration inside, it's a great way to build some up. So, really, there's something for everyone. 
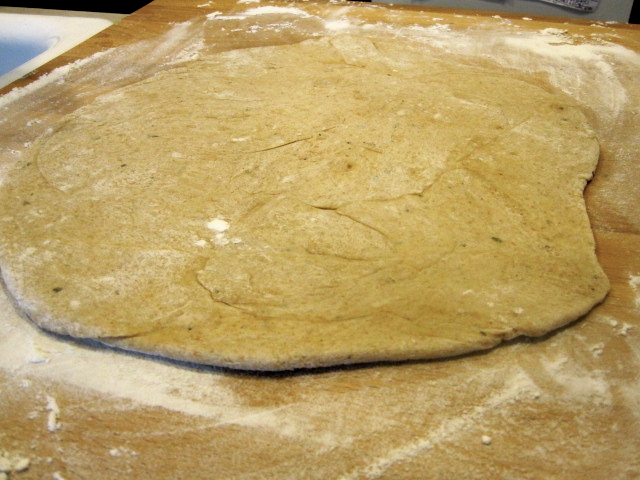
Once the kneading (and punching) is complete, I do my best to roll the dough out in a circle. I have yet to succeed. The circle, you see, is a complicated target. It's so...round. It's full of circumfreneces and diameters and radii. I've heard there's even a Pi in there somewhere...you know, just lurking about waiting to trap unsuspecting trespassers in mathematical folly. Anyhow, I do my best to form a circle, but always end up with something that appears to have once been something remotely related to a circle, before it went through some kind of traumatic experience (most likely involving a chance encounter with Pi in a dark alley - there was lunch money involved). They key piece to remember here is to get the thickness right. Between about a ¼ and a ½ an inch seems to be the sweet spot. 
Post-Pi encounter

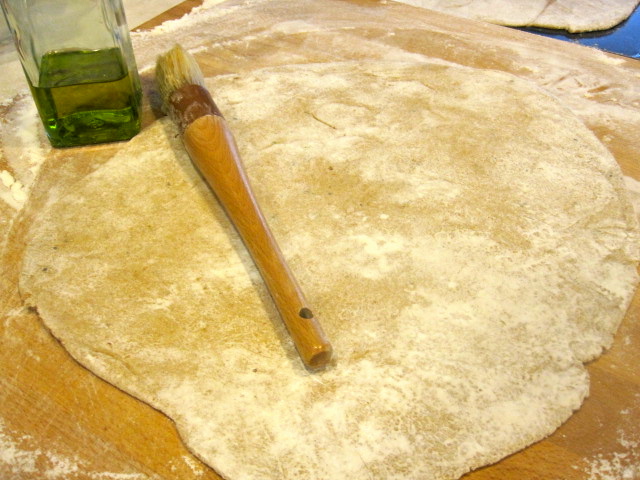
Once the mis-shaping of the pizza dough is complete, I baste the entire surface of the dough, on both sides, with olive oil. At some point here, you wanted to preheat the grill to medium. Did I fail to mention that? Well, hopefully you weren't cooking this as you read it...if you are, your dough is pretty much dead in the water - just warning you. I wouldn't eat it. Bad things will happen. No one will hear you scream (because your mouth will be full chewing dough, of course - what did you think I meant?). 
Olive oil coated pizza dough - heck, yeah.

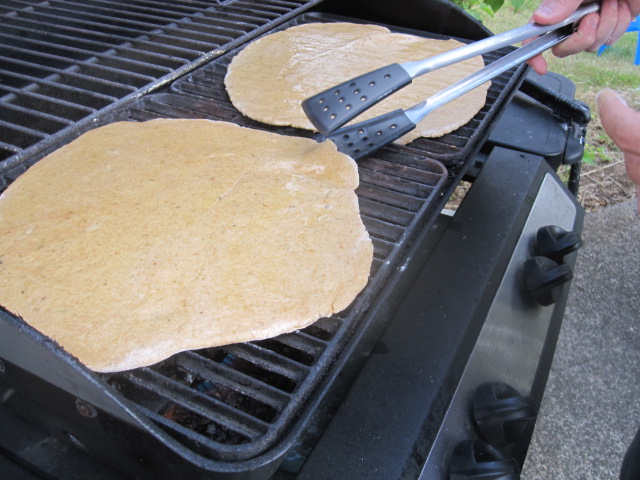
It's really easy at this point. Actually, if you can get the dough made right, it's pretty easy from there. But, regardless, now is when I would transfer the pizza dough to the grill. You'll want to watch it very closely - it's not going to take more than a couple of minutes on each side - you're looking for those nice grill lines and for the color of the dough to change and look, well, done. Once it's done, get it back inside - time for toppings!
Flipping can be complicated! I used a large spatula and two sets of tongs!

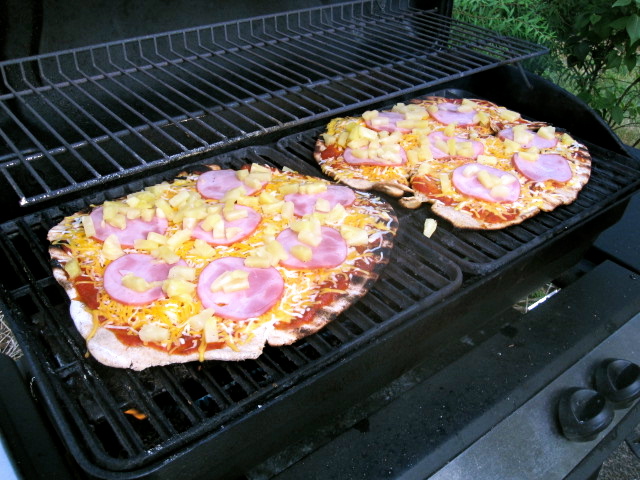
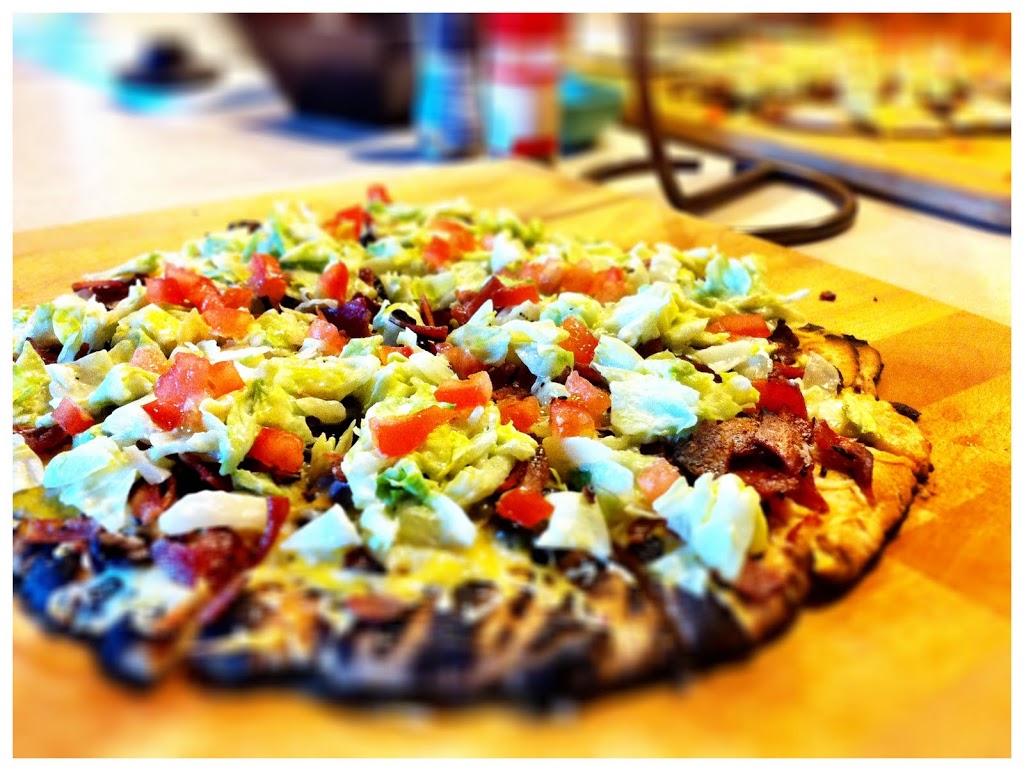
The topping part of this whole thing is very avant-garde. Do pizza sauce and cheese. Do something despicable and revolting with lots of onions and mushrooms. I won't judge (yes, I will). Do something marvelous with sausage and bell peppers. The possibilities are, of course, endless, which has always been one of the best things about pizza. So far, we have tried Canadian bacon and pineapple (using packaged Canadian bacon, cheddar and mozzarella cheeses, Dole pineapple tidbits, and Ragu pizza sauce) and a sort of taco/club pizza I came up with. For mine, I used a base of black beans, corn, crumbled bacon, and a Mexican cheese blend. After the grilling was complete with those ingredients, I topped the pizza with chopped iceberg lettuce coated in homemade chipotle dressing, as well as diced tomatoes. Really, though, you can do whatever you want! 
Hawaiian pizza! How does Canadian bacon make something Hawaiian?

Once you have the toppings on the already-grilled crust, the whole thing goes back on the grill for about 2-5 minutes. Basically, you're looking for enough time to melt the cheese and warm up or lightly singe the other toppings. At that point, it's ready to eat! Didn't I tell you it would be easy? And, I must say, the result is unbelievably good. The smokiness and slight char of the grill flavor just permeates the crust and makes you want to eat a completely ungodly amount. Which you very well may do. After all, it is...Grilled Pizza. 
Get the big Canadian Bacon. It rocks.

You get the chipotle sauce recipe when you get the fish tacos...
Patience is a...pain.


Grilled Pizza
By...us...I guess...we just copied what we saw Bobby Flay do on tv.
Once your dough is rolled out, brush each side with a decent amount of evoo. Have your grill already pre-heated to medium.  And if you can, remove any grates in your grill that may be in your way of placing and flipping the pizza. We did that the last time we grilled and it made the whole process a lot easier. 
I highly suggest buying a pizza peel for the next step. I picked up a large beautiful one at Ross for $9.99 and Josh said it made a world of difference with sliding the dough on and off the grill. So slide your pizza onto the grill and watch it closely for 3-5 minutes. It will need to be flipped very carefully with tongs. As Josh said," Look for the grill lines to tell when it's ready to be flipped." Repeat on the other side and slide the pizza pack off with the pizza peel and tongs and go decorate your pizza to your liking.  Then, bring the pizzas back to the grill and slide it back on for a few more minutes...just until the cheese is melted and everything is cooked through and then that's it, your done! Serve and Enjoy!
The one thing I found to be very cool with grilling pizza is how much heat ( temp wise) the pizza retains vs cooking it in the oven. When baking a pizza in the oven, it always seems to cool off quickly. With grilling, the pizza remains warm till the very last slice. It's amazing!!
I apologize for my long winded directions. Josh asked me to write up the dough ingredients, but I felt if any of you wanted the grilled recipe too, you could find it in one place rather than scrolling. 
And I promise...very soon, hopefully within the next month or so, we will get a print link for you all so you won't have to write everything down by hand or copy and paste because I know that can be a bother :) 
Happy Grilling Everybody!

Weekly Menu 8/1-8/5

August 1, 2011 By Chelsia Rief 1 Comment

Happy August 1st everyone!! How was your weekend? Ours was really good! My Gracie came back home from camping on Friday! It was so wonderful to have her back. She changed so much it seemed. Eden was thrilled to have her sister home and relieved that she had her playmate back. I am just not as much fun as Grace is, haha! Saturday, we got our pictures taken by a professional for the very first time ever! Josh and I didn't even have this at our own wedding ( seeing as though we got married at 18 & 19 years old) so this was a real treat for us! I can't tell you how much these pictures mean to me. I haven't gotten them all back yet, but she posted some teasers on FB for me and when I get the rest, I will share with you all.  And Sunday, was church and grocery shopping, followed by a relaxing quiet evening with my and the hubby in the back yard enjoying our tikki torches and savoring each other before Monday came and swept us away again into the busy work week.

Next week, next Tuesday actually is Josh's and mine 8 year anniversary! We are so excited. We're going to the beach for a week with the kids. Sooo...there will not be any blogging the following week. Or if there is blogging, it will be posts that are scheduled to send out but I won't be linking up any where. I will take some pictures of our fun week though!

For our menu this week, we're trying to use up some of the items that will expire while were gone...but we won't have a menu for Saturday and Sunday. Saturday, Josh and I are going out to a new restaurant for our anniversary and then Sunday, we'll be leaving for the coast.

Monday
Nachos
Tuesday
Grilled Sausage and Bell Pepper Pizza
Wednesday
Teriyaki Pineapple Turkey Burgers ( From last week) with homemade french fries and fruit
Thursday
Mesquite Chicken wraps
Friday
BBQ Chicken Pizza (without red onion)
I'm also bringing a meal to one of my friends who just had a baby. She goes to church with me and our church is so sweet that for 2 weeks,  the members deliver a meal. Since I'll be gone next week, I signed up for Wednesday night.
Church Meal
A Roasted Chicken with potatoes and veggies
Rolls
M&M Cookies for dessert
My favorite Blueberry Muffins ( for breakfast or snacks the following days)
And of course, since we're not on vacation yet, I'm going to make cookies for Josh's lunch this week. Whatever is leftover we'll take to the beach with us.  
Desserts & Treats
I was debating between two different recipes in my cookbooks for Chocolate Oatmeal Cookies. But I'm going to go with my Better Homes & Garden Cookbooks recipe, because I really like the additional spices their using in the Cookie :)
This seems like a pretty full week of cooking. But most of it is grilling, which is Josh's domain. But I am looking forward to it, especially making the meal for my friend. As someone whose had 2 babies, I can't tell you how much having not to worry about meals those first few weeks means.  Have a fantastic week everyone!

Weekly Menu 7/25-7/31

July 26, 2011 By Chelsia Rief Leave a Comment

Hey guys :) Sorry, I didn't really mean to take the week off last week. It just kind of happened. We got very busy and I've begun potty training my youngest and I just needed a week off. I'm now back ready to jump back in again and share some wonderful recipes with you :)

So how was your weekend? We finally had sun and temperatures in the 80's!!! It was to good to be true :) We went to the Farmers Market on Saturday for a few things. We got a huge head of lettuce and I picked up a pint of blueberries. One of my friends will be having a baby soon, so I'm preparing a small menu of food that I'll be bringing over to her home once the baby is born and I'll be making my favorite blueberry muffins for her and the family with some of the blueberries I picked up.

Grace is gone this week :( She has gone camping with my parents till Monday and it's sad without her around here. Eden is missing her a lot and cooking isn't as much fun without her home. Grace is becoming quite the foodie. She won't let us watch Chopped without her and she really loves to help out in the kitchen.  She has a beautiful appetite, so my meal planning for this week was harder for me to come by :( But we have to eat right???

Monday
Josh's Chicken Tacos
Tuesday
Smoked Sausage Kabob's with rice and rolls
Wednesday
Grilled Pizza....I'm thinking Taco Pizza
Thursday
Fish Tacos with Chipolte Cream Sauce and side salad
Friday
Train Wreck
Saturday
Pineapple Teriyaki Turkey Burgers with homemade french fries
Sunday
Breakfast Burritos
I have some leftover cobbler in the fridge so there won't be tons of baking this week.  Or maybe there will be...I never know, because I'm always adding things :)
Desserts/Treats

Berry Coffee Cake
Oatmeal Chocolate Chip Cookies- for Josh's lunches :)

Weekly Menu 7/18-7/24

July 19, 2011 By Chelsia Rief 1 Comment

I have to apologize for not getting this up yesterday. I spent a majority of the day making my grocery list, checking coupons, and finalizing the menu...and then going grocery shopping by myself that evening.  Not to mention, putting away laundry and beginning to clean out all the Homeschool bins. I was busy yesterday.

This week for us won't be as busy as last week. Which is good because we need the break. The weather is also all up in the air this week. Today they have promises of blue skies with a beautiful sunset, but so far all we've had is clouds, rain, and a humid 70 degrees. It's frustrating to say the least. This weekend is supposed to be nice though and I'm looking forward to going to the Farmer's Market =)

Monday
Please forgive me...we had a frozen pizza. Josh got home late and wasn't feeling good. 
Tuesday
Grilled Chicken Bruschetta with fresh green beans and roasted parmesan potatoes
Wednesday
Hot dogs with fresh fruit ( Cantaloupe)
Thursday
Breakfast
Friday
BBQ Chicken Drumsticks with corn, BBQ potatoes, and I might make some rolls if I'm feeling ambitious :)
Saturday
Oriental Chicken Salad with some sort of bread on the side
Sunday
Beef Burgers with Chipolte Peanut BBQ Sauce with my Homemade French Fries or Josh might make his grilled potato wedges :)
I'm praying that the weather cooperates for these meals because almost all of them need to be cooked on the grill. 
I still have some of Josh's dessert for his lunch left, so I'll be making cookies later on this week.
Desserts/Treats

Molasses Cookies for Josh's lunches
Not sure what else I'll make...

Weekly Menu 7/11-7/17

July 11, 2011 By Chelsia Rief 1 Comment

I wasn't going to put up a menu this week, but I've decided to go ahead and go for it anyways :) How was everyone's past weekend? We did some fun things, we've added to our herb and vegetable garden and planted some more goodies. And last night, we made our own version of Red Robins Whiskey River BBQ Chicken Wrap! I told Josh we needed to take pics, but he wanted to try it out on our own first  before snapping pics to blog. It turned out so good and we changed the recipe a bit to suit our needs and it was fantastic! I cannot wait to make it again!

We won't be cooking for at least 3 nights here because we'll be with family, and the weather is supposed to be rainy and possibly cloudy for a few days too, so we'll work our grilling around that.

Monday
Honey Ginger Chicken Stir Fry with rice
Tuesday
Dinner with Josh's family
Wednesday
Dinner with Josh's Family
Thursday
Grilled Canadian Bacon and Pineapple Pizza
Friday
Maybe breakfast burritos
Saturday
Beef Burgers with a Peanut Chipolte BBQ Sauce and Homemade Fries
Sunday
My niece's Birthday party is at a park so we'll be eating dinner with them :)
I'm not entirely sure that's the meal will be eating for Saturday, but I think we'll go ahead and try it out. We do love our burgers around here.
Desserts/Treats

PW's Raspberry Crisp - We enjoyed this dessert so much the first time I made it, we've been itching to make it again :)

PW's Rhubarb Cobbler- I never actually got to make this last time it was on the list because I ruined the rhubarb :( Story to come

Peanut Butter Scotch Cripies- For Josh's lunches

It's that time: Cooking with ingredients I have never cooked with before...Grilled Ginger-Soy Shrimp and Snap Peas

July 6, 2011 By Joshua Rief 1 Comment

Snap peas and shrimp. The unknown and the more unknown.
Okay. So. This started about a month ago. Chels and I were in Williams Sonoma, looking to spend some more of a gift card that a very generous friend gave us. We ended up getting quite a number of amazing kitchen items, but one in particular that greatly affects the outcome of this blog post. We decided to get a mesh grill pan. The truth? We honestly bought it less because of the possibilities than simply because the recipe on the front looked so insanely tasty. Those folks at Williams Sonoma know their marketing, I'm telling you.
Actually, speaking of, they cook in the middle of the store! I didn't know this until the first time we went a couple of years ago. This is brilliant on so many levels. Think about it! Not only is the amazing line up of products and seasonings being demonstrated in real time by real people, but the SMELL... It sticks around. You walk into the store and...the SMELL! You instantly just want to purchase everything in the store in hopes that if you take it back to your house it will magically recreate the incredible olfactory sensations you are experiencing. Surely, if you just buy the espresso machine and the European spatula and three different exotic barbecue sauces and the bamboo cutting board and the ceramic pie dish and you bring them all home and set them on the counter, the SMELL will come home with you. This is marketing at its finest. No deception. Just straight up olfactory seduction. Genius. Anyhow.
So, we bought the mesh grill pan. Actually, now that we have it home, I can see a lot of possibilities for it. I'm tempted to try the veggies for my fajitas in it. The smoky flavor is fantastic, and I think it's especially kind to greenery and roughage. But, first, Chels and I both felt we should try out the recipe that so visually enticed us in the store. Grilled shrimp and snap peas. Here's the catch. Neither of us have ever cooked with shrimp. Or snap peas. Scary.
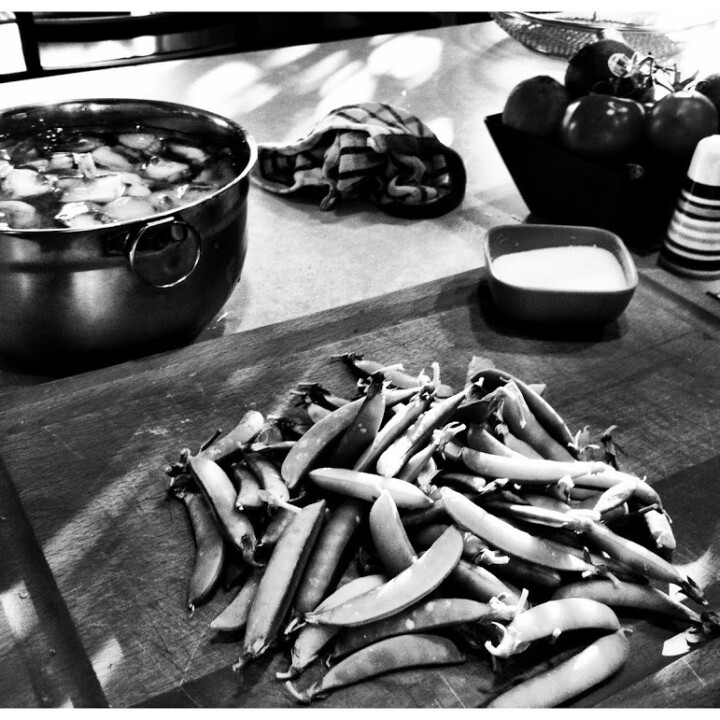
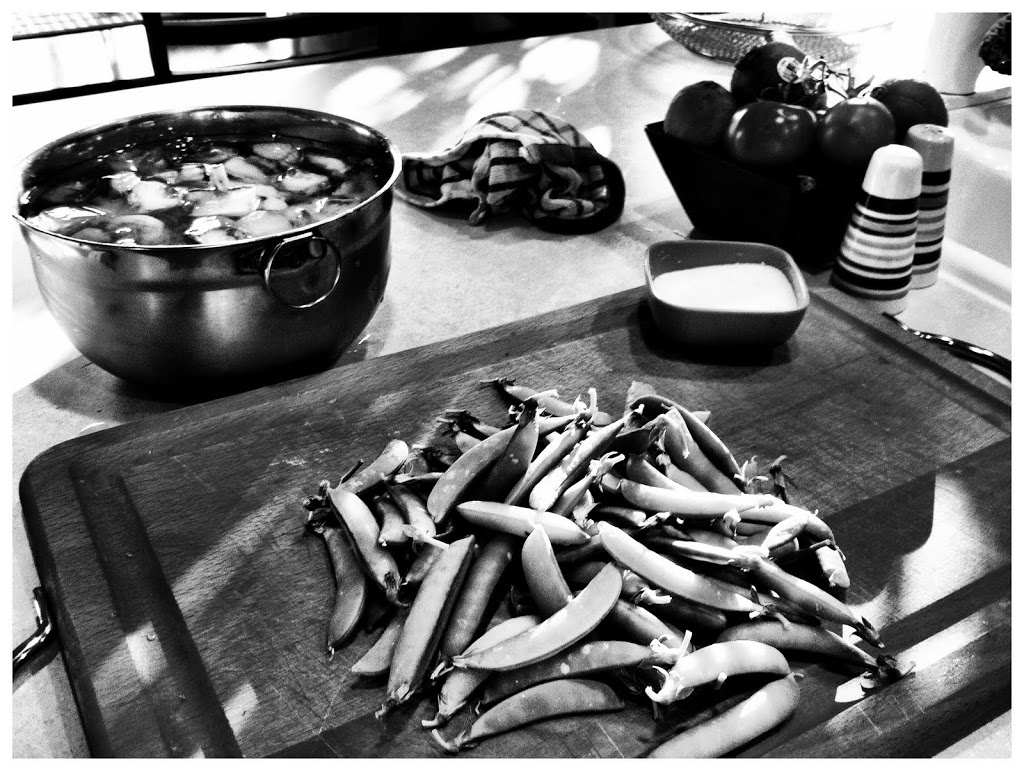
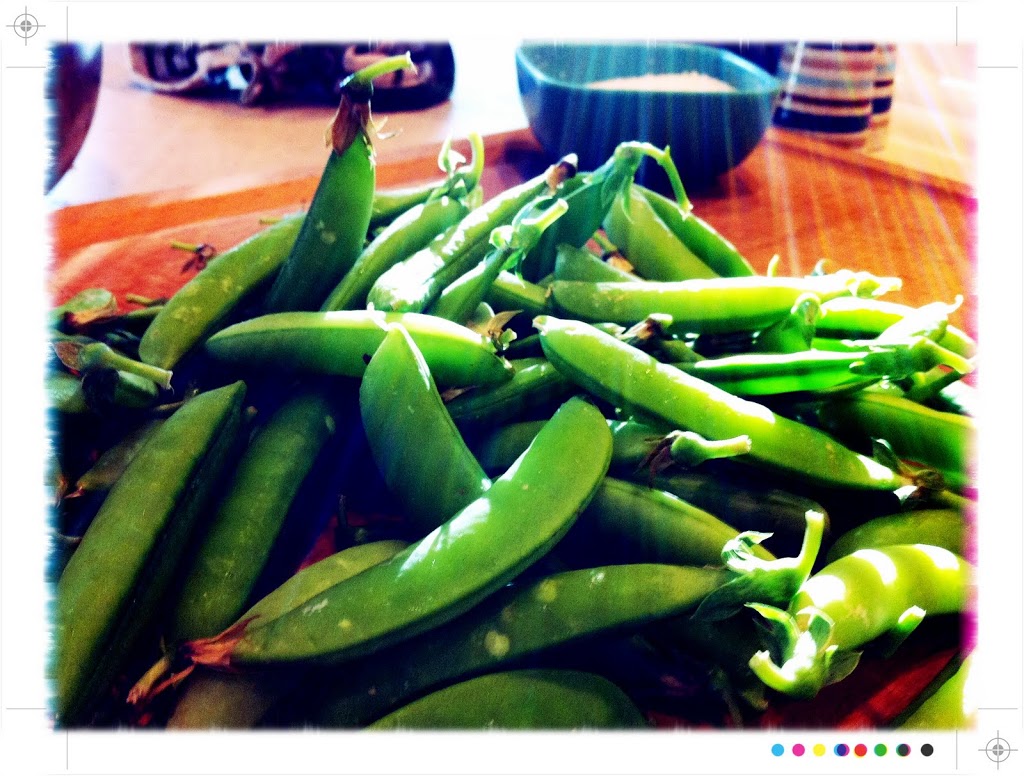
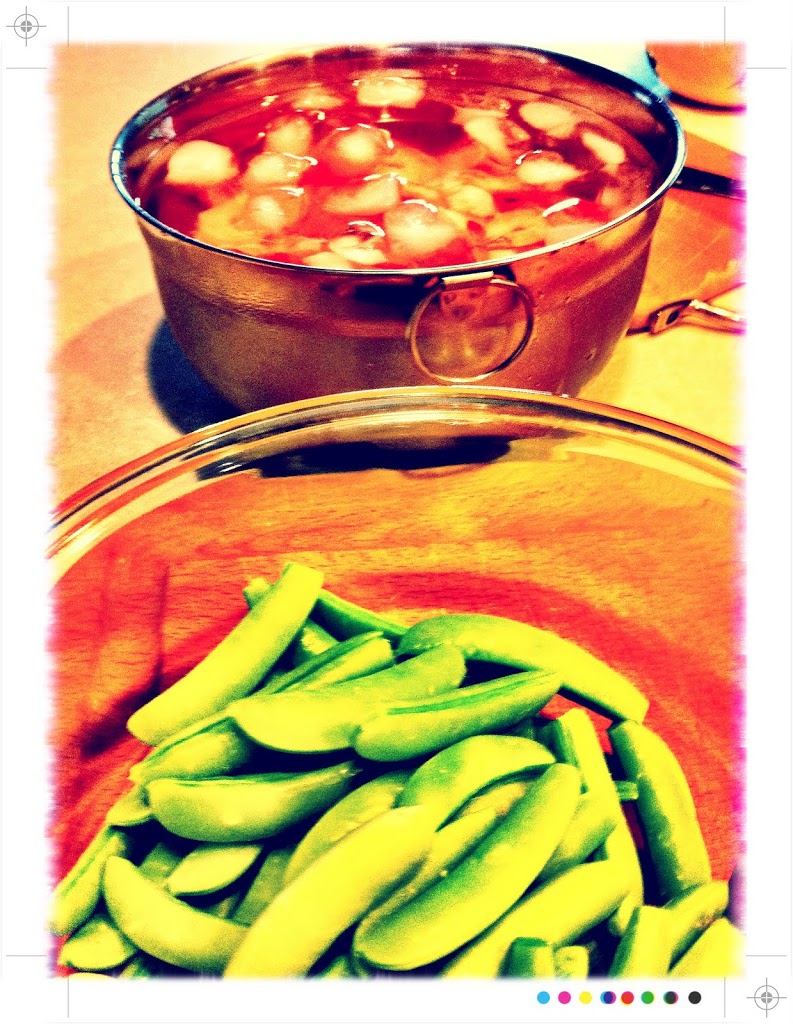
The snap peas were a little tough to track down. They really aren't anything remotely resembling readily available in our local grocery stores. We actually procured ours from our local farmer's market, which was rather wonderful. They were gorgeous, fresh, and photogenic. And not too much work to cut off he ends and pull off the hard "vein" running down one side.
The light is a natural effect. No joke.
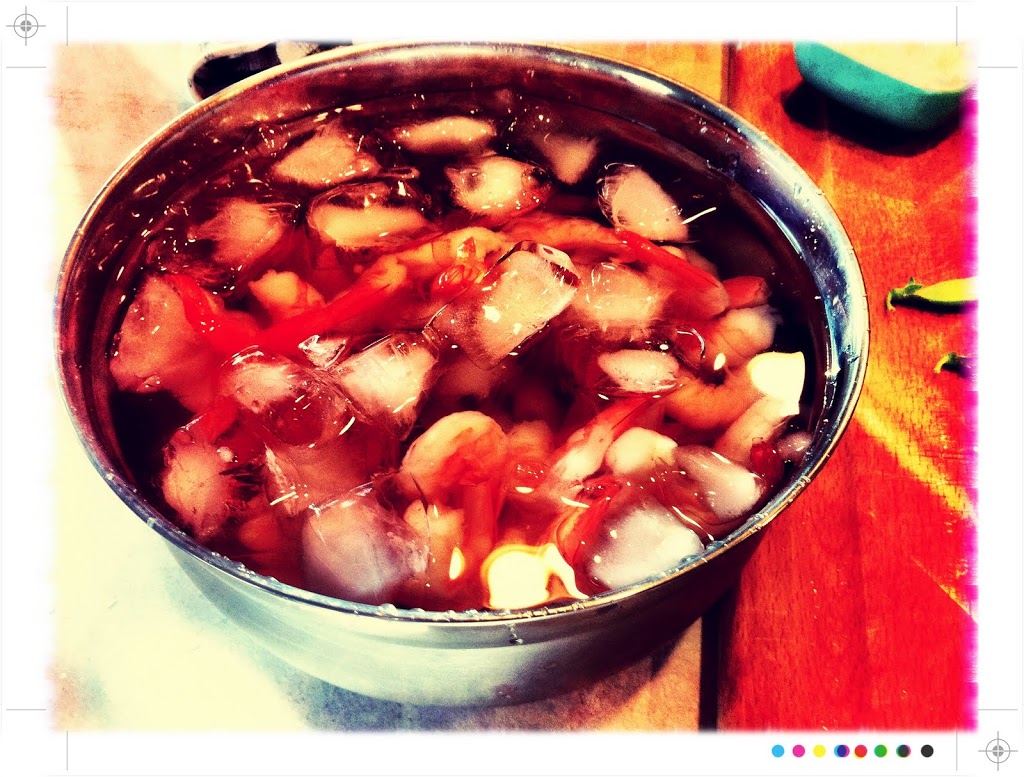
The shrimp was much easier to get our hands on. The Pacific Northwest is generally an incredibly easy place to get one's hands on fresh seafood. Now, the difficult thing for us here is that we wanted something friendly. If you haven't cooked with shrimp before, I think this is a great way to go. There are about ten or fifteen different kinds of shrimp in the seafood section (slight exaggeration?), so choosing was challenging, but I'll tell you why I think our decision was the right one for first-timers. The shrimp you are supposed to use for the recipe are jumbo and white. And not deveined. And other things. We wanted something smaller, manageable for the girls, and pre-prepared to certain extent (Pre-prepared? Like re-reopened or un-undone?). So, we chose the small pink cocktail shrimp. According to my research, for a lot of recipes, you can still cook with them the same way. They are already cleaned and deveined, which is awesome. I want to get more ambitious, but, hey, you can only mess with dinner so much - you still have to be able to eat it! One step at a time.
Shrimp has to stay cold!
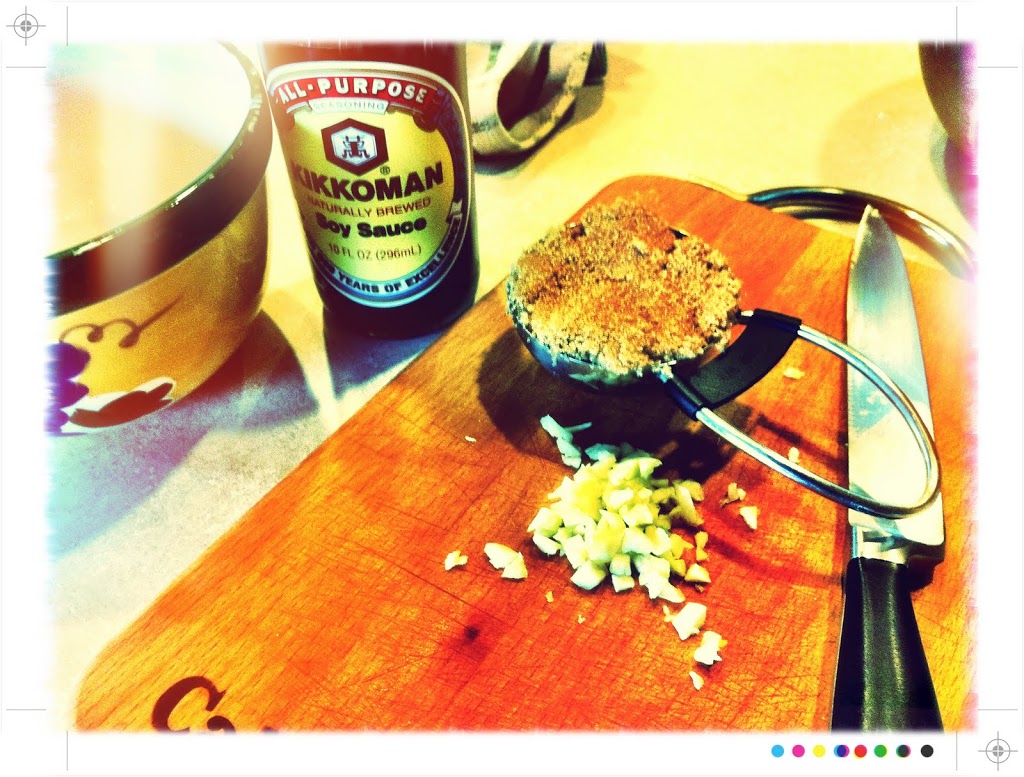
For this recipe, the sauce is ridiculous. You just read the list of ingredients and go, "Yes. Yes. This is the way it is supposed to be. This is right. This is good. This is the answer to world hunger. World peace. The cure for...shrimp that does not have sauce!" I mean, seriously - brown sugar (!!!), soy sauce, red pepper, ginger, and minced garlic! How insanely incredible does that combination sound? I can't believe I didn't think of it myself. I feel like you could put this on anything and it would instantly transport you to unknown and unexplored galaxies and latitudes (but not longitudes). Okay, ice cream is probably out of the question. And brownies. Maybe breakfast cereal. But I digress.
Evil knife stalking innocent ingredients
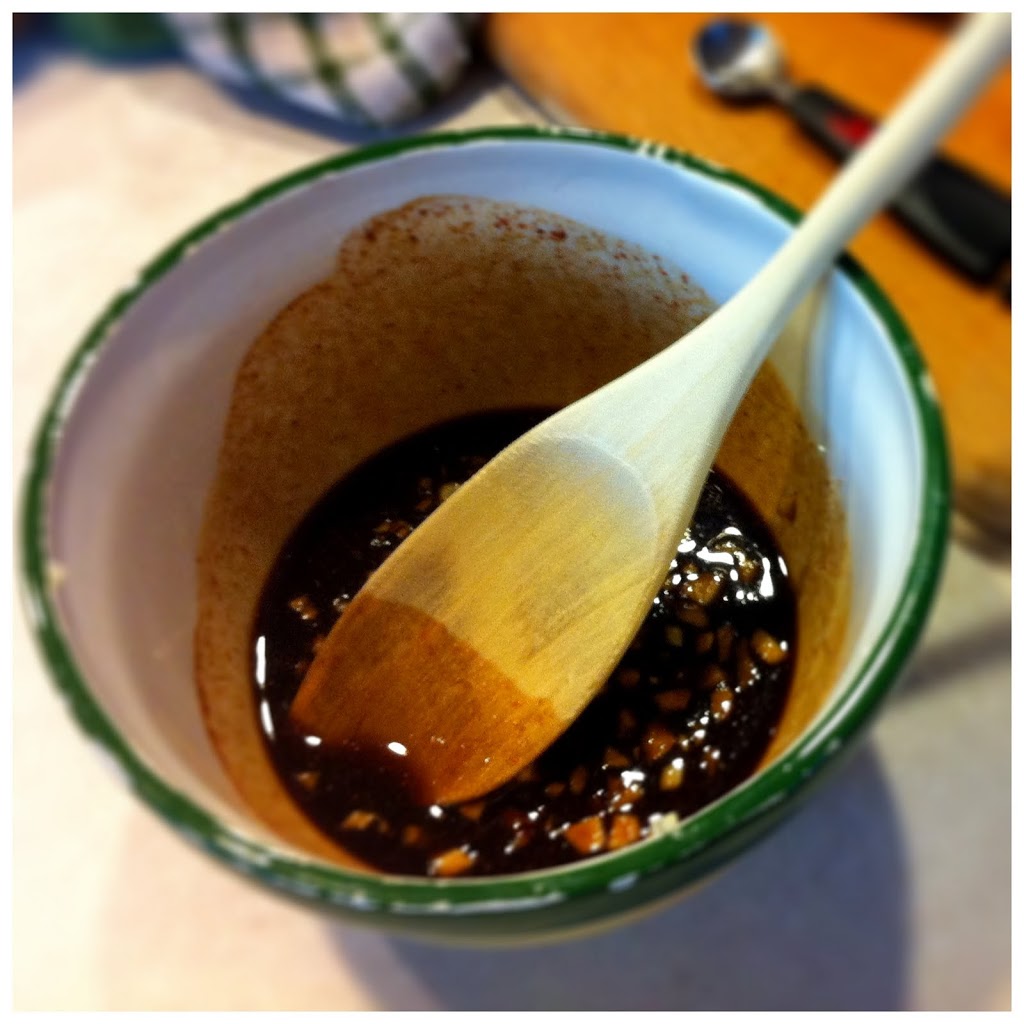
As an aside, I definitely recommend following the recipe's instructions and mincing fresh ginger and using actual pepper flakes. I didn't have either of these things available to me, so I can vouch that, in a pinch, ground ginger and ground red pepper will work just fine. But, that being said, this is so easy. Mix the ingredients together. Done deal. Hmm. Too easy?
Good on everything?
Anyhow. Once the sauce is mixed up, simply set it aside and head out to the grill, where the real cooking happens.
Simple. Appetizing. Intimidating.
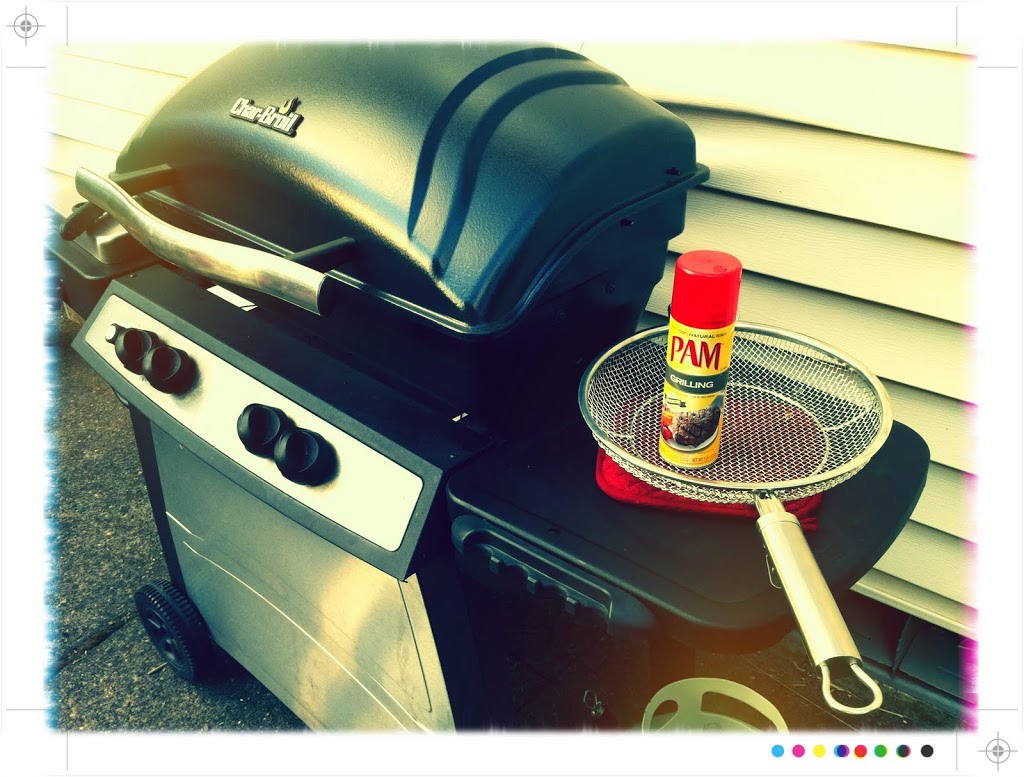
Out to the grill! For the mesh grill pan, a new experiment for me, it has to be sprayed down with grilling spray, and then heated with the grill for about five minutes. There is a deeply unfortunate aspect to all of this. Anyone who has bought a new wok will understand. The steel is so beautiful when it has not been used for anything. It shines and shimmers and just generally dares you to try to make something with it. Then, once you have sprayed it and left it in the grill for five minutes, already the discoloration has begun. Tragedy. But, the truth is, the more you break in your grilling implements, the better they will serve you. Still, sad...
Grill & Grill Pan. Pre-cooking (and discoloration)
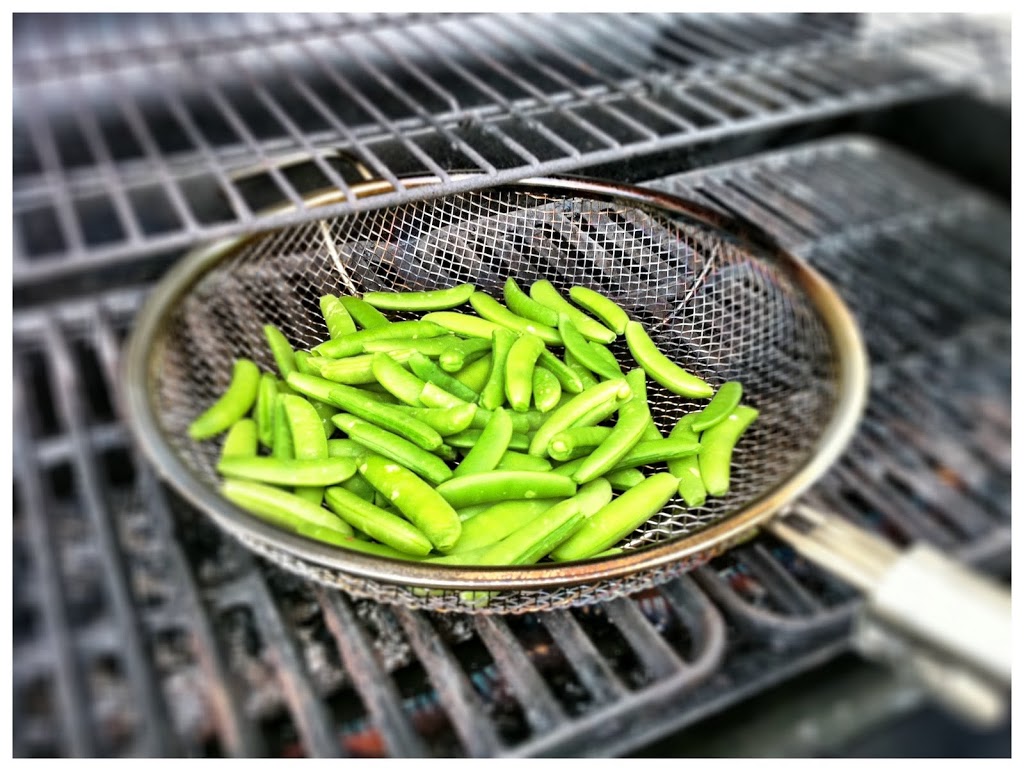
Honestly, this recipe almost makes itself. It is so simple! Once the mesh grill pan has finished heating in the grill (the handle on this one is removable, which is great for shutting the lid to heat it up), pour in the snap peas! They need to cook for about six minutes, during which time you'll want to toss them, stir them, and just generally keep them from burning. A couple of mine got a little crispy on the edges, but that was actually fantastic. The flavor was smoky and wonderful.
Snap peas and slightly-discolored grill pan
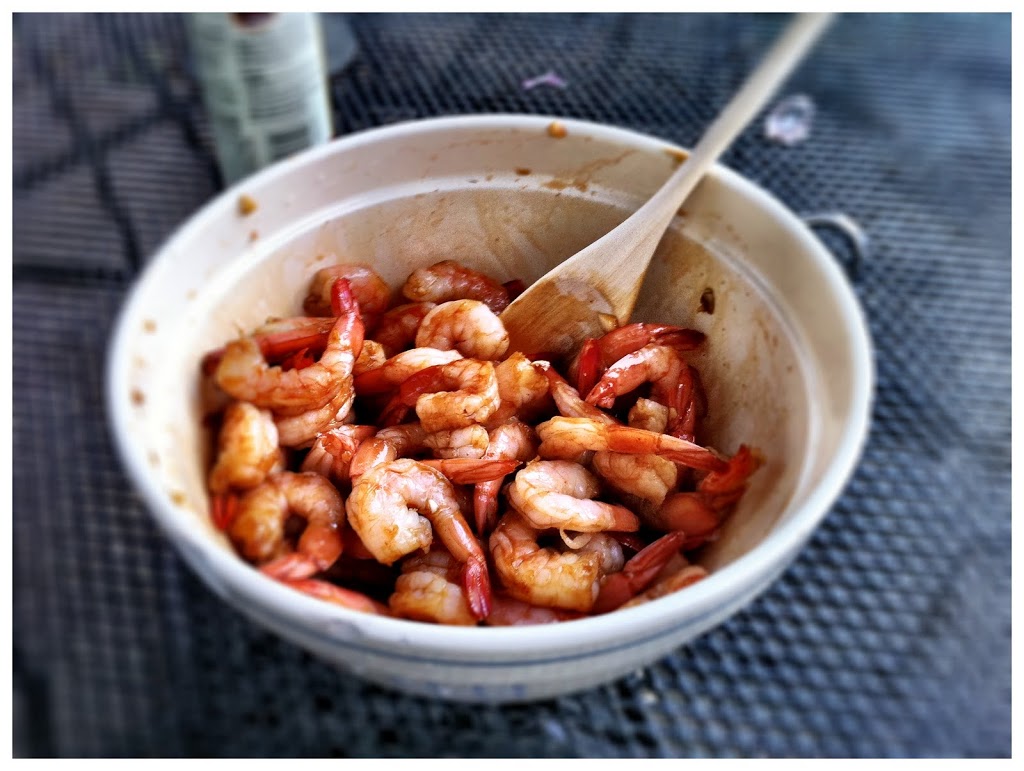
As the snap peas are doing their marvelous thing on the grill, it's time to combine the sauce and the shrimp. I used a colander to strain the shrimp out the ice water, and then put the shrimp into a medium-size bowl. You want to pour roughly half the sauce over the shrimp and mix it together. It does not have to be exact at all - don't stress this point like I did! Eye half of it, and set the rest aside.
Shrimp always look like they are posing for the camera
Once the snap peas have had their six minutes in the limelight, go ahead and add the shrimp. At this point, the SMELL... it is fantastic. Get a good wooden spoon out, and keep it moving. It sizzles and smokes and does all kinds of wonderful things. Another six minutes will about do the trick, and then you're just about done. No joke. It's that simple.
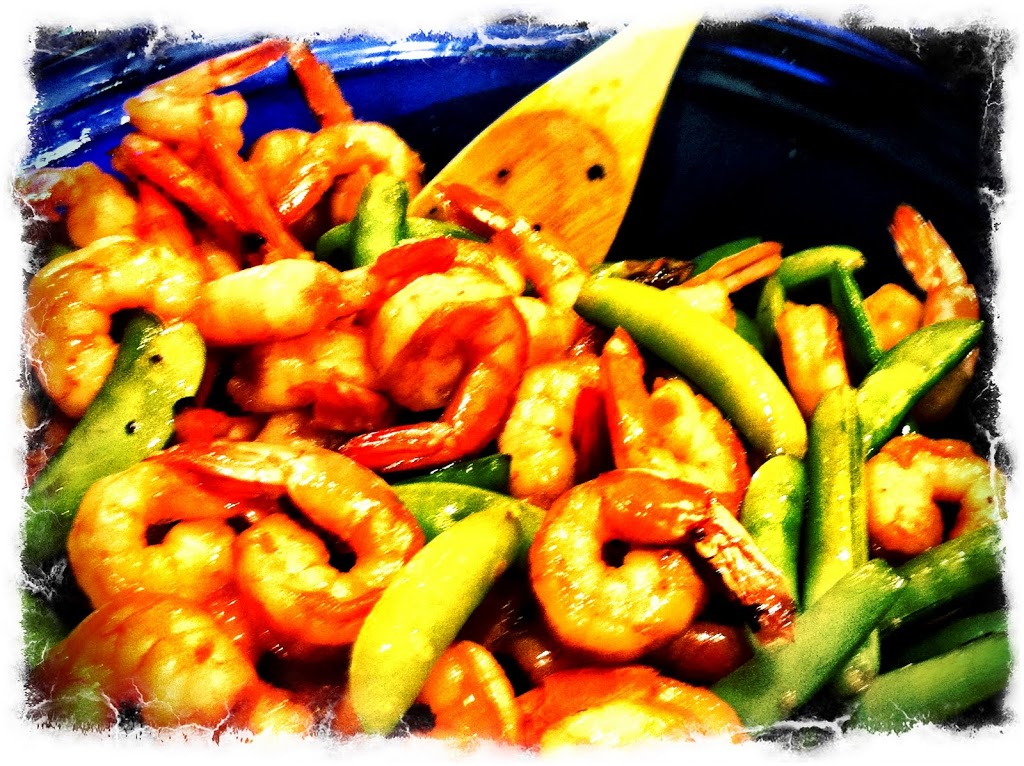
Incredible color combination. See why we were seduced?
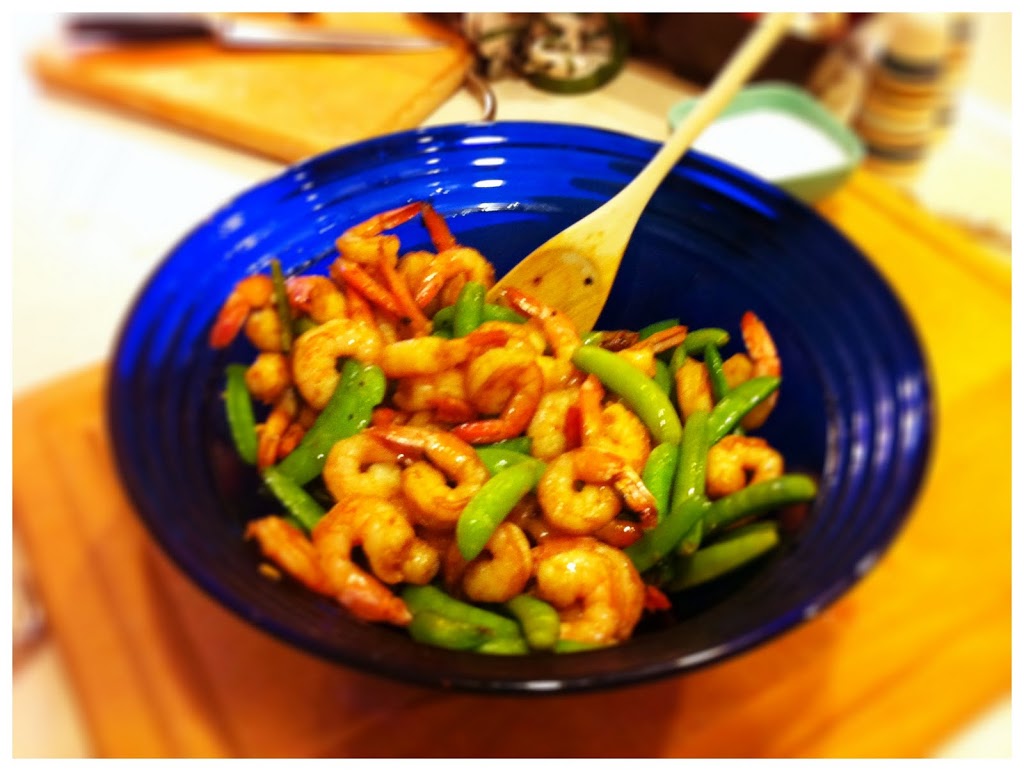
Keeping it simple! At this point, you take the shrimp/snap pea mixture and pour it into a larger bowl (there are so many bowls in this recipe!). Take the rest of the sauce, and mix it in. That's it. No joke.
What color was missing? Blue!
Evil knife lurking in background.
I would definitely recommend serving and eating this one right off the grill. It is great hot - not so much cold.
Sizzling is the key here. Sizzling.
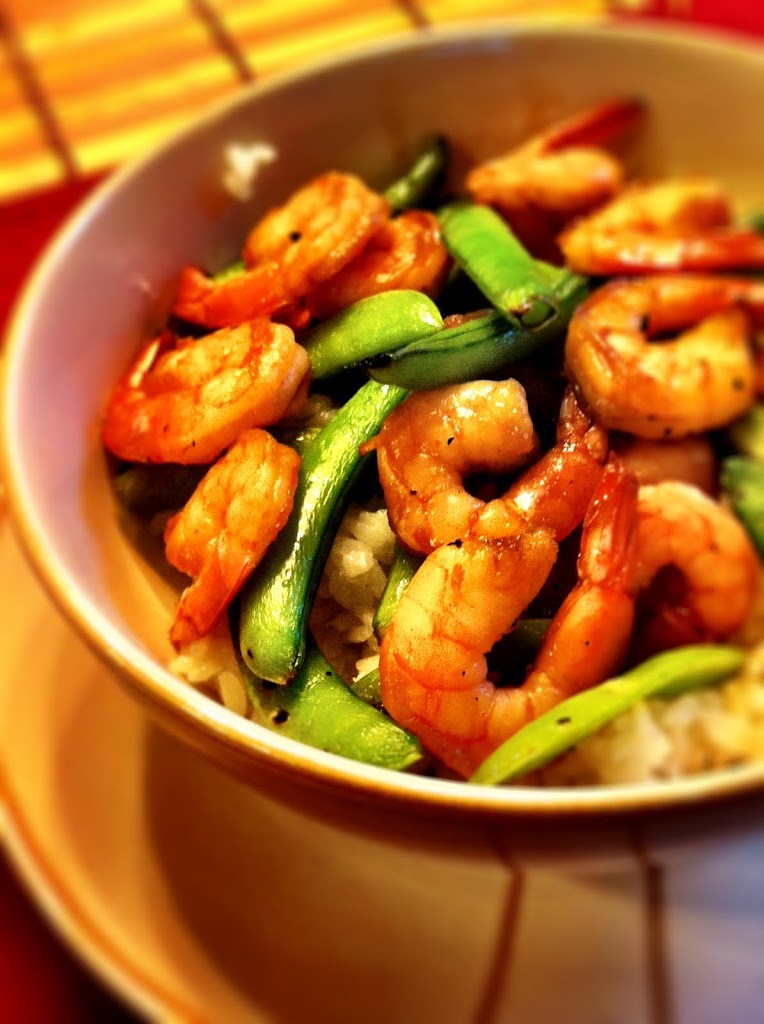
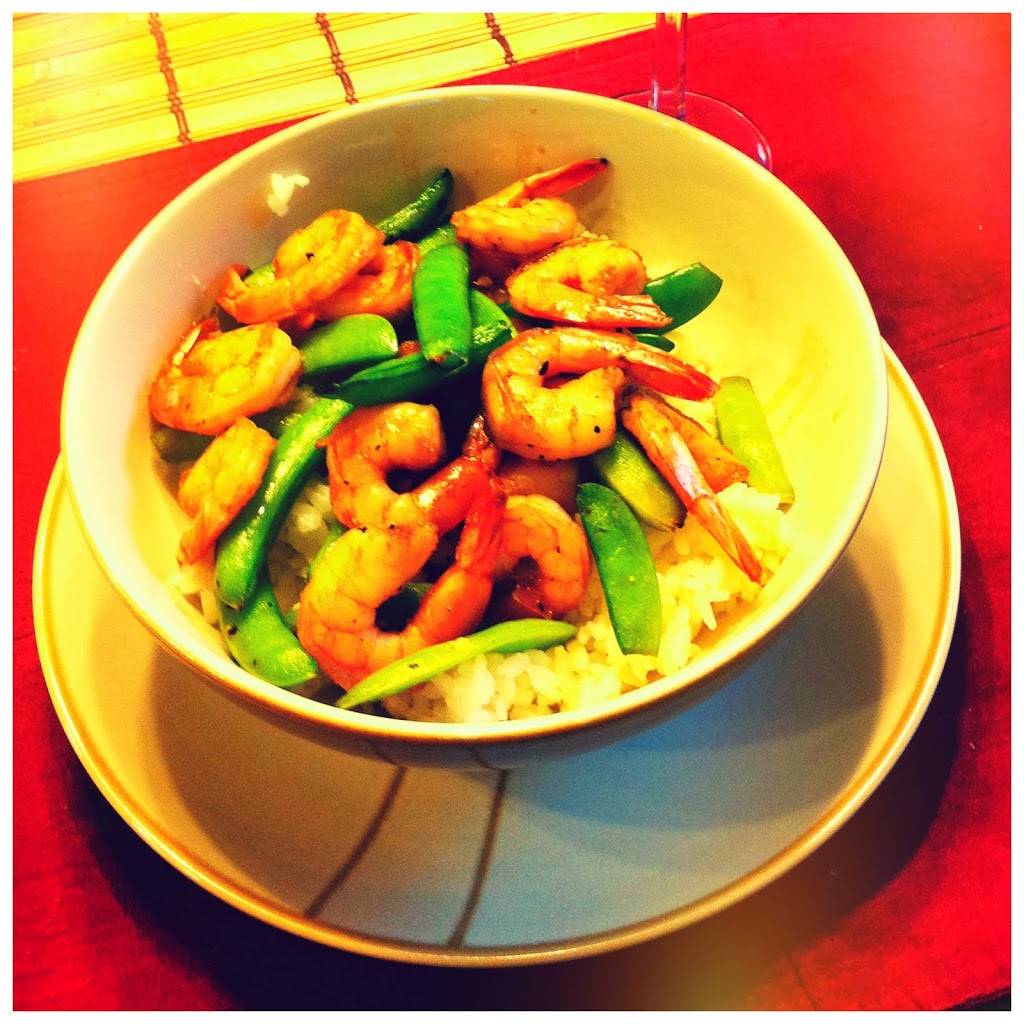
The serving suggestion is to simply spoon it out over rice, and I think that's the way to be. I want to try brown rice next time, but this time we used white, and drizzled a little (a little!!) extra soy sauce over it.
And the blue is gone...
And that's it! How easy is that? Nothing short of a gourmet Aisan-inpsired seafood dish. In 15 minutes. Almost impossible to mess up. Do it. Enjoy it. Even Eden (our two-year-old) loved it!
Red?
Grilled Ginger-Soy Shrimp & Snap Peas
 
2 teaspoons minced ginger
¼ cup soy sauce
1 teaspoon minced garlic
¼ cup brown sugar
¼ teaspoon red pepper flakes
8 oz snap peas, trimmed
1 pound shrimp, peeled and deveined
steamed rice
  •  In a small bowl, stir together the ginger, soy sauce, garlic, brown sugar, and red pepper flakes. Set aside.
  •  Preheat grill over high heat. Spray mesh grill pan and place on the grill for 5 minutes before cooking.
  •  Place snap peas in grill pan. Cover and cook tossing occasionally for 6 minutes.
  •  In a bowl, stir together shrimp and half of the ginger-soy sauce. Stir shrimp into the grill pan with the snap peas (once they are tender). Cook stirring occasionally for about 6 minutes.
  •  Transfer to a large bowl, add the remaining ginger-soy sauce. Stir and serve over steamed rice.
This recipe is linked to:
My Sweet and Savory's Meatless Mondays

No Weekly Menu this week- Happy 4th of July

July 4, 2011 By Chelsia Rief Leave a Comment

I do have some meals I can make this week, but I'm not really sure how much cooking or baking I'll be doing this week or next week. Josh's grandparents who are missionaries and live in Africa are in the states on Furlough for a little bit and every summer, they travel to Oregon for about a week to visit and hang out. In the past when they've come to town, Josh and I are up at his parents house every night and I rarely cook during the week. So while I've planned on meals that we can fix at home because I hate to assume, I don't really know how much cooking we'll actually be doing. I might make a dessert or two, but that's it.

I hope you all have a wonderful 4th of July with a lot of good food, fireworks and the company of the people you love :)

Two-Tone Cheesecake

July 1, 2011 By Chelsia Rief 12 Comments

I've been making Cheesecakes here and there since my first year of marriage.  They came out good, but you could tell I had much to learn. Over the years, I've continued to practice this art of Cheesecake making and I have to tell you, it's a dessert I love to make and I love watching people enjoy it. 
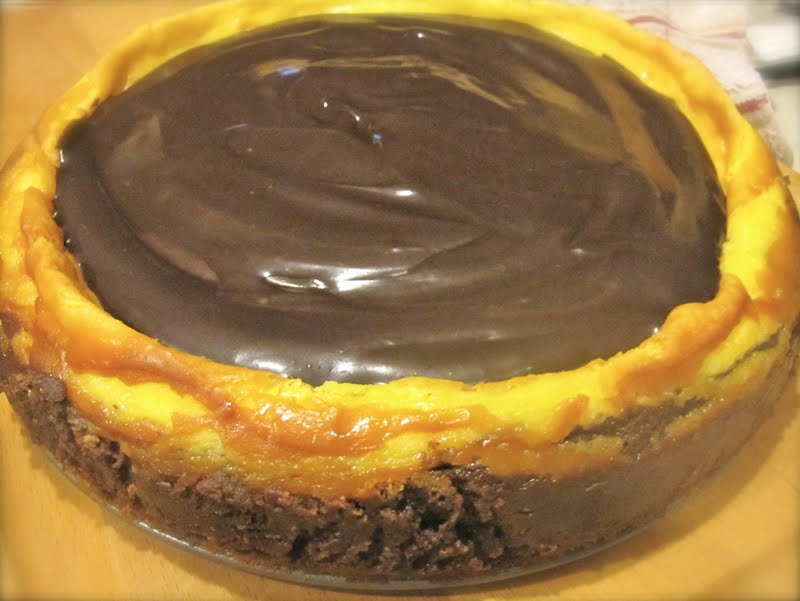
Picture taken with iPhone

I've told you all about how I like to make desserts for the Father's on Father's Day. Josh got his Peanut Butter Cup Cheesecake and My dad (Step-Dad) got his Chocolate Chip Cookies and so my dad, since he was visiting in town, got his choice of dessert. He wanted Cheesecake. So I gave my dad my awesome cheesecake magazine and he took his time flipping through it until he came across the Two-Tone Cheesecake and said,"Thats the one I want for Father's Day." 
I want to preface this before I start in on to much more of the recipe. By all the raves I got from this cheesecake, it could possibly be the best one I've ever made. My sister who obsesses over The Cheesecake Factory's cheesecakes, said,' It's the best one I've ever tasted." and My dad kept thanking me for it. And Josh also said, " I think it's your best ever, bebe." ( Bebe is the nickname he's dubbed me ;)
This is a time consuming Cheesecake ( aren't they all ) and it should be given the time it needs to do it's thing. Otherwise, you may just lose out on all the tasty yummy flavors going on in the this dessert.
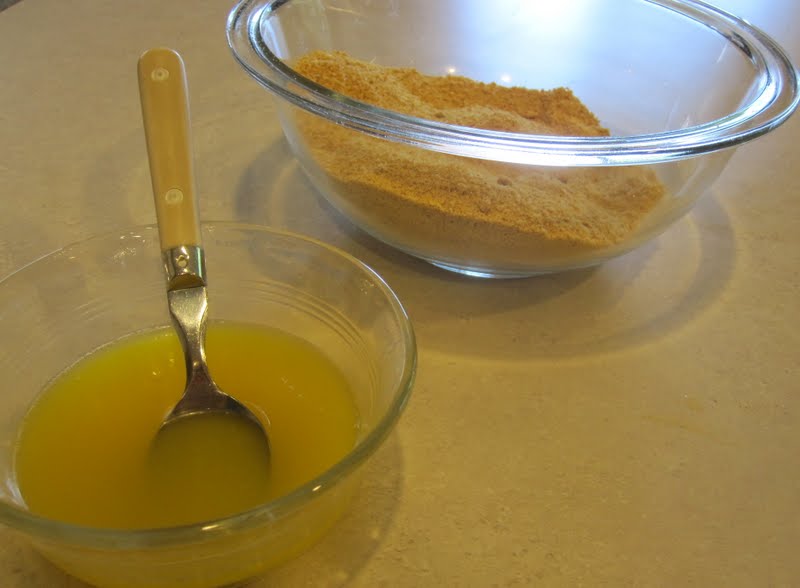
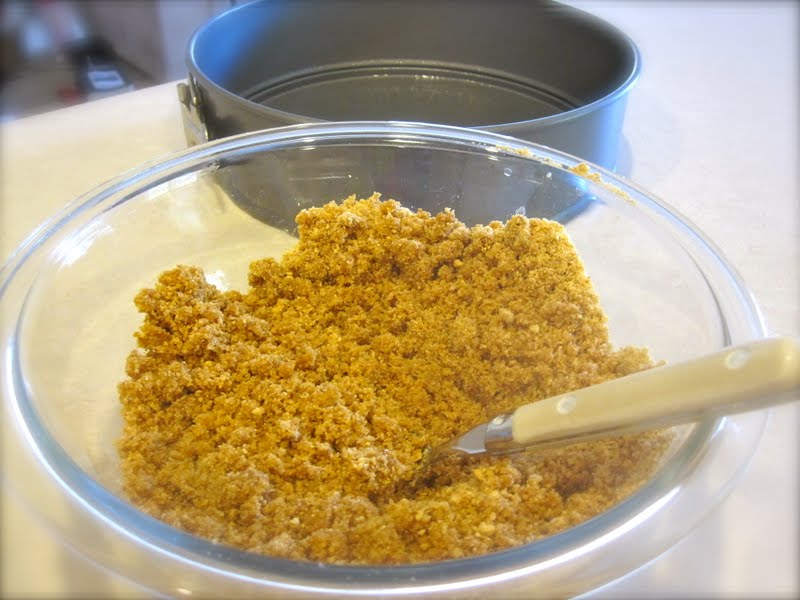
Pre-heat your oven to 325 degrees and get started on the crust of the cheesecake. First you need to grease up your Spring-Form Pan.  You need 6 TB of melted butter and 1 ½ cups of graham cracker crumbs and 6 TB of sugar.  The original recipe calls for chocolate graham cracker crumbs, but I couldn't find chocolate graham crackers anywhere, only cinnamon. So I used the original Graham crackers and Josh commented on how the chocolate crust might of been to much with this recipe...because this is a rich cheesecake. Combine the sugar and crumbs together and pour in the melted butter.
Make sure the butter is evenly distributed so that all the crumbs are coated.
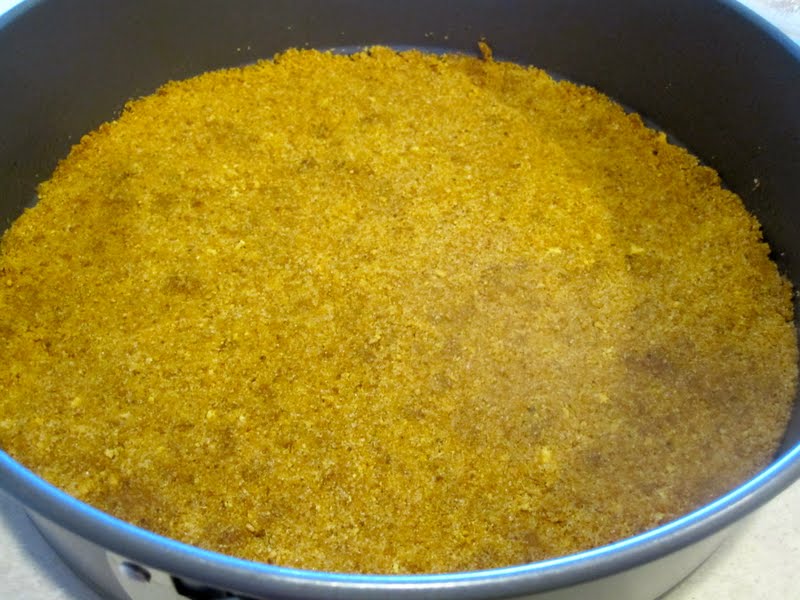
Press the crumb mixture into the bottom of the pan. Place the pan on a baking sheet and bake in you oven for 10 minutes. And then let it cool on a wire rack.
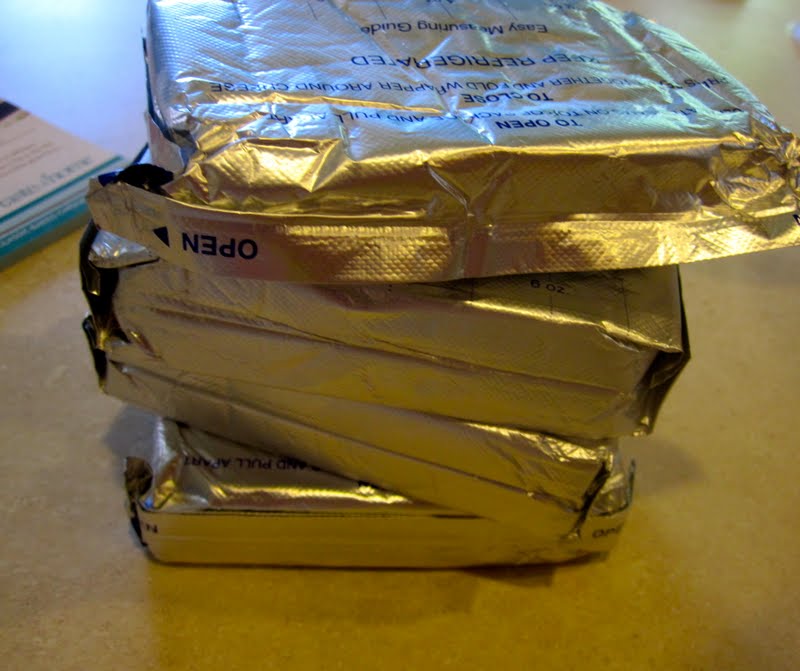
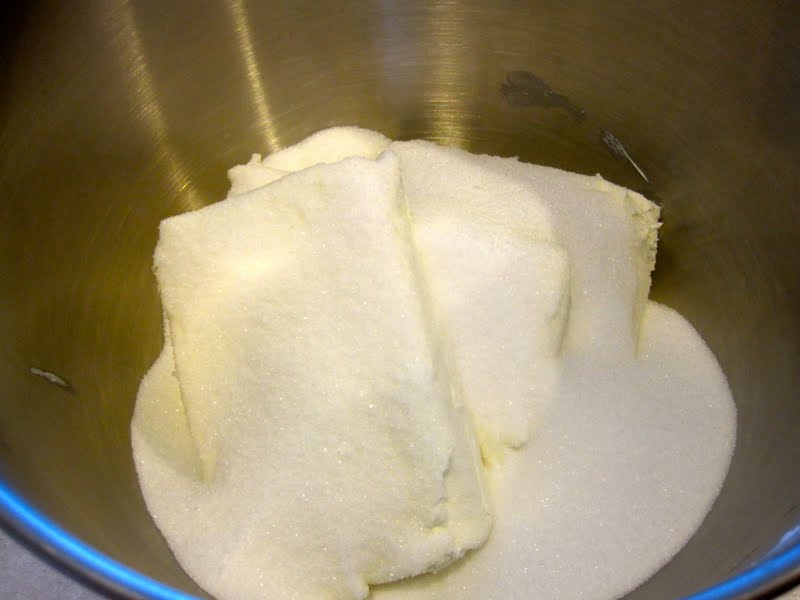
Now it's time to get started on the Cream Cheese mixture. You'll need 4 8oz packages of cream cheese...yeah...that is a lot of cheesecake and you'll need every bit of it. Hopefully, you've let it sit out on your counter for a good while, because it needs to be softened. But if your in a rush, it won't hurt to put them in a bowl and zap them in the microwave for a few seconds. Start with 20 secs and take it from there.
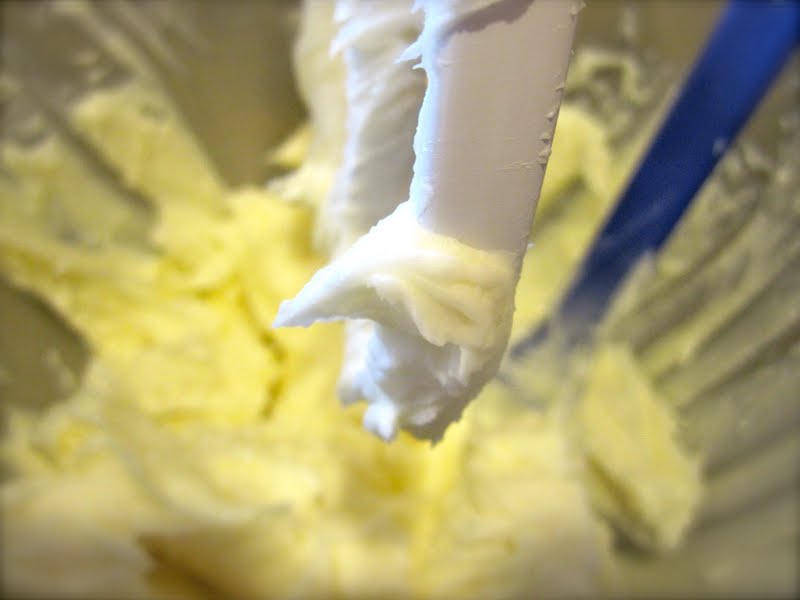
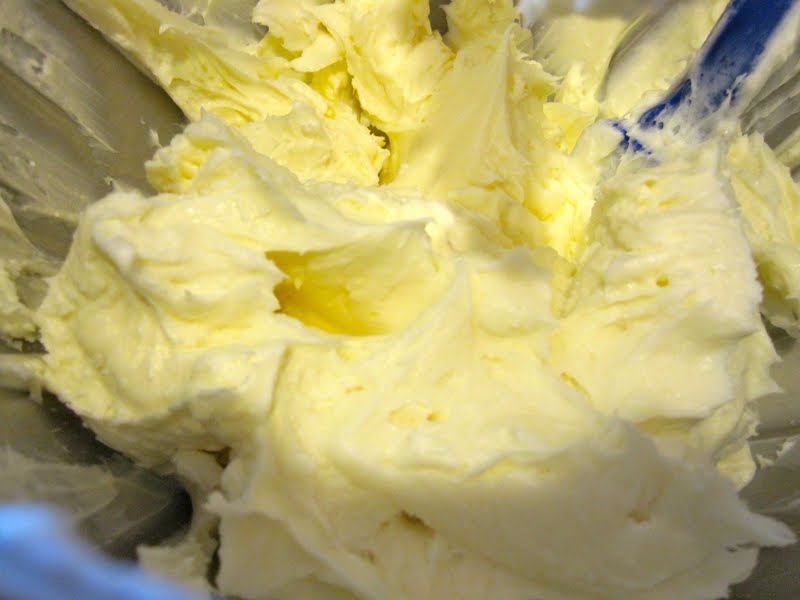
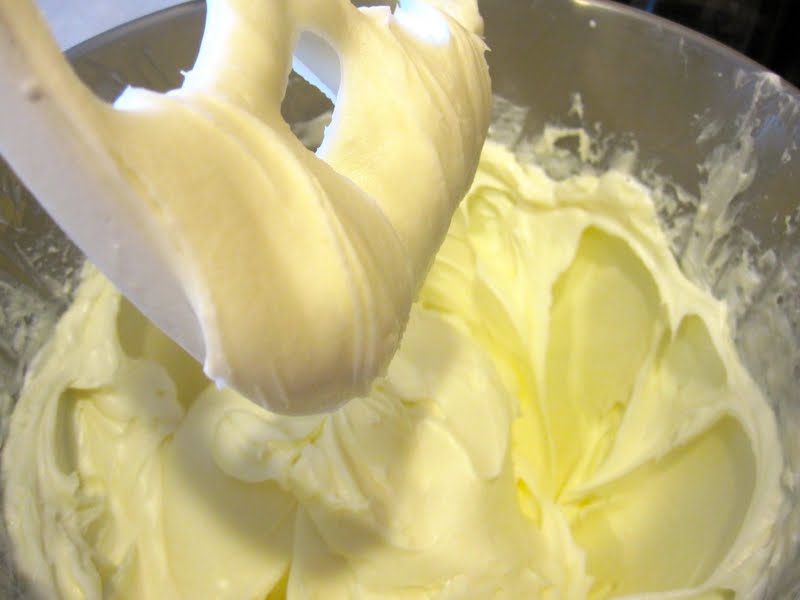
To the cream cheese, add 1 ¾ cups of sugar and beat until it becomes smooth.
You might need to stop your mixer a few times because with 4 pkgs of cream cheese, the paddle or beaters gets full quick and the mixture needs to be redistributed a few times. 
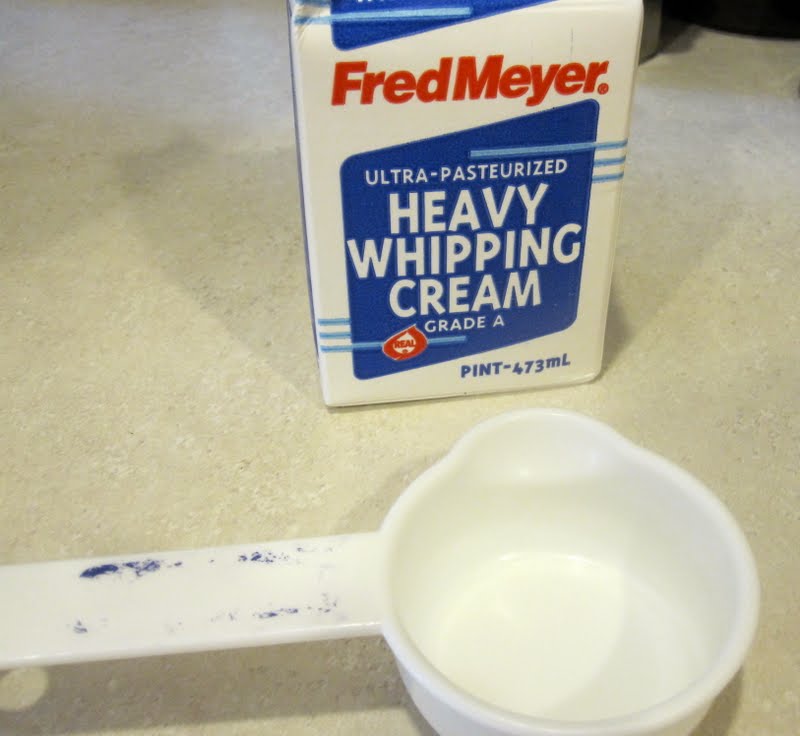
When the cream cheese and sugar is smooth, add in ¾ cups of  heavy whipping cream, gradually. 
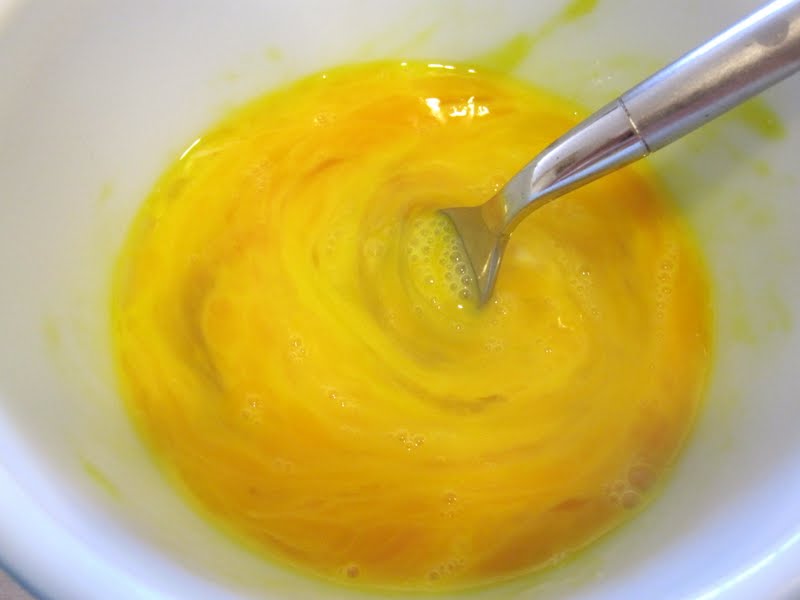
In a small bowl crack 4 eggs and beat them lightly and add them to the cream cheese mixture and beat on  a low speed.
When everything has been combined, reserve 3 ½ cups of the cream cheese and pour it into a bowl.
Now abandon the mess you've probably made in your kitchen and it's time to start on a new mess.  Take 6 oz of semi-sweet baking chocolate and melt it and let it cool.
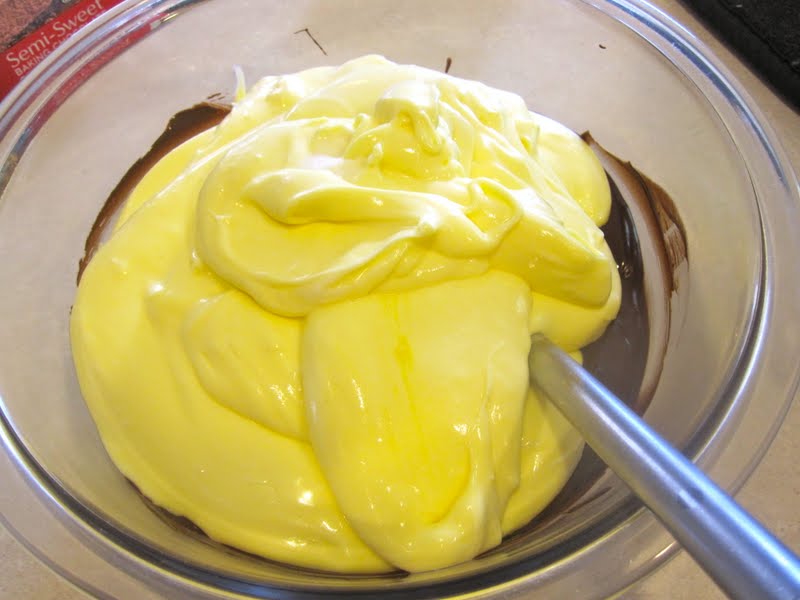
When your chocolate has cooled, pour the 3 ½ cups of reserved cheesecake over the chocolate and give it a good mix.
Mmm, chocolate!!!
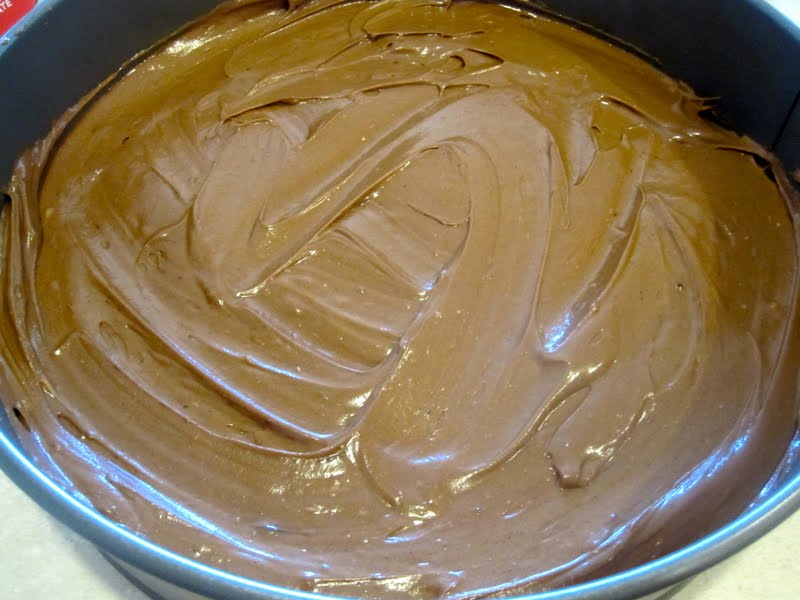
Pour the chocolate cheesecake mixture over your cooled crust.
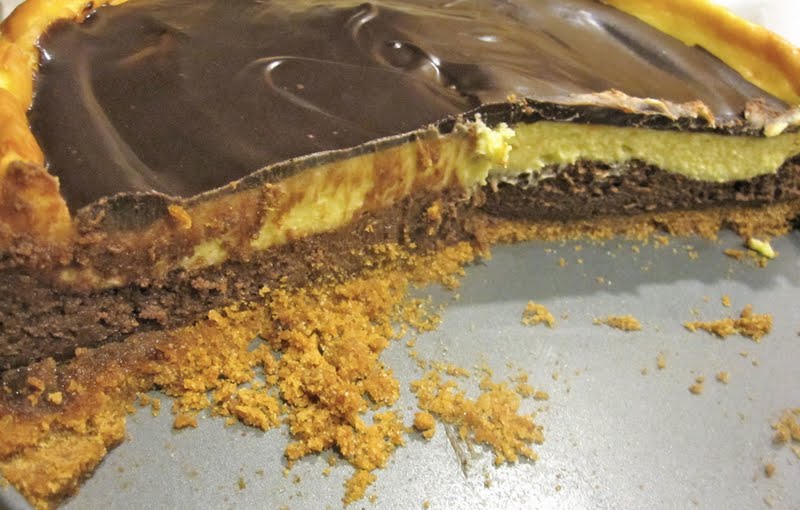
Now here is the tricky part. Very carefully, take the leftover batter and pour it over the chocolate batter, making sure when you spread it to not disturb the chocolate to much. At this point you get to place the spring-form pan back on the baking sheet and place that back in the oven at 325 for 65-75 minutes. My Cheesecake, took the whole 75 minutes to bake.
The center will not be set when you take it out of the oven, but that's okay. It will firm and set as it cools.  And the sides of your cheesecake may deflate a little bit, that is also okay :) When the cheesecake is done baking, cool on a wire rack for 10 minutes. Then carefully run a knife around the edge of the pan to loosen and then cool the cheesecake for an additional hour. (See what I mean about this cheesecake..it's time consuming.)
When the cheesecake has just about cooled, get busy working on the chocolate topping.  Take 4 more oz of semi sweet chocolate and melt it in a bowl in the microwave again. Meanwhile, take ½ cup of heavy whipping cream and pour it into a sauce pan and bring to a boil. Pour over melted chocolate, and whisk until smooth and let it cool down a bit. Then pour it over the cheesecake and chill in the fridge. 
For the best results, make this cheesecake a day ahead of time before you need it. The recipe says it should chill overnight. But I didn't do that. I let it chill in the fridge for 3-4 hours before serving and it was incredible then...the slices the next day were even better.
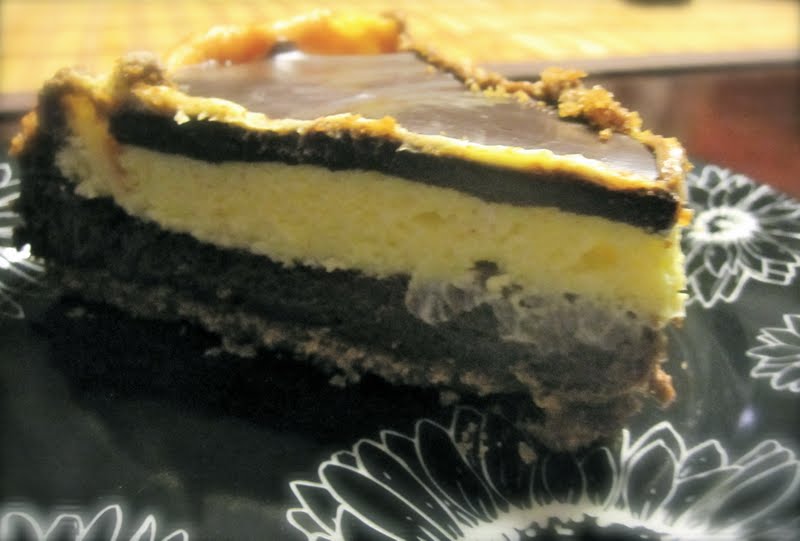
I love the defined layers...so incredibly delicious!
Two-Tone Cheesecake
adapted from Taste of Home Cheesecakes and More Magazine
Crust:
1 ½ cups graham cracker crumbs
6 TB Sugar
6 TB butter, melted
Filling:
4 pkgs ( 8oz each) cream cheese, softened
1 ¾ cups sugar
¾ cup Heavy Whipping Cream
4 eggs, slightly beaten
6 oz semisweet baking chocolate, melted and cooled
Topping:
4 oz semisweet baking chocolate, finely chopped
½ cup heavy whipping cream
In a large bowl, combine cracker crumbs, sugar, and butter. Press onto the bottom of a greased springform pan. Place on a bakin sheet. Bake at 325 degrees for 10 minutes. Cool on a wire rack.
In a large bowl, beat cream cheese and sugar until smooth. Gradually beat in cream. Add eggs, beat on low speed until just combined.
Remove 3 ½ cups to a small bowl; gently stir in melted chocolate. Pour filling over crust. Carefully pour remaining filling over chocolate layer. Return to baking sheet. Bake at 325 for 65-75 minutes or until center is almost set.
Cool on a wire rack for 10 minutes. Carefully run a knife around the edges of the pan to loosen. Cool for 1 hour longer. Meanwhile, place chopped chocolate in a small bowl. 
In a sauce pan, bring cream to a boil. Pour over chocolate. Whisk until smooth. Cool slightly; pour over the cheesecake. Cover and Chill overnight. Refrigerate leftovers.

This recipe is linked to:
Alli n Son's Sweet Tooth Friday, La Bella Vita's Fresh Food Friday, Comfy in the Kitchen's Feasting in Fellowship, Friday Potluck @ GirlChef ( Guest Host), Sweet as Sugar Cookies sweets for a Saturday, A Well-Seasoned Life's Sweet Indulgences Sunday, The Sweet Details Savory Sunday, Cupcake Apothecary's A themed bakers sunday, Bizzy B. Bakes' Bizzy Bakes

Weekly Menu 6/27-7/3

June 27, 2011 By Chelsia Rief Leave a Comment

So how was everyone's weekends?? I hope there was sun and warm weather and that your were not plagued with any yucky allergies. Josh and I have been fighting them off with boxes of kleenex and meds and it works and it doesn't. Friday was pure awfulness for me. I sneezed and blew my nose the entire day and I tried to not itch my eyes to much, because it sucks when you do.

The weekend we stopped by the Farmer's Markets and had a blast. We picked up some Snap Peas, Rhubarb, Asparagus, and radishes. The colors of the produce are so vivid and beautiful, and the prices so affordable. Josh and I are already making plans to go every Saturday that he has off. It's just wayy to much fun!

Tonight we made some Fish Tacos and they were so incredible!!! We only took finished product pictures and I tried to convince Josh just to use those to blog them, but he enjoyed the whole cooking process so much that he really wants to take picture for everyone to see and enjoy. We had a lot of fun making the dish together. And for dessert, I made The Pioneer Woman's Raspberry Crisp and OH MY GOSH, it was incredible!!! Josh can't stop talking about it and my girls cleaned their bowls. I did take some pictures, but alas, as I started working with the berries, I discovered some were going bad, which badly depleted my stash. So instead of 2 ½ cups I ended up with about 1 ½ cups of Raspberries. But the Crisp was truly a masterpiece. So I will make it again and blog it for sure.

Monday
Ginger Shrimp and Snap Peas with Steamed rice- We came across this recipe when we bought this beautiful stainless steel grill mesh pan and we've been excited to use it!
Tuesday
Grilling Hot Dogs and maybe some fresh fruit...if it doesn't rain
Wednesday
Homemade Pizza- We didn't make it last weekend...
Thursday
Honey Ginger Chicken Stir Fry with Steamed Rice, we might be adding a few new ingredients ;)
Friday
Beef Burgers With Peanut Chipolte BBQ Sauce
Saturday
Oriental Chicken Salad...with some sort of bread side...not sure yet.
Sunday
Not really sure...we all know I like to leave Sunday's pretty much open
Just a heads up everyone, Josh's grandparents who are missionaries and founders of The African Bible College, will be in town all next week, and when they are here, we like to spend a lot of time with them since we only see them for about a week during the summer. Usually we spend every evening over there and that means we have dinner there. So I'll make sure I have back up meals here, but I'm sure we'll be there. 
Desserts/treats

I'm going to experiment with some rhubarb this week. The Pioneer Woman did a post on it last week and it looked incredible, so I'm feeling brave...Rhubarb Cobbler, here I come!
My mom's Peanut Butter & Butterscotch Crispies for Josh's lunch....Not sure if this is a recipe I have permission to blog or not...I hope so, because it's so good :)

And I just came across this recipe today and now I'm dying to make it Blueberry Crumb Bars! I have
2 lbs of blueberries sitting in my fridge just begging to be used in this recipe!

Can you all believe 4th of July is next week?! It just blows my mind!

Weekly Menu 6/20-6/26

June 20, 2011 By Chelsia Rief 2 Comments

It's been a crazy crazy crazy week around here. My dad and sister got into town on Monday, and while Josh began making dinner, he sliced his finger on a lime and my dad had to take him to the E.R. and he was there for 4 ½ hours. Thankfully, he didn't need stitches, they did glue the wound shut though. It's now in a splint and all bandaged and not at all pretty looking.

With my dad being in town, we did a couple of fun things, food wise. I made an Oreo Cake For my sister's birthday (that will be posted tomorrow), we went to the Old Spaghetti Factory ( YUM), and my dad made his delicious Cheese Manicotti for us all...and we still have leftovers!

Thursday, my dad and sister left to go visit more family, but they will be back tomorrow evening and I'll be making my dad's Father's Day dessert Tuesday afternoon sometime.  They leave again Thursday morning, to start the trek back to Las Vegas, but not before we make and serve more delicious foods.

Monday
We have leftover Manicotti and I don't want it to go to waste, so I think that will be dinner tonight.
Tuesday
My dad and Sister come back so we'll be grilling our Teriyaki Pineapple Turkey Burgers with some of my Homemade Fries
Wednesday
I'm putting my dad back to work in the kitchen again and he is going to make his amazing and delicious BBQ Chicken and BBQ Buttery Bacon potatoes...oh my word, they are soooo good!
Thursday
Chicken and Steak Fajitas with a salsa salad...this is of course assuming my avocado is ripe by then
Friday
Grilled Chicken Bruschetta this is one of our favorite recipes to grill in the summer. We'll have salted crusted potatoes and corn with it.
Saturday
Fish Tacos with a chipotle cream sauce and a salad on the side
Sunday
I'm thinking a homemade pizza with chicken, pepperoni, pineapple ( if I have any left), and whatever else is in the kitchen and needs to be used :)
Since I made chocolate chip cookies on Sunday for my dad for part of his Father's Day gift, we still have some left in the house, so I don't think I need to make any treats for him for his lunch. But I will be making two desserts this week.
Desserts/Treats

A Two-Tone Cheesecake for my dad for his Father's Day dessert

And a Raspberry Crisp

Sounds like a pretty good meal line up this week and I am really excited to try the Fish tacos. It's been years since I've had them and I really enjoyed them then. 
  • « Previous Page
  • 1
  • …
  • 146
  • 147
  • 148
  • 149
  • 150
  • …
  • 159
  • Next Page »

Welcome!

HI! We're Chels & Josh, and this is Catz in the Kitchen! Let's find love around the table, one recipe at a time!

More about us

Popular

  • If you've ever thought about turning your cement porch into a wood deck, it's surprisingly easy! Here are some thoughts, tips, & photos from our experience!
    DIY: Turning a Cement Porch Into a Wood Deck
  • Ever thought about turning your concrete slab into a covered deck? It's definitely doable! Here are some thoughts, tips, & photos from our experience!
    DIY: Turning a Concrete Slab Into a Covered Deck
  • DIY Window Box and Shutters
  • DIY Under the Stairs Closet Pantry Conversion
  • DIY Home Library Built-In
  • Grilling these simple chicken foil packets is an easy, tasty way to get a flavorful, healthy meal on the table, whether you're camping or at home!
    Loaded Chicken Foil Packets

Recent

  • One-Pot Turmeric Chicken & Rice
  • Chicken and Broccoli Stir-Fry
  • Catz on the Move: 5 Nights in Paris with 5 Kids
  • Simple Baked Oats
  • Almond Ricotta Cake
  • Molasses Cookies

Footer

↑ back to top

About

HI! We're Chels & Josh, and this is Catz in the Kitchen! Let's find love around the table, one recipe at a time! Read more

Socials

Contact

  • Contact
  • Privacy Policy

Catz in the Kitchen is a participant in the Amazon Services LLC Associates Program, an affiliate advertising program designed to provide a means for sites to earn advertising fees by advertising and linking to amazon.com.

Copyright © 2025 Catz in the Kitchen

19 shares